Showing posts with label arting. Show all posts

Monday, May 28, 2012

In Five Years


In five years, where do you want to be? Interesting question, no? I managed to scrape aside some time today to work in my journal, and I forgot how much I missed it! Sometimes I don't realize how much I honestly need my art time, when I'm so busy in my day to day life. I've been so busy with school that I really haven't done any art at all since the last time I posted, which was a while ago. I think that I need to make sure that I set aside some time each day, especially during the summertime, to work with my art. Maybe even get up an hour earlier, so that I have a nice, art filled morning as a nice way to start my day. And then I'll make sure to come on over here and share everything with you. :)


This page had quite a few layers on it, and you can kind of see the journaling in the background. That's how I've liked to start out quite a few of my most recent pages. It kind of gets you in the mood to work on the page, and, for me, as I've been writing out how I'm feeling about the topic, I start getting ideas on how I want to work the page. For example, as I was writing the journaling for this page, I got the idea to do this page mostly in blues, as that is my favorite color, and this page is very much about me and my goals.


On this page, I decided to do a little bit of a collage on top of the painted background. Sometimes it's kind of hard for me to decide what to do on a page, especially when I haven't worked in a journal for a while (I kind of forget what choices I have!!), but this sort of came naturally to me. I sorted through some of my images that I have collected over the years, trying to look for some interesting black and while images, and any with a blue or purple tint. I had some other pieces that I had culled, but I decided not to use them. That's fine too, just put them back where you found them, and save them for another page. Normally they end up just sitting on my desk until I decide to use them, but maybe you'll be able to work up the motivation to tidy your stuff up. ;) Also, I used my typewriter from the '50s that I got for Christmas to type up some of my journaling. I also hand wrote some of it, to add a bit of an eclectic style to it.


So that's what I have for you guys today. I hope to be back on here tomorrow, and I'll see you then! But, for now, Adios!!

Saturday, September 24, 2011

Fearless Art Journaling - 21 Secrets


Hey guys! What goes on? 
Sorry I was gone for a couple of days, but sometimes, especially on weekends, I just get lazy.
Generally I don't do much on the weekends when it comes to art, but today I just went crazy!! 
I was really bored, and didn't want to sit around all day like I normally do.
So, I grabbed a bunch of art stuff and just started to play.
I'd say that I was probably working on art for three to four HOURS today!! 
I was a happy camper.

I worked on a bunch of art journal spreads, as well as a bunch of collage papers. 
I worked on some index cards (didn't really finish any),
and glued some pages together in my new art journal that I'm doing.
I also worked on a bunch of things from 21 Secrets.
I realized that if I didn't get to work on that soon, I'll have wasted a bunch of money.

For example.
The art journal spread in the picture above was for a course in 21 Secrets.
It was titled Fearless Painting, and I really like the way this turned out. 
She suggests getting a really LARGE art journal.
But that's not really my thing.
So I just did the same process in my normal art journal.
Because I wanted to see how that would look.
I like it I think.

Really random and free. 
I work like that a lot, but sometimes I feel like I need to just let EVERYTHING go.
You know what I mean?


I worked on a few other things today as well, including a couple of loose collage papers.
This is one that I did today. 
I started out by just putting down a layer of blue acrylic paint; just to put some color down on the page.
I had this idea for a technique, and I decided to try it out, since I was experimenting anyways.
I took a hand carved stamp that I had made out of an eraser.
And I colored in the sections with a Portfolio oil pastel.

I'm just gonna go out on a bunny trail here to talk about Portfolio oil pastels.
They are crazy awesome.
And crazy cheap.
My two favorite things when it comes to art supplies. 
They're so creamy, and rich, and smooth, and buttery.
And you can actually buy them at Staples.
Actually, as far as I know, that's the only place you can buy them.
Anyways.

So yeah. 
After I colored in the sections, I wet the oil pastel with water and stamped onto the background.
It gave a really cool watercolor effect.
And I simply love the way it turned out. 
Personally.
Of course though, I'm biased. 
:P


And then, of course; the last thing I have to share with you today.
I'm leaving all the other stuff for another day.
This right here is a type of monoprint that I've been working on perfecting.
I take a paper towel that I've dyed, and then place it in between two sheet of paper.
Then I just press down.
Depending on how much pressure you put, you get different effects.
For the above effect, press with a moderate pressure.
Lighter will pick up less paint, and heavier will pick up more.
Obviously.

Anyways, as that's all I've got for you today, then it's time for me to say goodbye.
So see you guys later. :)
See you.

Tuesday, September 13, 2011

THE BIG ONE ON ONE CHALLENGE REVEAL!!!!


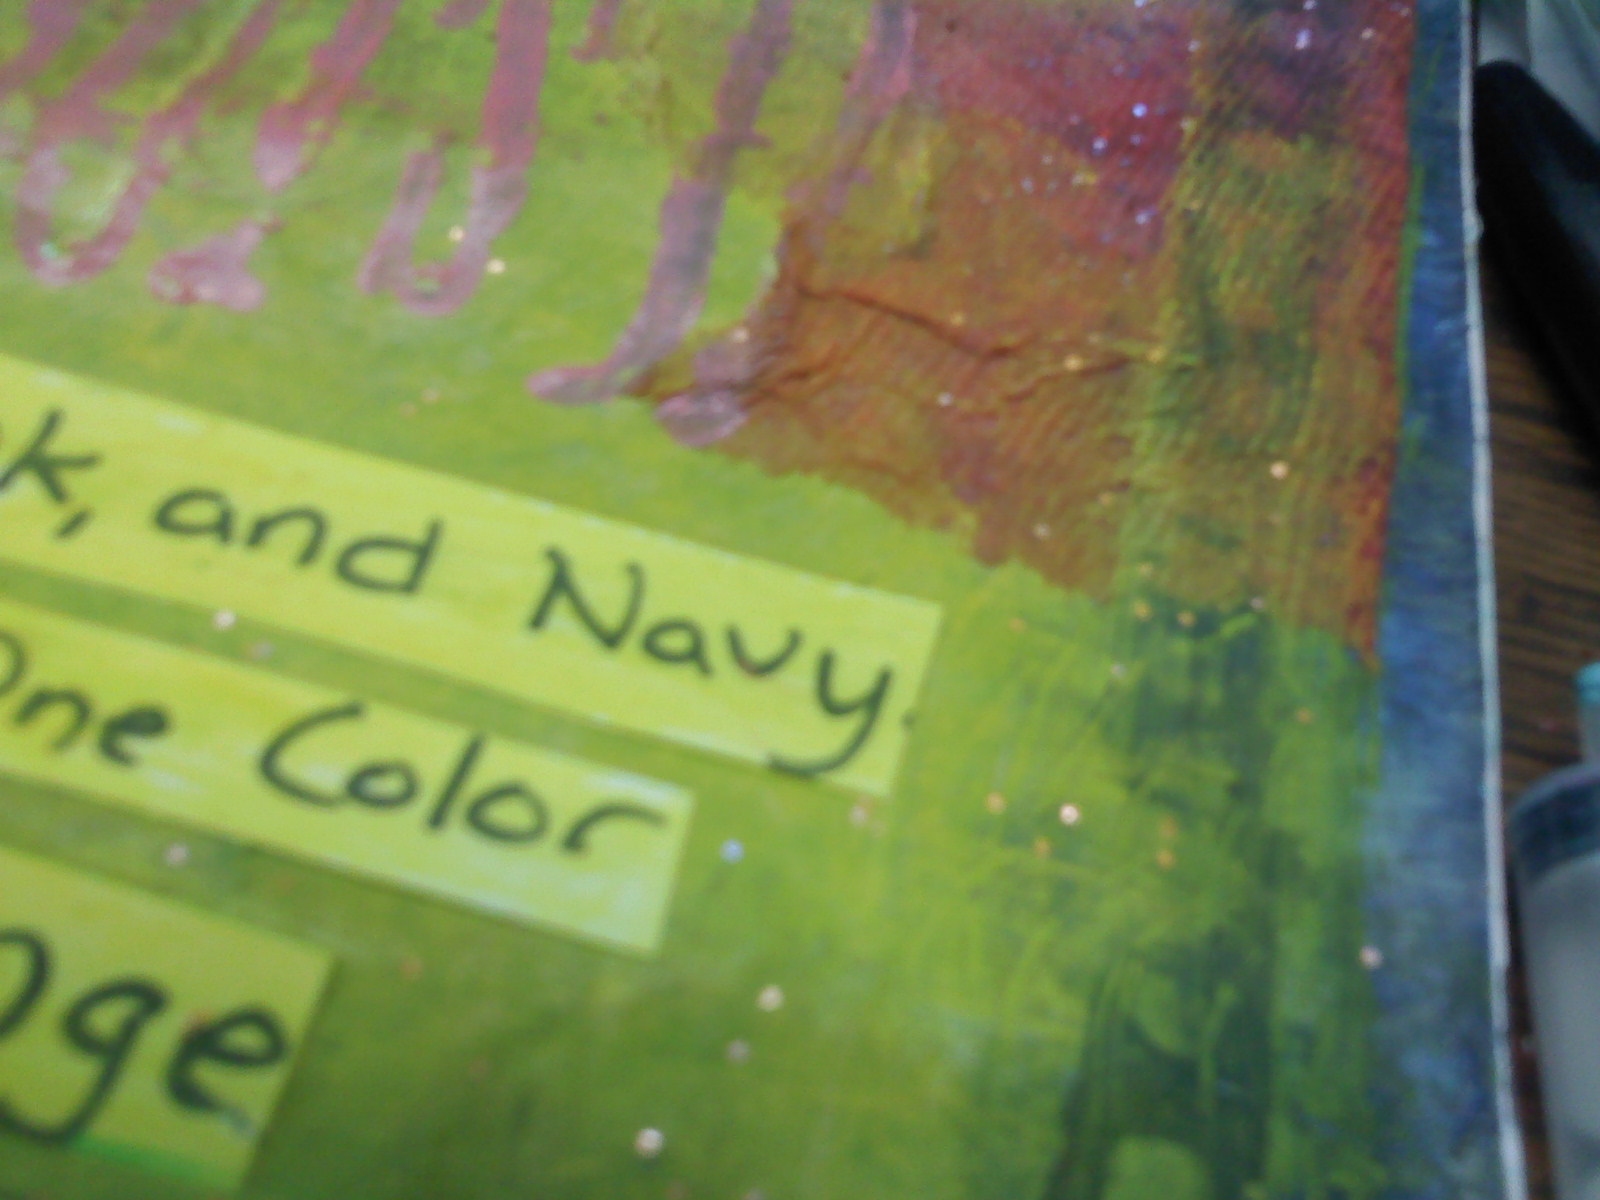
That's right my friends. I am here. For a while at least. :) And, if you look at the headline/title of today's post you'll see what's going on today. You remember about a week ago when I told you all about a challenge I was doing with the one and only Dede? Dede is pretty much a hero of mine when it comes to art, and so when she said she'd love to do a challenge with me, it made me pretty happy. :) I didn't tell you guys what the challenge was going to be, but now it's time for the REVEAL!!! Looking at the edited/words added picture above, you can see the color combo for the very first time; Navy Blue, Hot Pink, and Yellow. Now mind you, when I was DMing with Dede on twitter I picked those colors right off the top of my head, with no thoughts about how hard it would be. Dede probably came up with something totally awesome with no trouble. :)))) But I had a little difficulty with this combination for some reason. I think my problem was that my yellow kept mixing with the navy and making lime. :) But after enough layers I finally came up with this:


Yeah. I like it. A lot. It was really fun to make, and it ended up exactly as I had visioned it. Pretty much. Actually, I've been dropping a bunch of hints about this color combination. Probably about three or four. :) I wanted to see if anyone would see a pattern in my work. I would actually show some things with those colors in it. For example, I think I did an index card, a loose paper, and I told you about one of the homemade stamps I was using. You can see it as a border around the top half of the page. The journaling was just done on white cardstock with a regular sharpie. I glued it down, then ran over the top with yellow paint.


Here's that just a bit closer, and you can see some of the scattered glitter pieces around the edges of this piece. I love the way the glitter went around the page though I sort of focused it in this corner:


And here it is. :) For you followers of my blog, you may see (or at least sense) something a bit familiar in this page. If you haven't been reading my blog you probably won't. But this corner was collaged with... you might have guessed it... the paper towels I dyed a few days ago!!! Yeah. It is. Doesn't it look cool? I just loved the texture that it added, and I thought it looked pretty cool. I'm glad that I finally worked up the courage to push through and actually use one in a piece of art. If you remember, the paper towels actually looked really light in color. But what I found is that when I collaged them into my piece, they turned darker, to a hot pink. It was pretty cool. So... make sure to hop on over to Dede's blog... she'll be posting her page for our challenge after I. :) No ICAD today, but hopefully one tomorrow, when I'll see you guys again!! And that's all she wrote.

Saturday, September 10, 2011

An EXTRA-LONG Post...


Hey guys! I'm back with you guys today, and sorry I didn't post yesterday, but I had a total volleyball MARATHON yesterday!! I did create a little yesterday though, so I'll just do an extra long post today. Oh yeah. And I did join a volleyball team a few days ago. My first game is Thursday! Wish me luck, we're gonna need it. :) So anyways, now that I've got you up to date on pretty much everything else that's going on in my life (which obviously isn't much) let's get to the crafty/art version. It's like my life is in two different stories. One for art and one for the rest of everything. Anyways, let's get started.

If you look above at the page I was working on today, you'll see that I just finished a page in my art journal. :) I kind of love it, and I think it's really pretty. I'm also starting on a sort of online art journal course (yes another. :P) and I'm probably gonna make a journal for that. This is actually a page in my 21 Secrets journal, and I love the way it turned out. I journaled, and put the title down in the corner. I actually used this same word on one of my index cards that you've already seen, but this just seemed to fit the page perfectly. Normally with art journaling I end up putting the title down first and then journaling what comes to mind when I think about the title. You might do it in some other way, but that's how I work, so that's what I'm doing. :)


Here's just a bit of a close up of the title and a bit of the journaling. Most of the journaling was really light; the gray circles were really textured since I used gesso to lay them down, plus did some lifting which added even more texture. Then, when I went to write on them, the ink in my pen just didn't flow as well. But, for emphasis, I did the last few words with a Sharpie. They go over anything.


Here are my index cards from yesterday and today. I love the one from yesterday; excellent texture, and I am really loving the textures. But seriously. The second one is kind of annoying to me for some strange reason. Don't even ask me why. I feel like it's just overly simple or something. I was considering just trashing this one altogether, never showing it on the blog, and simply counting this as one of the five "free days" we get for ICAD. But when I really started to think about it, I finally decided against it, since this is really about creating, and just having fun. And I did have fun. So that's what I'm doing, and I'm keeping it. That's my story and I'm sticking to it.


Also, today, I worked on making some of my own stamps. I've been having a whole lot of fun making these recently, and I just love the way these two turned out. To make them, I simply cut some pieces out of cardboard (it was actually just a cereal box) and then did some punching on some craft foam. The one on the left was REALLY easy to make, and really quick. The one on the right took a bit longer, but I really love the effect I get with it so it was totally worth it. I love the variety I can get with making my own stamps. I love that I can literally make anything that I want, and it can be as epic as I want it to be. It's really cool. So far I normally just use black paint to stamp, but I've occasionally used other colors. I also used one of these (I'm not going to mention which) on my page for mine and Dede's challenge. I know that I'm torturing you here, but that's all the more reason to check in here on Tuesday, right?


One last thing before I go. This is a single, loose page that I've been working on for a bit of collage fodder. I love the way this turned out, even though it was just made by picking up paint from other pages (you can see the lifting from the circles of the page I showed at the top of this post :P) and a bunch of other colors I've just been messing around with. I love them so much. :) So that's pretty much all I've got for you today, but be sure to check in tomorrow. Okay? Okay. See you guys later! Bye!!

Wednesday, August 31, 2011

Painted Dictionary Pages


Hey guys! I'm here once again. So Blogger updated their blog layout, and as I type this, I'm sort of confused as to how this whole thing works. So let's just hope that my layout stays basically the same. I kind of like the new look though. It's different, but fairly clean and organized. Pretty cool. Today I want to share with you some painted papers that I've been working on. I started out by finding some paper to work on; I ended up going with some smaller sheets that I tore out of an old dictionary. I then painted a bunch of random colors onto it. I like the way it's working. My favorite color combination is lime and blue, so that's what I ended up with. I added some white, and a bunch of periwinkle.

Loose papers are so my new thing. I love working with them, and it's a lot different than I am used to. I kind of like that. You know, seeing something different. A change is always good. Sometimes that's what you need. Something different to kick you forward, and help you decide what is best for your artistic/creative side. Sometimes you just need to figure out something new. Something improved. And something different. I challenge you to try something different. And tell me all about it in the comments. :) See you guys later.

Thursday, August 25, 2011

Collage Art Journal


Hey guys and gals!! I'm back once again with all of you! I love posting here, though I'm sorry that this post is so late coming today! I got home from school, then had to do some homework. But I'm glad that I'm finally getting to this! It's probably going to be a bit of a shorter post today, because I have to do this quick. Either that or I'm just going to focus and just GET IT DONE. :) If you look at the picture above, you can see a page that; though I haven't worked on it for a while; I might think about working on this one soon. I was looking through some of my older journals for something for the blog, and this just naturally drew my eye towards it. I think it's the colors. I really do. Whenever I see lime and blue together, it just feels RIGHT. Those are my two favorite colors, and when they're together it is such a bright and colorful situation. If you have any suggestions for how to continue the layers on this that would be amazing! Comments make me happy. :)


Here's something else I want to show you; I barely ever work with collage, and when I do, it never really turns out that well. This is my absolutely favorite collage page I've done. I don't really know how I did it, though it just turned out perfectly. I love how the images work together, even though they are from completely different places. Some are from magazines, some from catalogues. Some are from the newspaper, and still others were simply printed out in a collage sheet. That's how collage works. You take tons of pieces from completely different locations and create one whole. It's really a cool process. I actually did this in my homemade magazine journal. As you can see from the many different things that I've done in this, the possibilities for this type of journal is endless! Once again, suggestions are always appreciated. Actually, I think I'll start a new paragraph for this.

Suggestions. That's where I left off. I love suggestions, and comments simply make me happy. If you ever have anything that you're looking for; a certain type of journal, or perhaps a tutorial. I think that's something that I need help with. I need to know what you; the people want to see. I know what I want to see in a blog, but that's not always what my readers want. :) So please, please, PLEASE comment with your suggestions. Please. :) I don't want to seem like I'm begging for comments or anything, and you don't even have to compliment my work. :) I just want ideas for the blog. Okay. I'll see you guys later! Bye!!

Sunday, August 14, 2011

Repurposing a Page


Hey guys! I'm back here with all of you showcasing more art journaling. This is another page that I did for the 3 Little Words class in 21 Secrets. With this one I sort of exited the grain of the project a little bit the first verse I did normally, the second one I did normally, but the third one I just wrote. The words just started coming to me, and I didn't feel like giving up my inner emotions just to stick to the way the project told me to. I have plenty more pages to mess around on when I'm trying to do that. I'm trying to use at least 10 pages for each class, maybe more; I might end up getting another journal. :) Wouldn't that be something? Anyways, yeah. I worked on this page today, but I also have been working on it for a few days. You have seen it too. What am I talking about you may ask? Here's what I'm talking about.


Remember this page? The horrible one that I had no idea what to do with? Yeah. That one. What I ended up doing was doing a TON of journaling on top of it as seen above. Just a note; I do all of my journaling that I don't want people to be able to read in a sloppy cursive, with lots of misspellings. Plus it just gets all of my emotions out. After that, I simply gessoed over top of it and started the creating all over again. And ended up with the above page.


I really love the way that everything seems to fade into the background. I love it. It turned out quite well, if I do say so myself. Now one last thing; the poem. I'm sure you want to see it. :) Here it is.

Sometimes I wonder late at night,
Thinking of things from moments past.
Like a thief in the dark;
Quietly slipping from place to place.

Sometimes I wonder; is there really
A deep sea rarely detected by others?
Full of all my floating fancies,
And all my wells of words?

Is there a place so quiet
That you can't hear yourself whisper;
So dark you can see a million miles?
I don't really know for sure.
But sometimes; I do wonder.

Monday, August 8, 2011

I Missed This Crazy, Online Internet World

Hi everybody!! I'm back finally! That was stressful. Moving. Wow. But I'm glad that I'm finally back and ready to be journaling again. I've really missed it. And you guys. I can't explain how much I've missed you guys! Sorry that there's not a picture today, but I sort of am doing this on the fly. I remembered how long it had been since I'd posted and thought I'd check in, as well as trying to put together some sort of plan for this blog. I had one at one time, but I've probably misplaced it somewhere in the abyss that is my room. I still have a bunch of boxes to unpack, and somehow I lost 3 or 4 notebooks that I have a lot of important stuff in. I'm probably going to go dig them out after this, but we'll see. Maybe I'll just go journal. Who knows.

So my journal has defiantly been growing larger since the last time I've shared. I've done quite a few more pages, and actually STARTED another journal. For 21 SECRETS!! I finally got it. I'm trying to pry 180 hours out of the thing so I can count it as a fine arts credit for school. Awesome? I think so. I've done probably 6 0r 7 pages in my new journal, even though about three of them are currently in progress. I'll be sharing some of these with you as well. I'm still going to try to continue my other things though. You know; the stuff I had going on before. My creative experiments, and my weekly checkup and such. It was always fun.

So here's something; I've started jogging. Walking. Running. Whatever you want to call it. I started it. I've only done it twice, but I'm sitting here right now, and my legs feel like they're going to fall apart. Which shows you how badly out of shape I am. Frankly, I'm a little confused as to how I was doing martial arts twice a week, and not being in shape. But anyways. It's called Couch to 5k, and so far, it's "fun". I guess. But arting is a lot more fun. So currently I'm in an ongoing battle with my brother as to who can get more viewers to their blog. Ha. Currently I'm in the lead, but not by much. So I'm gonna start my writing again. :) That's not the only reason though. The real reason is; I missed this crazy, online internet world.

Saturday, June 11, 2011

Creative Ideas 6.2


Sorry that I didn't post yesterday, but I just got so caught up in stuff that I just plain forgot. But I'm back today with another post on the Creative Ideas concept. In case you haven't seen the previous one, the basic idea for this is that I give you ideas to use in your artwork, and then you do as many as you want, then link to them in the comments. Or not. You could just be inspired by the prompts. Your choice. But anyways; here they are:

  • Use a supply in your art that you don't normally use. Suggestions include anything from newspapers to those fancy sparkle paints you got.
  • Use fabric in your work. If you're a fiber artist, use paper.
  • Use the color combination: red, orange, yellow, and tan. I've been experimenting with this and it always turns out really cool.
  • Use a quote from one of your favorite television shows, movies, books, etc, in your art piece.
That's all I've got for you guys today, but I'll probably see you guys tomorrow!! Bye!!

Sunday, June 5, 2011

Collecting Collage Images


One of my favorite things to do in mixed media is sift through all of the images. I love to collect them too. They're really fun to find too. When you start mixed media, you'll find images everywhere. It's just bound to happen. This post is for those of you who are just beginning mixed media, and are trying to find pieces to use in your artwork, OR for those of you that just want to find NEW places to find images. As you advance in your artistic journey, you will start to open your eyes to the things all around you. This is just a short list of suggestions for image locations, and don't be limited to these. Here is a short list however:

  • Magazines. This is the most common place that people will look for images. This is the most referred to reference, and these work well for larger, glossier photos.
  • Junk Mail. This doesn't sound like a good idea, since a lot of this stuff is JUNK after all. At least that's what they'd lead you to believe. I love a lot of the images you can find in the junk catalogues.
  • Catalogues. These have tons of textures and images of people in them. Amazing for mixed media.
  • Online Collage Sheets. These can be free or paid for. Either way, these are excellent sources. Sometimes they have color images, and sometimes they have black and white sketches. A lot of the images shown above are from free collage sheets.
  • Old books. A lot of books in general have really nice, vintage looking images in them. A lot of them are black and white.
These are all I can think of right this minute, but I hope they help you with finding some things to use in your artwork. Remember. Images are everywhere. You just have to find them.

Saturday, June 4, 2011

ATC Background Tutorial


A little while back I did a tutorial on ATCs. I love to make the backgrounds a bit different on each card. These are some of my favorite backgrounds to use, and they're so simple. They only use a couple of supplies, and they're really easy to make. The photo above shows what they look like. You can make these in any colors you want, but I recommend darker, more vintage looking colors. The style of this technique just goes better with those types of colors.


These are the supplies needed for this technique. I actually designed/developed this technique in order to use up older, dried up old baby wipes. So you're going to need one of those. You'll also need an ATC blank in white, a spray bottle full of water, and ink pads in two coordinating colors. With the inks, I recommend Distress Inks, since they react with water, but if you know of another brand that does the same thing, feel free to use them. I'm using Aged Mahogany and Vintage Linen.


Here's the ATC after I've already put the lighter color (the Vintage Linen), and am starting to apply the darker mahogany color on top of it. I like to use two colors, since I think that it adds more color, texture, and dimension to the finished piece. When you apply the color, either dab the ink on, or rub it back and forth on the pad. Then rub it lightly against the paper in light circles.


Here is the ATC after both layers have been applied. You can see how on the edges it is a bit darker. I like it better that way. It seems to add dimension. I don't know about you, but I like it. You can also make it more even if you like; it doesn't matter to me. I like the look of it. :)


Spray/mist the ATC back with a bottle of water, making sure that some of the dots of water are bigger than others. Let it sit for a minute and...


Scrape or dab it off with the baby wipe. This is what the finished piece looks like! I love it!! I hope you guys try out this technique, and, if you do, feel free to post it in the comments. I'll come and visit you!

Note:: This technique can be used in any way you like; in an art journal, mixed media, ATCs, or any other thing you can think of. It doesn't matter! Just play around. That's what matters.

I hope you guys enjoyed today's post, and I'll talk to you later. Bye!

Wednesday, May 25, 2011

Link Collection. Number Two.


Okay. So it's that time again. I'm going to do another link post. I seemed to have a good response on the previous one, and it was a lot of fun to put together. I think that people seemed to enjoy it too. And you know, sometimes it just feels good to put together a short post that's still good and solid, with lots of juicy material. And a good photo. :) The picture above is of my favorite bookshelf in the house; one single shelf just for my craft books. Some other books worked their way into there, and a couple are missing, but for the most part, those are the ones I've got. And I like the ones I have. That's the point. They're inspiring to me, and I enjoy flipping through one or two of them when I'm bored. But without further ado, here's the links!!

An art prompt about your life. Amazing. And inspiring.
A tutorial on making colorful fabric ATCs from leftovers. They're lovely.
A list of several journaling prompts. Whether you're a journaler or an art journaler, these are sure to inspire you.
A cool post on some ladies that were working on quilts that look braided. Love.
Another amazing post by Balzer Designs... I couldn't resist. Her site is so inspiring.
A free motion quilting pattern that immediately caught my eye when I saw it. The whole blog is worth exploring, especially if you're a quilter!
Some beautiful english paper pieced hexagons just for the heck of it...
And to top it all off, a lovely post with only pictures of roses.

So I hope that you guys enjoyed this little collection of posts that I found inspiring to me. Just a side note here, I post stuff here that actually inspires me. While some things may inspire me in one way, yours might be a little more subtle. But that's okay! That's what inspiration is really all about.

Tuesday, May 24, 2011

Update Post


Sorry I've been MIA for so long, but with us moving sometime within a couple months, things have been pretty hectic around here. My parents were gone for a while looking at houses, and a whole bunch of stuff kept coming up that was actually keeping me from being on the computer much at all. However, I still would like to manage to keep up with the blog. Even though the posts may not be quite as long as they normally are, I'd still like to post every day, even if it's only a short post. Also, I've been working on putting together a bunch of mixed media kits and working on making my jewelry. I've only listed one thing so far, and that's located here.

I've also been working like crazy on writing articles. I'm trying to become a Platinum Member of Ezine articles, and to do that you have to write 10 articles that fit all of their article guidelines. So far I have five published, and there's one that's still in the review cycle. And one that I'm currently writing. So almost seven in all. I've been using some of their article suggestions to give me ideas, and I'm so grateful for those.

Another thing that I was considering was maybe doing more than one post a day here on the blog. If they're short quickie posts anyways, then it shouldn't be hard to do a couple a day throughout the day. As long as they don't take me a half hour to write. I just don't have that kind of time. Not if I still want to craft. :) So yeah. That's all I've got for now; if I do another post today, I'll probably do a link post. I had fun doing that last time. So I'll talk to you all later! Bye for now!

Friday, April 8, 2011

A Quickie Post


Hey all! I've got more of a quickie post today, and will for the next few days. I've mostly been working with paper crafts lately, which means that I don't have so many pictures to share with you all. Also, this from here until the 11th is all catch up, so that means that my thoughts on the pages and cards aren't exactly up to date.

Anyways, first off is this card for the 365 Cards challenge. I really liked working with smaller cards as it's a bit less intimidating, so this is only 3x3. It was supposed to be based around their sponsor's name, HeartSong something or other. I really liked it, but my card didn't quite turn out how I wanted it to...


I've got another art journal page for you today as well, and it's basically just a black background with some random blue paint scraped on there. I like the lace on it as well, though I'm not really one to use very delicate laces in my work.


And here's another view of it. I like it a lot, though it's actually not finished yet - actually it's not close at all.

Saturday, April 2, 2011

Realistic Tiger Drawing


Yo all you peoples!! Okay, so I'm back once more for a post with some more of my art. I'm glad that I'm finally managing to get into at least somewhat of a rhythm with my posting here, because I really like sharing it with you all! I guess I can only hope that you enjoy looking at it as much as I like creating and sharing it. So anyways, as a little idea of what I'd like to do, is to post on here daily. I know that sounds impossible, but I really think that it would encourage me. I don't know why I think that, I just do.

So looking back to the first picture on today's post, you see an art journal page with a zebra painted background and a little zebra doodle. This was a printable piece from Milliande's page, and it was also from one of her prompts. I know I'm a little late to the party as this prompt initially came out on January 1st, but when I find a good art journaling prompt series, I just can't help but play! It's simply not in my nature!


So as we look at this page, the first thing that probably pops out at you is the zebra. That's the prompt. Z for zebra. The zebra type background was drawn by me, freehand, and then painted with a paintbrush and acrylic paints. Black and white. If you look at the white sections up close however, you can see where some of the black pain mixed in and created gray. Though that's not quite what I was seeing for the page, I let it go anyways.

I added the doodle and a couple of spritz of glimmer mist, then stamped a few words and doodled a bit with a marker. So far I am kind of liking where the page is going, but it's far from done. I don't like it currently. But I have a vision for it, so I'm going to keep going and try it out anyways. As far as I know, it should work. And nobody's going to tell me otherwise. :P

Next up on the list of things to show you guys is a card. It's a card for today's challenge on 365 Cards. To use a bit of pink on a masculine card. Now I'm not so much of a card person, but when I do make them, I have fun with it. So I don't know why it doesn't happen more often. You see, I think what happened was when I discovered art journaling, the more structure aspect of cards and scrapbooking just didn't seem fun. The pleasure just disappeared. And when I'm crafting, the last thing I want it to feel like is a chore and that I "have" to do it. I need to have fun.

That's what gave me the idea to start putting pictures in my art journals. That would give it the same type of art journaling pleasure, with the pictures, memories, and practicality of a scrapbook. I may try that out tomorrow, though I'm not sure. I'm considering joining a monochromatic challenge for scrapbooking and entering art journal picture pages instead of the average type of layout. *shrugs* We'll see.

So now I've got another crochet/yarn arts type project to show you guys. I do quite a bit of crochet and knitting work over time, and if you've ever done that for any extended period of time, you know that you come up with tons of little scrap ends that are really short - anywhere from 6" to 3 feet. That you can't do ANYTHING with, but feel horrible throwing them away. So here's the deal. I had been stashing these little thread ends for about a year when it finally dawned on me - why not just create my own pattern just to use these up?

It's done entirely in single crochets, making it extremely simple, and it's fun to work up since you are constantly changing color, thus you never get bored of the project. Plus, all of the little thread ends are constant reminders and memories of finished/half finished projects that have fond memories attached to them; who would have thought that yarn could be so sentimental? I sure didn't. :)


And now, what you've all been waiting for; my first EVER realistic drawing. All in pencil, on an ATC sized cream cardstock. I can't tell you how long I spent on this single card - it was for a swap I'm in, and I thought it was worth a shot. If I had to give it a guess, this single card cost me about 3 hours of my life. And 2 of those were spent perfecting the eye. I guess you can imagine how late I stayed up last night. :P I thought I couldn't draw, but I guess I was wrong. Okay, very wrong.

This is a perfect example of how you should never doubt yourself when it comes to art. I spent four to five years thinking that there was no way I could POSSIBLY draw anything realistic. So I resisted the temptations I had to try. But here I am, my first try EVER to do something realistic and it turned out almost photographic. I know. It's strange. But don't doubt yourself. I learned that the hard way.

Friday, April 1, 2011

The First Post For April!!


Hey everyone! I'm back, once again, and I'm here with a new post. Just today I broke out my good ol' art journal and started messing around. I always have a lot of fun when I do, so I'm not sure why it doesn't happen more often. But anyways, I did. So here's the deal. I used several different types of prompts. Number one was Balzer Designs "art journal every day" prompt/series. I discovered this near the middle of last month and just thought that I'd wait it off until this month rolled around. So the thing is that you do SOMETHING in your art journal every day, whether it be just a simple doodle, or a complete technique. It doesn't even have to be a whole page.

In fact, when I started this page, I had initially planned on only doing a little bit, trying to merge my way back into it... the thing was, once I started, I couldn't stop! It just felt so good to create; to work once again freely with absolutely no fear. I started off the page with another prompt from daisy yellow, another blog that I thoroughly enjoy. She is just so inspiring, and her projects are so bright and "in your face"... exactly my style! Anyways, she was having a prompt session that she referred to as her Creative Experiments page. Apparently it's a monthly thing, and it seems like something I'll work with often!


There is a list of prompts and creative experiments to try, and I picked one to try out. I chose "switcheroo", which she prompted us to switch out one of the things in our art. She actually used this example, but I liked it so much that I couldn't help myself! I normally use acrylic paints in my journal, but this time I used watercolors! They aren't that thinned, since I still wanted the bright, bold colors, but they are watercolors never the less! They look so cool!


And, one last picture before I leave; a picture of my cross stitch!! Last time I showed you, all that was here was the train engine and the leg of the kid, but now there are 3 stacked alphabet blocks and about half a football. Also, all of these pieces aren't quite completed, but they will look even cooler when it's actually done! I promise! :P

Wednesday, March 30, 2011

ATCs Galore!! (And a Tutorial!)

Hey all! Okay, so I know that I promised you all an ATC tutorial when we last met, and I'm not one to break my promises. At least I try my very best not to. :) So anyways, I'm here with some ATC's. No lie. So here's the deal. Some of these steps may seem pointless, worthless, or meaningless. And I almost guarantee that at least one of them will seem that way. But when it actually comes down to it, and you dig out all your supplies in order to try and make SOME sense of this tutorial, you'll thank me. ;)

So first off I'd like to start with a basic definition of an ATC. An ATC is a miniature piece of art. Otherwise knows as Artist Trading Cards. Thus the acronym. So basically what you do with them is to take your medium and work with it on a miniature "canvas", which is 2.5"x3.5." An ATC can be worked in many, many, MANY different mediums, so you never can be quite sure what you'll receive back when you participate in a swap. Some people collage, some paint in watercolors, some in acrylics. Some draw theirs, and some even embroider (a medium that I have yet to try in ATC form :O) theirs. For my example I'm going to show you a collaged one. (For the time at least)


Okay. To start off, you need to collect your supplies. I collect a vast variety of supplies, pulling anything and everything that could possibly match the idea I have forming in my head. That's another thing to note. When I'm working on an ATC, I normally have a basic idea in my head, though it is only in the VERY beginning stages. Don't be intimidated by my large pile of supplies (otherwise known as arty crap); I won't use them all, only a few of the actual things in the pile shown will be used.

I'm more of the out of sight, out of mind type. So having all of my possible supplies out in front of me (even for something as small as an ATC) is very helpful. Notice that I have various images, stamps, papers, inks, punch outs and punches, trims, tapes, embellishments, and paints sitting out in front of me. I'm telling you, it totally helps.


A closer shot of the various papers I was trying to choose from. I had a piece of a magazine image, a paint chip, several specialty papers, and some pages from an old book. These show the variety that can be used. For a tutorial, I should have also included some cardstocks, but unfortunately they didn't quite match the vision I had in mind for this particular card. Also, don't be afraid to choose and pull several papers. Or even try out several for the same image. The thing with this kind of art is, that if it doesn't work, just use it on something else. :P I'm telling you; my method's foolproof.


The next step is to cut your paper into 2.5x3.5" rectangles. When you are cutting and measuring for this step, make sure that they stay pretty true to the initial measurements. When you're just getting started it doesn't matter that much, as you're probably not going to be trading your first cards, but when you get started trading they need to be pretty precise. Some people even think that if the measurement varies too far from the right proportions, then they cease being ATCs!! So be careful. One more note on this picture; as you can see, this is actually a perfect example of the tip I mentioned in the last paragraph in action. I couldn't decide between the specialty or the text paper for my image, so I cut one of each and tried out the image on both. It gives me a better visual. Also, the one that you decide not to use can always be used for your next card. :P
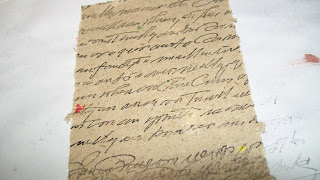

I decided on the specialty paper. It just seemed to work right with my image. After looking at it for a moment, I decided that it seemed a little plain, so I jazzed it up a bit with a cursive background stamp. You can see that the bottom stamping defiantly isn't perfect, but you won't be able to notice in the finished card.


Next up on the list; paint! I love paint for all of my projects, so when you mention collage ATCs, that's sort of the first thing that comes to mind. Don't ask me why, it just does. When I looked at what I had already decided, I thought that a more monochromatic type scheme would work best for this project, so I found a nice metallic bronze. You can't really see here, but it's actually a bit sparkly and shiny in real life.

Also, instead of using a paint brush to spread my paint like a "normal" person would, I use an old credit/gift card. They're sturdy and fun to use and they sort of resemble a pallet knife when they're used. Plus, as an added bonus, I don't have to clean any brushes; I just let the paint dry on the card! I'm a lazy bum when it comes to art, I admit it, but I don't really care...


This is what the card looks like after being spread with metallic paint. I told you it resembles a pallet knife!! And can you see the sneak peek of my image there in the corner?


Now for the stamping. I like to add at least a bit of stamping to each of my cards and art journal pages. Actually, anything that uses even a bit of collage automatically needs some stamping. Sometimes I use rubber or acrylic stamps with ink pads, but this time I thought the card was calling for something drastic. I used a large (and I mean LARGE) spiral foam stamp with black acrylic paint. It gave me just the look I was going for!! If you want another tip for stamping, here's one for you; when stamping on anything (art journal pages, inchies, ATCs, scrapbook pages, etc) always stamp at least SOME of the images off of the edge of the paper. It gives it a nice cohesive effect.


Next, I went over the entire card with a layer of distress ink. A tip for using this stuff is to NOT apply it evenly. I know that it goes against everything you've ever learned about crafting. Ever. But trust me. It really works, and just adds to the distressed effect that's so popular recently. Now that I think about it, I should really do a distress ink tutorial/technique examples post. Hmmm...


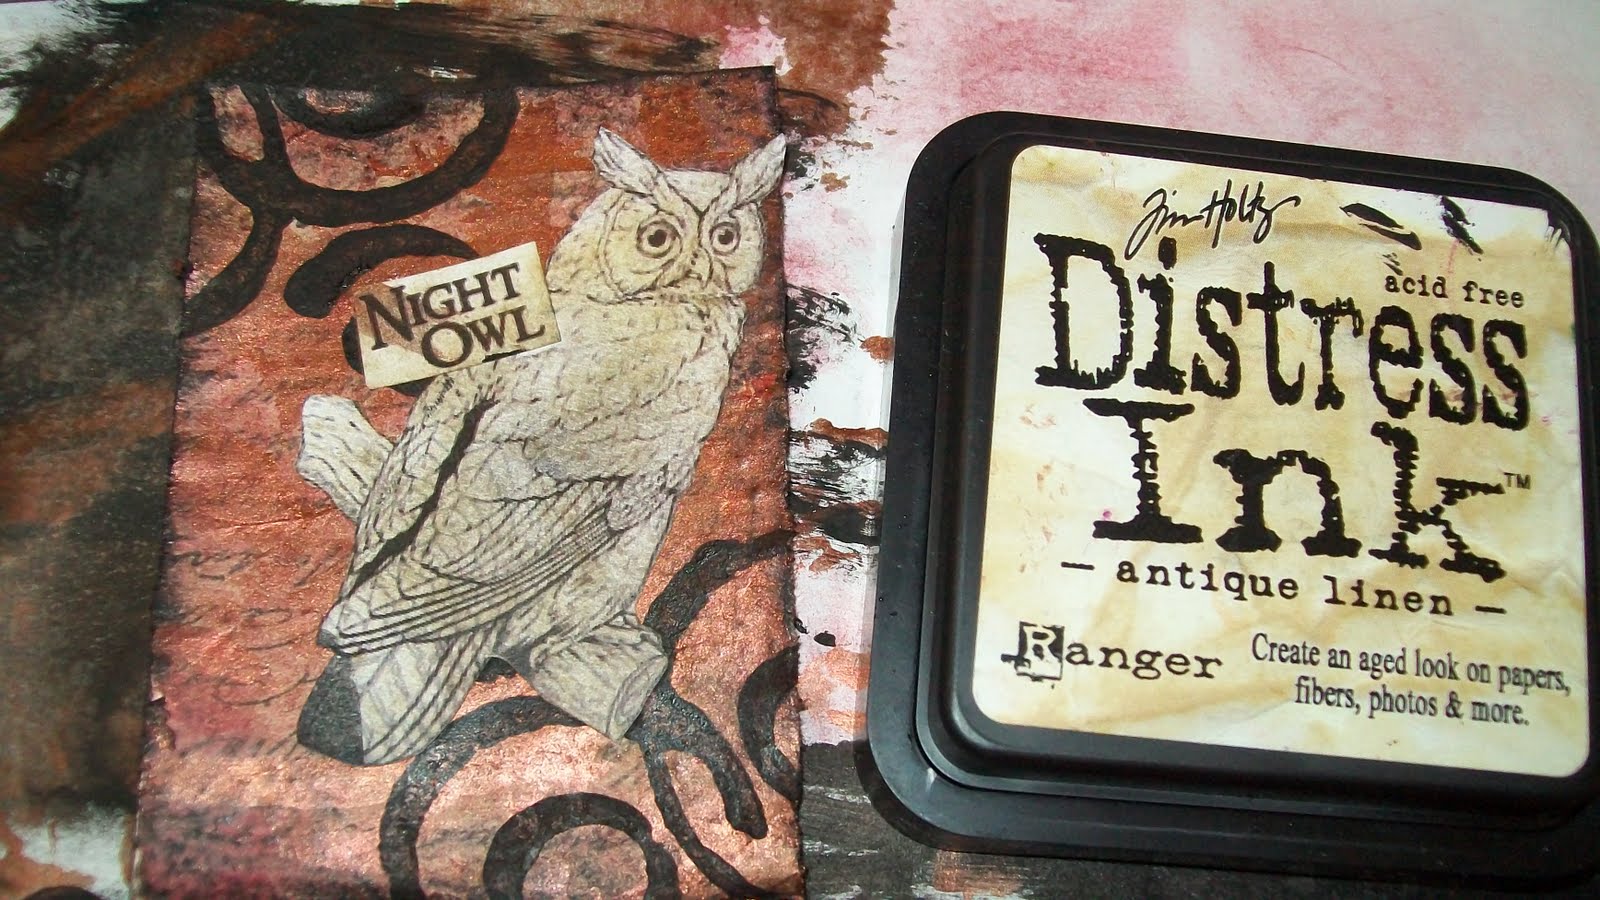
Next I placed my image on the card. Isn't the owl so cute?! Anyways, you see how the tip of the owl's tail has a streak of black on it? Or how the sentiment has a streak of metallic brown running through it? That was an accident. Purely mistake. But unlike some other people, who may have tried to cover it up, or even reprinted the entire thing, I just went with the flow. It's the same way as when I'm working with an art journal page. Almost every single time I sit down to create, another color gets mixed into the white background. Instead of getting upset, and either trying to cover it up or flipping to a new page, I just use it as a prompt! For example, if a bit of green gets scraped onto my page since it was left over on my pallet, I simply make a green page! Great inspiration.


Okay, anyways, back to the card. I thought that the above owl was looking a little bit white for the card, and it felt like it stood out too much. So, I went over it with an small amount of antique linen distress ink. I love this stuff and I'm proud!! :D

So anyways, here's the finished card. I just added the small piece of black electrical tape in the lower left hand corner and spotted it with white stickles (which is a professional glitter glue which has much more sparkle than regular glitter glue. Though I'm not really a sparkly/glitter person, when I do want bling, I want it to sparkle!)

So that's about it!! I know that the post was long, and maybe a bit annoying to read the whole thing, but I hope that I at least helped somebody with this. I know that I had fun writing it! Enjoy!

Related Posts Plugin for WordPress, Blogger...