Showing posts with label paint. Show all posts

Tuesday, February 19, 2013

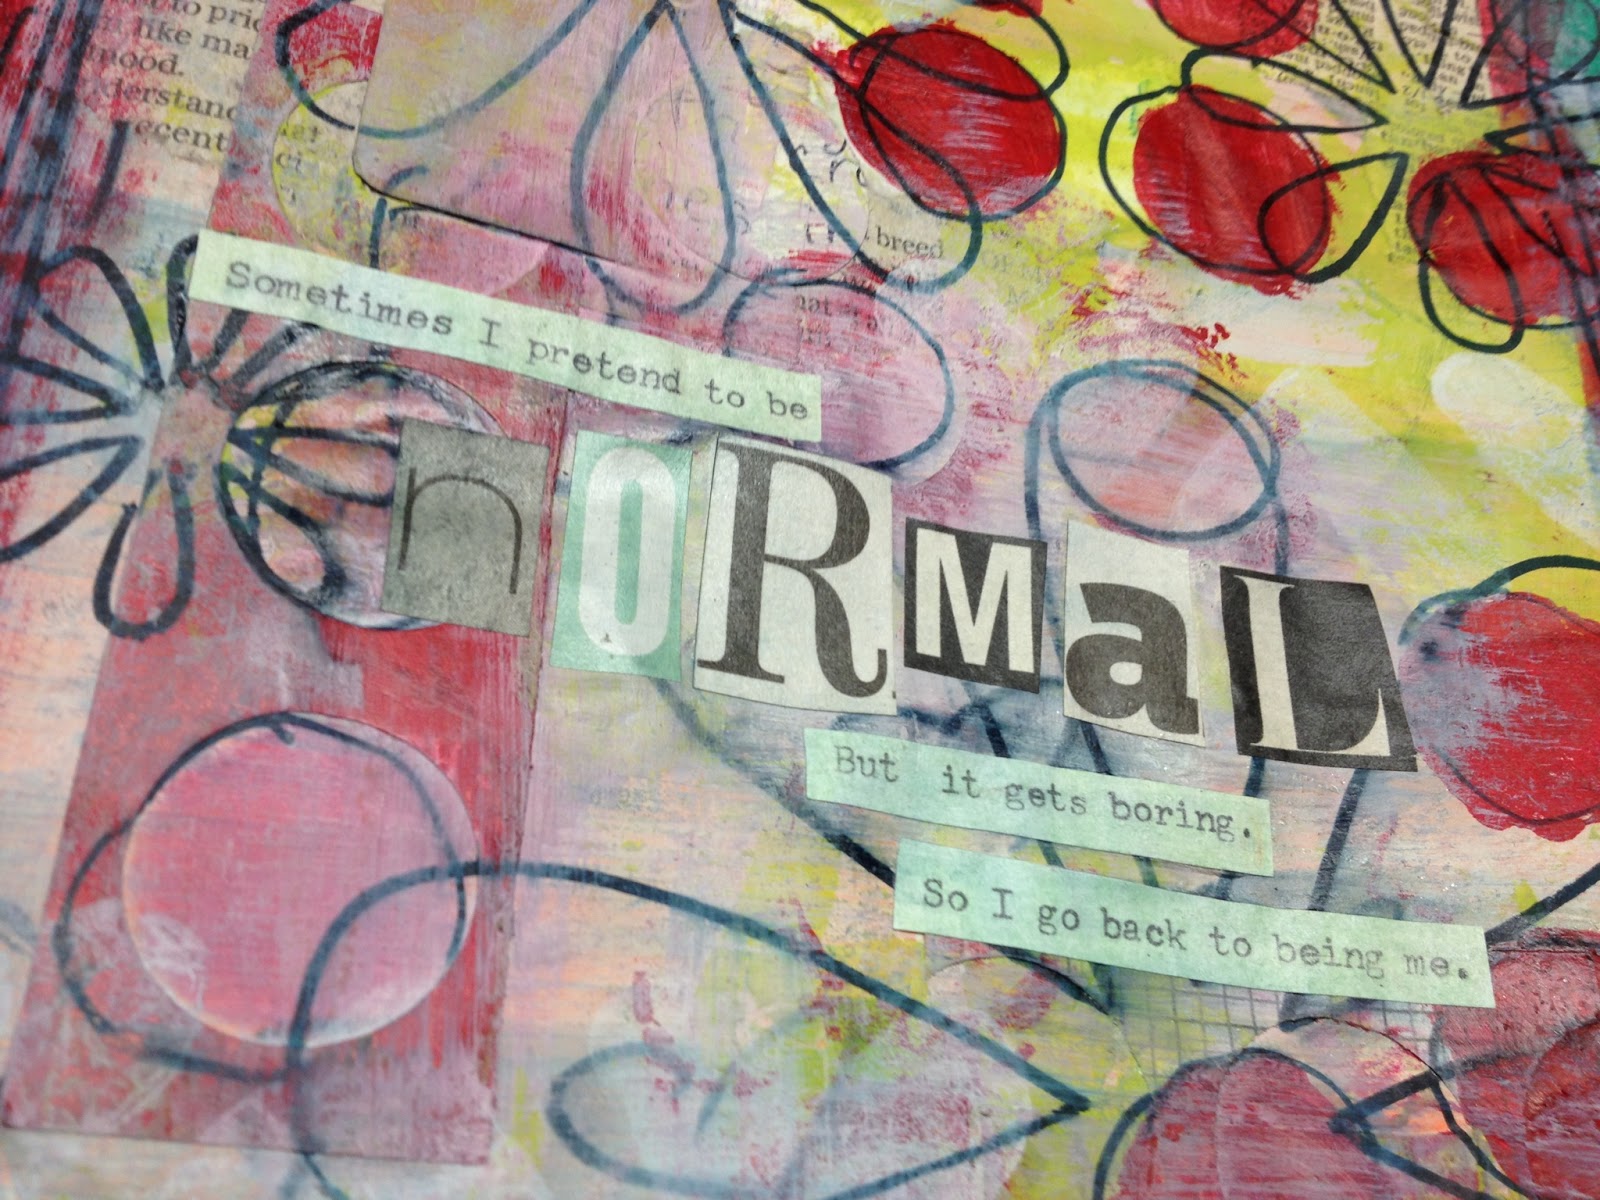
Normal: Daily Art Journal Page


Hey everyone! How's it going? Hopefully you all had a good Tuesday; I know I did. However, I do happen to be exhausted. Today I had open gym at my school, and I basically played basketball for at least two hours straight. Like I said, I am very tired. I almost fell asleep on the floor.

Anyways. Enough about that. Let's get onto the art!


Today's page feels quite a bit more graphic to me for some reason. I'm not exactly sure what caused me to go in this direction with the page, but I quite like the way it turned out. To me, it really seems quite reminiscent of Traci Bautista's work. The minute I thought of that, it reminded me of all the old series I used to do on the blog. The work through of the Collage Unleashed book, even though I stopped and started it a million times. And I also brainstormed some ideas for a couple of new series.

I will still be continuing my own challenge, Resize It!, even though I need to sit down one of these days and record. It just seems to be such a hassle. I like doing it though. It doesn't feel like a chore, while, at the same time, it does. It's difficult to explain. It also has a lot to do with the fact that I'm lazy. However, the fact that I started brainstorming a bunch of new ideas means that you guys aren't going to have to simply see my work every day. You get to see my work with some sort of structure. And I hope you'll enjoy that. :)


Here's a better look at the quote I used for this page. I love it. So much. I saw it on Pinterest, which just so happens to be one of the most useful tools I've had for art journaling thus far in my life. And that's saying a lot. I can find inspiration for pages, as well as clipart, free collage sheets, and quotes to put on the pages themselves. I just think it's cool.

Anyways. I've had this quote pinned for a while now, and thought that it would make a good page. This describes me perfectly. I'm not normal, and I'm 100% proud to admit it. I don't have a problem with being different, and perhaps just the slightest bit weird. I consider myself slightly eccentric, though I think my sarcasm trumps all. 


I thought that I would leave you guys with just a few detail shots of the background. I did a collage initially, using a bunch of pieces of paper and things that I normally would have thrown in the trash. That's something else that I've been experimenting with a bit. Keeping all of the things I'm tempted to throw away. And USING them. That's the key word. If I don't use them, then there is no purpose to it, at all. It's just clutter. However, if I do use them, that's just more fodder that I can use in my collages and art journaling. 


Just one last thing; I used all kinds of shapes in today's piece; hearts, flowers and circles. Though they normally don't go together very well, I like to think that it works. You can't be afraid to play. I've said it before, and I'll say it again. If I would have stopped at the precise moment I thought I should, only because I was scared of ruining it, then I would have missed out on this great page. If I didn't like the way that it turned out, I always could have tried to cover it up in some way. There are no mistakes in art journaling, only opportunities.

Anyways. I hope you guys enjoyed today's post, and I'll see you all next time. :)

Thursday, February 7, 2013

Heart Investigation 1.1: Cherish


Hello people. I'm back with you guys again today, with some more hearts on yet another art journal page. I have officially decided that I am going to continue working with this shape until I've thoroughly exhausted all of my options. I'm not going to freak out if I don't do hearts one day, but I do think it would be interesting to try to explore it in as many ways possible.

I had actually started this page a few days ago, when I was trying to work with the idea of an entirely blue page, for my 52 Sparks page. However, I got frustrated with it, and completely abandoned the idea. Today, I came back to it with a fresh mind and began where I left off. And I'm glad that I did.


I had to add a bunch of layers in order to be able to get myself to a point where I was happy with the result. Layer after layer after layer. Stamping, collage, and paint. I also used chalk pastels, oil pastels, and sharpies to doodle into the background. Something that I really enjoy doing is taking markers and just doodling a layer. 

It's not what the majority of my pages are made up of; not like some people. However, I do like the way it looks underneath layers of paint and collage. Just a bit unique and different. Something that I quite enjoy.


Here you can see some of the book text that I used on this page. Actually, I use book paper on most of my work. I have an old dictionary that I got from a thrift store, which I simply pull pages out of whenever I need them. They are awesome for collage, and also for monoprinting, when I do that. 


Something that I've really liked seeing in my work however, is the development of my own personal style. It's something that takes a lot of time to come up with, and I'm quite proud of what I've been able to accomplish on my own. I love it. I like to think, personally, that if someone was to see my work, they would be able to tell that it was mine.

Though I'm not quite sure that I'm exactly to that point yet, I look forward to the day when I am. That's one of the things that every artist dreams of, and being even remotely close to that is amazing. Anyways. Thanks for visiting guys! It's greatly appreciated, and I hope to see you guys tomorrow! Bye everyone.

Tuesday, February 5, 2013

Power: 52 Sparks Page


Hey guys! What's happening?

I'm back with you guys again today, with yet another art journal page. Personally, I've really been enjoying the daily art journal pages I've been doing, and it seems that every time I create something, yet another idea pops up into my brain. I just love it so much.


 Today's page is just a bit different than what I've done in the past. Today's page is composed of a ton of layers. I'm not exactly sure what got me to that point, to be completely honest, but I did what I was feeling. And apparently I had a lot of pent up emotions stuck inside of me. Every time I would add a layer, I would love it just that much more. I started with a layer of collage, then the layers of paint, ink, tape, stenciling, and other things followed soon afterwards. 


The 52 Sparks prompt was this: How do you feel when you are alone?

I didn't exactly know how to answer this question, but I decided to give it my best shot. For now, I decided to just put down power. However, I think I may add some letters later on to make it say "Empowered." I feel like that might be a little bit closer to the truth. However, at the same time, I also will feel very frustrated if I am by myself for too long. I think that might have part to do with my personality, and part to do with the fact that I'm a teenager. Not quite sure.


Anyways. Yes. That's what I have for you guys today. I'm so glad that I'm back into art journaling daily now; it just makes me feel so good. I don't even know how to explain it. One of the things that I love the most about it however, would have to be when I'm working on a page and remember something that I used to use all of the time, but have forgotten about. That's what happened with this page and the flower stencil. I forgot I even had it. Then, when I was working on background, I remembered it. And then I went to seek it out.

Overall, I had a lot of fun working on this page. Make sure you check out Dale Anne Potter's 52 Sparks, and I'll talk at you guys later!

Thursday, January 24, 2013

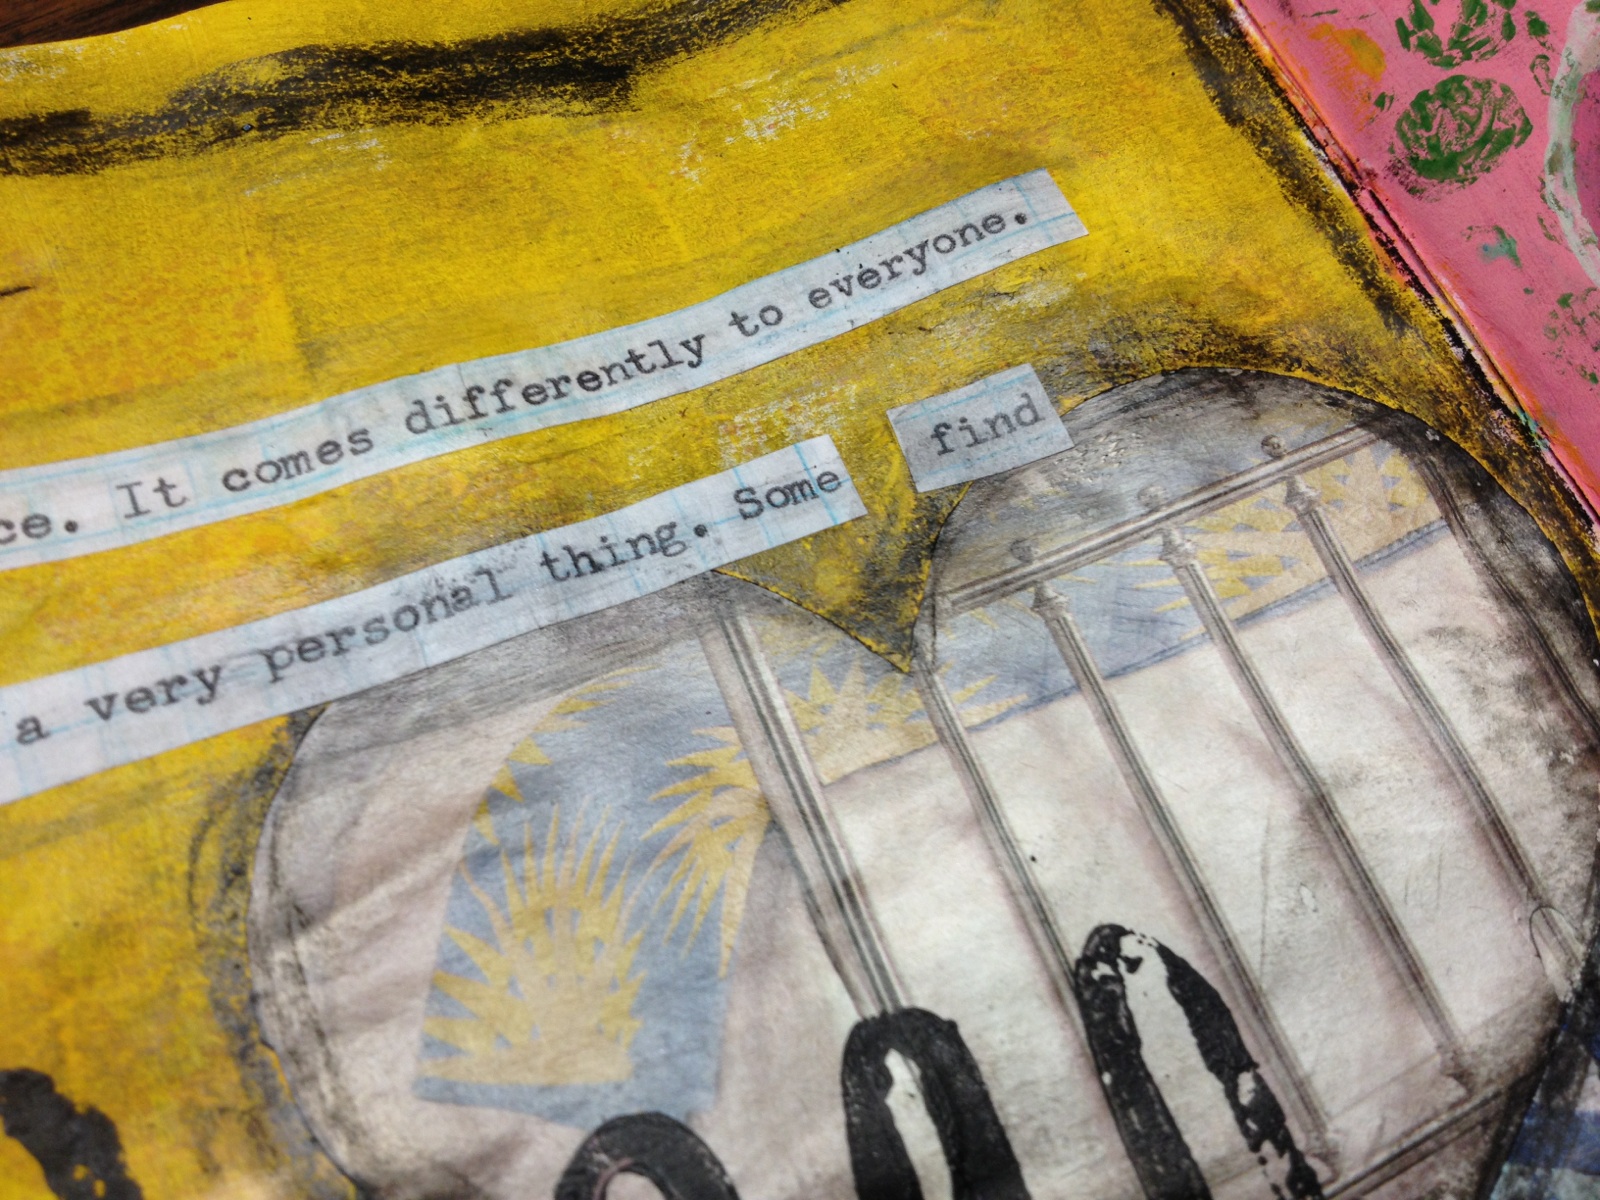
Peace - Art Journal Page


Okay guys. I am here with you guys again today, though I really doubted I was going to be. I had a ton of homework in Anatomy and Algebra II, and, from that, I wasn't even sure if I was even going to have time to do any art at all. 

I ended up finishing all of my work around 9, then sat down to make something. I didn't know what I was going to do, but I decided to go with it anyways. I took my journal that I used for the In the Sun prompts this last summer, and flipped to the next available page.

It was painted yellow, and there were quite a few layers underneath of it.


That's part of what I love about this kind of journal. Since the pages are already half-way done, they go together super quickly. So I can actually make something that looks respectable on a day like this. When I literally have no time. But still want to create art.

Then, I added the collage. The piece of chevron type paper was actually made for my first 52 Sparks page. If you look in the background of the page, you'll see what I'm talking about. It's under a ton of layers, but it's still there. This piece was left over from collaging that. I saw it on my desk, and felt it went nicely with the background. So down it went. The heart, which was also lying on my desk, followed soon after. 


I grunged up the background a bit with some RoseArt crayons and chalk pastels, then added a title and some journaling. Then I was done.

Going back to the concept of stopping when it's finished. Even though there weren't many layers on this page, as there are with the majority of my work, I liked the way it turned out. I didn't want to force it to be something that it wasn't. I would have ended up ruining it, though I'm perfectly satisfied with it right now. I like letting art develop on it's own. To me, that's what makes it special.

So that would be that! As a side note however, it is highly unlikely that there will be a post either tomorrow or Saturday. I had meant to get some posts stocked up to post on those days, but I was so busy, I didn't have time to. I'm going to a sports tournament type thing, and I'll be gone until 9 P.M. on Saturday night. I'll be so focused on sports, I probably won't even think about art. I might bring a couple of things to mess around with, but I probably won't be posting. Just a comment. 

Anyways. Thanks for visiting! And I'll see you guys next time!

Monday, June 18, 2012

30-30-30, In The Sun, ICAD2, and Summer of Color


So here I am. Back with you again for yet another art-filled post. I hope you enjoy. Today I'd like to start you guys off with my 30-30-30 challenge page for today. This is today's piece, and I will show you the piece that I was telling you guys about yesterday. The one that I forgot to take pictures on. So anyways, let's talk about this one first. I used a quote today that I absolutely love. It's by Dr. Seuss, and it says:

"Today you are you, that is truer than true; there is no on alive that is youer than you."
                                               -Dr. Seuss


And I absolutely love that quote. It's amazing. Plus, I really love the way this page turned out. It's a little more pink than I'm used to, but that's okay. I like it anyways.


And here is the page from yesterday that I forgot to photograph. I like the way that this one turned out as well, even though it's a little bit dark for my taste. The journaling that I did on it was basically just words that I believed were, or could be 'Mystic', which was the title that I had chosen for this page. I love the way that this turned out as well.


I also made another batch of papers today; this time I used the Week 2 colors from the Summer of Color. I already talked about it here; go ahead and check it out if you want to. The colors for this week were based around Mint Chocolate Chip Ice Cream, and so the colors were a mint green and a dark brown. These are what I came up with. I didn't spend as much time on these ones as I did on the other ones, because, quite frankly, I didn't know what to do with them. I was legitimately confused. They were weird colors to work with for me. I hope that everyone else had an easier time with it. :)


Next up we have my ICAD card. This is my 18th index card for this challenge, and I think that I'm doing very well with it. I used the prompt 'swirl' for today's car, and you can probably see it pretty well. At least I hope you can. For some reason I was having difficulty with this prompt, with getting it to turn out the way that I wanted it to. I think it turned out decent though, so I'm happy.


Last, but certainly not least, I have my In The Sun page for today. I took a bit of a break from this journal over the weekend, as the prompts weren't being given; just catch up days and photo prompts. Which is fine by me. But today's prompt was to do a black and white photo transfer and then color it in with oil pastels, or any other material that you could find that would work. But here was the problem. My image transfer didn't work.


You see that gray layer? In the back there? Yeah. That's my image transfer. My failed one. it ended up as a plain gray square. No image at all. It was kind of sad. But I decided to continue on anyways. I added some other magazine images to the page, along with a bunch of layers of doodling. Love the way this little bit looks, especially. So many yummy layers that I simply love!


And here was the title. Where it counts. The other part of today's prompt was to form your page about what it is that you wished for TODAY. I wished that I would be able to put my energy where it counts. In my opinion, at this time in my life, that's what matters.

Thursday, January 26, 2012

Graphic Art Journal Page


Today I've got another unfinished page for you guys. This happens all the time, I know, but I'm just hoping that you guys are liking it too. :) I just like sharing. This page is a very graphic type of page, which is very different than most other pages that I have done in the past. Normally, I do a bunch of layers, which will eventually end up looking pretty cool. But this was inspired by a class on 21 Secrets, which I enjoyed while it was still alive. Now that one is dead and I'm being forced to work from the PDFs. :) Actually, I don't care as much as I'm trying to make it sound. I think that it's fun, and forces me to use my imagination more than it would otherwise. Also, the colors of this page are a bit different than what I am used to working with. I enjoy using pinks and purples on occasion, but it seems like I'm using them more and more lately because that's what I have left. Yeah. That's the way I roll. Anyways, because it's getting kind of late, I think I'm gonna go. I know that I don't have that much for you today, but I'm hoping to come back tomorrow with a tutorial. We'll see. We will see.

Monday, January 23, 2012

Collage Unleashed - Odd Painting Tools


Hey people!! I'm back, and although it's very late yet again, I am here. I'm hoping that tomorrow I'll be able to get the post to you earlier in the day, but the way I figure it, later in the evening is better than not at all. Am I right? :) Maybe some Saturday I should just do a bunch of posts and schedule them to post. Then every day I can make a new one and schedule that one too. Huh. Interesting. That might actually work. We'll see. We will see. So today's post is another in my work through of the book Collage Unleashed by Traci Bautista. I've done these posts many times before, and I love how I can incorporate her techniques into my work. It makes me feel special. :) So anyways. Back to the topic at hand. What I decided to do today was sort of experiment with painting with odd tools. She has a long list at the end of Chapter 1 (I haven't worked through all of it yet, I just thought this would be a cool part to look at) of a bunch of different things that can be used to create new and unique textures. I picked three different things to work with, and added three different layers to three entirely different pages. Let's start with the chopstick, shall we?

The first thing that I really wanted to focus on was the chopstick. It's a plastic one, from a fairly nice set that we got at one of those chinese restaurants. I thought that it would be cool to try and use it for a page with texture, so I took out my trusty pallet, filled one of the channels with a nice turquoise acrylic and then just dipped the stick it. Then I just scraped it all around the page. It took a little bit of work to get it to the point where I liked it, but when I finally got there, it was definitely worth every bit of effort that I put into it. So I think that using a chopstick for texture was a great success. For sure.


The next thing I used was a toothbrush. Now, I've used toothbrushes before in my work, but they've definitely been becoming a lot more prominent in my recent pieces than they have in the past. For this page, I decided to use what was left of the blue paint from the last page, so anywhere that you see that turquoise color on this spread was done with the toothbrush. I really appreciate and respect the texture that the toothbrush gives, but personally I have found two faults with it. One, I find that I press too hard when I'm working with it and will often times work my way through the paper. The second problem with it is the fact that it just doesn't spread the paint very far. The paint gets caught up in the bristles, and won't come out, and I think I end up wasting a lot more paint than I'm using. Which is obviously disappointing.


And now for my last and final page. Here I have a spread where I added a layer of texture and color with a ball that I made out of masking tape. This is probably the most interesting texture that I have gotten thus far on the pages, even though this particular page isn't really my favorite. Basically I just took a long strip of tape off of my roll, crumpled it up into a little ball and used it as a stamp. I tried to use it to spread the paint around the page, but it just came across as messy and sloppy, which certainly wasn't the message that I was trying to convey. Obviously this page needs a lot of work, as do the rest of the pages I had here. But I am having fun experimenting and sharing it on here with you guys. And so, until we meet again, I bid you a farewell.

Sunday, January 22, 2012

Random Pages I


Today I'm coming at you with a bit of different type of post. I'm not showing you stuff that I want to work on, or stuff that I've worked on recently. I'm not showing you a tutorial, or a video, or some part of some series that I may have been doing. Today I have something a little bit different. I want to share with you some pages that I've already done. Just a couple. Two. But I feel like they both express my personal style. In two entirely different ways. Let's start with the one above. I made this page quite a long while ago, because it was actually one of my first pages when I started art journaling. I think that this page really shows you who I am. In one aspect of my life. It's a dark, dreary, almost depressing looking page, and the quote has a slight feeling of eeriness to it as well. But the reason for that is that it's out of context. And you don't know the characters. (Isn't that your Dad's camera that he said you touch it, and die? - Dukey, Johnny Test) It's a quote. From a cartoon. And it's spoken by a talking dog that was genetically engineered by the boy's older twin sisters. His response is simply "Yes."


I think that this page represents a very different side of me. And there are, in fact, different sides. While the page above shows the somewhat morbid (as my Mom likes to joke about), but still humorous side of me, this blue and green page shows an entirely new part. I like to be funny. Happy and excitable. And I always want to be a fun person to be around. I think the bright colors of this page really express that. Blue is my favorite color, and green is my next favorite, so that is also incorporated in here. Even though it is so very different from the first page, these are both very realistic representations of me. That's something that I wanted to explain. Sometimes you don't have to be only one person. Sometimes a mix of two very different types of personalities makes a person more interesting. Being yourself is what matters. Don't be afraid to be yourself.

Wednesday, January 18, 2012

Watercolor and Acrylic Background Tutorial


Today we are going to be focusing in on another tutorial. This was actually scheduled for yesterday, and yesterday's was for today, but I decided to switch it up a little. Normally it's going to be "Tutorial Tuesday", but I guess today it's going to be a Tutorial Wednesday. That's not too bad. Anyways. The tutorial that I'm going to be showing you guys today is how to mix different mediums to create one cohesive piece. That's one of my favorite things to do. Mix different kinds of materials in one thing. That's why they call it mixed media after all. Okay. So first things first. What we're going to be making. You can obviously do this technique anywhere that you want, but the easiest way for me to do it in a tutorial format would be to show you on plain pieces of copy paper. You could do it on cardstock, mixed media paper, in a journal or sketchbook; anywhere that you would normally use any other technique that you find floating throughout the internet. Let's get started.


The first thing that you're going to do here is prepare a pallet. You've seen me doing this on multiple occasions, so you're probably pretty used to this by now. Now let me give you a really quick run through of the supplies that you are most likely to use. You're going to want a little bit a tube watercolors. This forms the background, and is used in many layers throughout the technique. Next, you're going to want an acrylic paint in a similar, but NOT identical color. If it's identical in shade, then, in my opinion, it will not have enough variation to make an interesting piece. You could try it though; I haven't yet. The last type of paint that you're going to be using is just a plain white acrylic. I am using a poster paint, but you could use any kind of acrylic that you like. You're also going to need some paper (or whatever surface that you are going to use), and a paintbrush. The paintbrush that you use for this technique NEEDS to be one with the natural bristles. The roughness of them gives the right texture that we need for this technique. A softer brush will not work.


The next thing that you are going to do is mix a little bit of your tube watercolor with water, and spread it all over the page. Make sure that you are very haphazard with where you are placing your marks, and don't over think it. Just play with moving the color around on the page. I cover almost the entire background in this first layer, but you can certainly do a lot less if you wish. This is just this particular page. I first came up with this technique when I was just playing around with a bunch of supplies, so it's a very experimental technique that is very open to suggestions.


The next step is going to be to add some white acrylic paint to the page. Again, be very spontaneous, and don't worry about what comes next. I added some layers of the watercolor on top of this, and then alternated back and forth, blending a bunch, and just trying to come up with an effect that I enjoyed.


To finish off the technique, just work with the supplies you have. I added the acrylic paint, and mixed that with a little bit of the white paint. Then I took a paper towel and lifted some of the paint up off of the page, and then dipped it in watercolor and dabbed it over the page. I also added some more layers over top of that, and finished off the page by putting some little rectangle splotches of watercolor over the page. This technique will be very different each and every time you try it, so be prepared for that when you do it. As you can see, this blue page is a lot different than the pink one that I showed at the beginning of this post.


I don't really know what's up with me lately and making big batches of colorful papers, spreading them out on the floor, and taking pics of them to share with you guys, but I guess I just love the way they look. These are all pages that I did today in about a 45 minute time slot. As you can see, you don't have to have a lot of time to create a bunch of quality backgrounds.


This is just another angle of a couple of the pages, and a few others. Some of these were done with this technique, and others just used portions of it. Some used none at all, and were just made because of the fact that I had leftover paint on my pallet that I wanted to use up. That's another thing that I tend to do. I hate being wasteful, so I'll make tons of other papers to make up for the paint that I would otherwise just throw away. That's what I've got for you guys today, and check back tomorrow for yet another post.

Monday, January 16, 2012

Pallet Cleaning Tutorial


Hey everybody. I'm back with you guys today, and I've got something that I would call kind of cool. Although I'm kind of biased in that aspect of course. :) So today I've got a little type of tutorial for you. I know that a lot of you out there in the painting and art world use pallets to hold your paint. I don't really know how many of you let the paint cake up in it like I do, but I'm going to show you a fun, creative and useful technique to clean it, if you do this. It's fast, it's easy, and it's not as wasteful as just dumping all of that excess paint into the drain. Plus, that's probably not the best when you want to keep your drain unclogged. So let's get started.


The first step is to choose which section of your pallet that you want to clean out first. But let me note first that this method of cleaning is a bit slower, but it's a cool technique in the long run. After you've chosen the section that you want to clean, you're going to dump a little bit of water into that section. Then, you take a paintbrush, and mix it around. The paint will mix with the water, coloring the water and dissolving the paint into the water. I must tell you that this doesn't work with all types of paint, but I always find that it's at least worth a shot.


Then, you just load up your paintbrush with the paint and the water, and spread it over some paper. It works the same way as a color wash does, and gives you lots of colorful, pastel like pages to use in your work.


Here's a pile of papers that I did just today off of my pallet. They always seem to turn out nice and colorful. Just a hint, darker colors work best for this technique. That gives it a bit more colored pigment to mix with the water, and it doesn't turn out as just being a hint of color on the paper that is barely even there. Anyways. That's the tutorial for today. I hope that you guys enjoyed it. One last tip though, is that you can use these papers and scrape paint on top of them, stamp on them, stencil them, spray inks, and in other words just layer over top of them. A lot of times they can turn out really well, and you can never tell that they were made from leftovers. And there's no shame in that.

Sunday, January 15, 2012

Collage Unleashed - Color Scraping


So today I started my run through of Traci Bautista's "Collage Unleashed" book where I left off. Color scraped pages. I love the way her pages look, but I took a break from all of my series I had going. But, I'm trying to start some of them back up. This is one of them. Something that Traci does with her pages is use a lot of color through color scraping papers that she then uses to create unique, one of kind journals. I thought that it might be fun to work on some of these pages. I've tried them before in the past, but they have never really turned out right. Anything I do that's inspired by her either ends up too light or too dark. But this time, for some strange reason, these turned out great! I love them so much, and I'm glad. I guess, like they say, practice makes perfect. Though these certainly aren't perfect, I'm really happy with them never the less. I used a lot of acrylic paints, stencils and stamps on these pages, as well as scraped some stuff around on the page.


Here are the two pages that I did that I really liked. On the right, the base of the page was a little bit dark for my liking, so I ended up just lightening it up with the paints I used on top of it for the stamping and the stenciling. Using light colors on a dark background makes it look better, especially if you don't enjoy the way the background is looking. On the other side, I really liked the color scraping below the stamping, so I had to be very careful that I didn't ruin it with the excess layers and stuff. I used a foam flower stamp with a brown paint and a piece of bubble wrap with some white paint.


The rest of the pages that I have made are just basically made from the leftovers from the other pages. Take these two for example. I laid these pieces of paper behind the originals to catch the paint that I was scraping off the edges. That way I didn't get paint all over my desk. That was just the solid color that you see in the background. The redish/pinkish color that you see over top of that is a wash that I did when I had some red paint leftover on my brush from doing some of the original painting. I dipped my brush into my water and just spread it all over the top of my papers.


And here are another two. These were done pretty much the same way as the ones above, but they don't have full washes on them. The one on the left actually doesn't have one at all, and the one on the right is only partial. I'll probably work on these gradually as I do other art journal related activities. Because that's the way I roll. ANYWAYS, that's all that I have for you guys today, but I have something really cool planned for tomorrow. I hope you come and check it out!

Saturday, January 14, 2012

Beginner Art Journaling Supplies


Hey everybody! Jordan here, with yet another post to share with all of you. I know that I've been doing pretty short posts lately, so I thought that I might make it up to you by giving you more of an extra long post today. It is Saturday after all, so I can deal with it. As you have probably seen from the title, today's post is about the basic supplies that you can use to art journal. I'll probably have a separate list some other time, about all of the advanced supplies, which I also like for art journaling. I'm not going to go in depth in each supply. But I promise you, I will do them separately as well and link back to here. So let's get started shall we?


Journal: One of the first things that you're going to want to have is, most definitely a journal. I love composition books, as you followers of my blog know. I think that it's the cheap aspect of them that really attracts me, but there are other reasons too. They are very highly customizable, and you don't feel BAD decorating them. Say you buy a really expensive moleskin. It will almost feel like you're defacing it to put stuff on the cover. Or even on the inside. That's another reason for me buying composition books. Since they are so cheap, you don't feel like you need to be perfect while playing around, and you won't be AS scared of the blank page, since there are already lines on there. Of course, you can easily get rid of those by painting over it. Plus, I just love that there are so many pages. 100 sheets, 200 pages. Of course, you CAN choose other types. It's your journal. Do as you wish.    


Paint: Next up on my list, we're going to go with paint. Now, not everyone uses paint in their journals. But I'm making this list to go with the supplies that I find myself using on almost, if not every, art journal page that I make. If you just go to the art supply store and look around, you will probably be intimidated by all of the kinds of paint that you will find there. But don't be overwhelmed. Paint is one of the most fun supplies to search for and buy. There are so many different colors and shades of those colors, that just simply browsing them makes my head go ablaze with ideas, and just makes me HAPPY. I don't know why. But I'll have another post on this for sure. I might have to do a post on each kind of paint. I know. It's sad that I'm so obsessed. But at least I won't run out of blog ideas... ANYWAYS. Back to the subject at hand. There are so many different kinds of paint; craft acrylic, tempera, fresco tempera, oil, watercolor pans, watercolor TUBES, acrylic tubes, student acrylics, ARTIST acrylics, artist watercolor tubes, poster paints, gouache, and so, SO much more! Paint is the ultimate craft supply.    


Pens and Markers: Next up, we have our pens and markers. Now this is a bit of an interesting aspect of the art journaling world. Obviously there are many, many, MANY different kinds of pens to use. And lots of different colors too. It's easy to get lost. But, when you are just starting, I recommend holding off on the colored pens. YES they can be fun to use. Most definitely. But so are black and white. And they have many more uses than the colored ones. In this picture here, I have Sharpie Paint Markers, Sharpies, a ZIG calligraphy marker, a Sakura glaze pen in white, and a black Sakura GellyRoll. These are the ones that I find myself coming to most often. Of course, feel free to explore the vast world of pens and markers. They're out there, that's for sure. 


Glue: Next up, we have glue. There are many different kinds of glue as well, but this topic is much more scarce than the others. I left a couple kinds out of this purpose on accident, but I'll mention them here. One, we have Mod Podge. This brand is very commonly known, and has many different uses. There is Allene's Tacky Glue. Most crafters have at least heard of it, if not bought a bottle or two. If you haven't, it isn't a big deal. This glue does come in handy quite often however. You also have HOMEMADE Mod Podge, school glue, glue sticks, and scrapbooking tape runners and glue dots. All of these have come in handy to me at one time or another.     


Spray Bottle Filled With Water: Ah yes. Even though many people do NOT consider this a necessity, I in fact, do. I love my spray bottle, and used my old one so much that I wore out the spraying tip so much that I broke it. We went through a lot together, so I held onto it, and put something else in it to spray, while I got a new, bigger spray bottle in the travel isle of Target for a buck. I'm sure I'll go through quite a bit with this one as well.


Scissors: Scissors, of course, are important to the creative process. No matter how much you love the raw edge of a torn piece of paper, you will always come to the point when you want a nice clean edge to a piece of paper, or a shape. For instance, a circle. It's not easy to tear a perfect circle. Not that it's easy to cut one either...     


Paper and Fabrics: Next come papers and fabrics. Or any sort of collage material to tell you the absolute truth. I left out a lot of my collage papers and fabrics in this photo; I just wanted you to sort of see what some of the pieces that I use look like. I'll save leftover papers from projects, wrapping paper, greeting cards, pages from books, pictures from magazines, fabrics from clothing I've outgrown, receipts; any piece of paper or fabric that I find in my everyday life. There are many more kinds than this obviously; there are so many different kinds that it would literally be impossible to list all of the different kinds out there. I'll definitely have to do a separate post for all of you guys about papers and collage materials; that would be really fun!


Paintbrushes and Painting Tools: The next thing then would be paintbrushes and other painting tools. When you first hear the phrase "painting tools", I am almost positive that the first thing that comes to your mind would be paintbrushes. And while those are, in fact, one of the most COMMON painting tools, that doesn't necessarily meant that they are the only ones. But let me focus on them first anyways. I use approximately six different brushes; seven if you include the foam brush. But I have a 1" flat brush, a 5/8" flat brush, two 1/2" shaders/angular brushes, a 1/2" flat brush, and a glue brush that doesn't have a size; it came with a kid's paint set. There are also pallet knives, which you can buy fairly cheaply at Michaels, and an old toothbrush can also be used to spread paint. The last thing that I'm going to share in this subject is an old credit card. These have practically endless uses, and I have used mine so much that it's literally about to break in half from so much use.


Stamps: Last, but certainly not least, we have stamps. I know that a lot of people would argue with me about stamps being a necessity, but I'm going to stick with my facts that I've found, and that would be that they most definitely are. There are many different kinds of stamps to use, of course, and a lot of mine are either homemade or found. But I do buy some too. The ones that I buy are normally one of two kinds. The $1.00 stamp sets that you can find at Michaels. Or the cheap foam stamps. I can't make those, so that's why I buy them. But there are other, cheaper alternatives as well. Or rather, about the same price. But they're more custom. I make eraser stamps using cheap erasers and an exacto knife, and  cheap, sticky-back foam that I adhere to cardboard from cereal boxes. Of course, you can also use bubble wrap and other pieces as stamps as well.

Yeah. That was a pretty long post today, and I thought that I had lost the whole thing really close to the end. But luckily, I found it pasted into the search bar of my computer (it does that when text is highlighted). So yeah. Anyways, that's all for today, and I'll see all of you guys tomorrow! See ya!

Related Posts Plugin for WordPress, Blogger...