
Friday, June 17, 2011
Hey Guys!! An Update.
Hey guys, how's it going?? Sorry I haven't really been around much the last couple of weeks, but, in case you haven't heard, we are moving from a small town in Ohio to a much larger town in Florida. And it's coming in just mere weeks. Actually about two. So all of my crafting stuff is officially packed up and has been put in the "pod" in following my Mom's orders. So I probably won't be able to post on here for a little while; maybe as much as a month, so we can settle in. I'm going to miss all of you guys for that time, but I promise I'll be back!
Saturday, June 11, 2011
Creative Ideas 6.2

Sorry that I didn't post yesterday, but I just got so caught up in stuff that I just plain forgot. But I'm back today with another post on the Creative Ideas concept. In case you haven't seen the previous one, the basic idea for this is that I give you ideas to use in your artwork, and then you do as many as you want, then link to them in the comments. Or not. You could just be inspired by the prompts. Your choice. But anyways; here they are:
- Use a supply in your art that you don't normally use. Suggestions include anything from newspapers to those fancy sparkle paints you got.
- Use fabric in your work. If you're a fiber artist, use paper.
- Use the color combination: red, orange, yellow, and tan. I've been experimenting with this and it always turns out really cool.
- Use a quote from one of your favorite television shows, movies, books, etc, in your art piece.
That's all I've got for you guys today, but I'll probably see you guys tomorrow!! Bye!!
Thursday, June 9, 2011
My Second Portrait Ever!

Okay, so I'm here with a new page. I'm trying to catch up with an online course that I'm playing around with; yesterday's prompt was to make a page that represents who you are at this moment in time. This isn't really who I am; but it's who I'd like to be. You see, I'd love to have black hair; even though my hair is already a really dark brown, I just think it'd be cool. Then the blue highlights are something that I'm considering getting. I don't know yet though. I kind of like the way my hair is now... kind of tomboyish. If I get an electric blue streak or something, I don't know if I would like it. I dunno.
Well, anyways, I really like the way that this page turned out. It's only my second portrait ever, and even though the first one turned out better, I really like this one. A lot. I love the blue color that the shirt is too. Basically I just started by sketching out a face, and then I painted it. To get the color of the skin, I lightly shaded in the face with an orange pastel, then mixed it in with white acrylic paint. There were only a few layers in the actual background, which I actually completed after the portrait was finished. I normally do a lot more layers than this, but it seemed finished quicker than normal. And that's what matters. :) I'll see you guys later!! Bye!
Wednesday, June 8, 2011
Art Update

Okay, so technically I was planning to do an update on my Collage Unleashed project today, but I really couldn't work on ANYTHING today. You see in the picture above; the current disaster that is my art studio. It is a MESS. I'm packing up stuff for our move. It's actually really hard for me to decide what to keep out f0r my work and what to put away. The reason for this is that I use so many different things in my work. I never know what I'm going to need. I think what I'm going to end up doing is just pack up most of it, and then just pull out of the box. That's all I'm going to say today... sorry it's so short. See you guys later!!
Tuesday, June 7, 2011
Creative Experiments 1.3

Well, I'm back with another creative experiments post. Yeah. I've been having a lot of fun with this series, and I intend to keep it going for a while. It seems like it's such a vast variety of things going for it, that it makes it an almost unstoppable series. So I'm back for the third time with another post about experimentation with white acrylic paint. This time I was trying to use it as a substitution for gesso (making a good base) and also as a texture paste type substance. I started with the page on the left. I just used white acrylic paint and used a brush to stroke it on very heavily. Then I used the handle of the brush to draw swirls in the paint.
I made several notes about this one. Number one being that it dried very quickly, making it very tough to draw enough texture. It just didn't work very well in my opinion. I didn't like it so well. Also, the texture was the same as paint, then the texture drawings sort of merged into each other. There wasn't that much texture after it dried. The second thing I tried was setting the white paint out for a little while (a couple of hours) and THEN painting it on in the same way. It actually had a LONGER drying time, and it kept the texture. This one I was in LOVE with.

After I'd put on the base layer/experimental layer of white acrylic paint, I decided to use red, orange, and yellow water soluble chalk pastels to make a nice background to work off of. It turned out really good. I love the way the color blend so perfectly, and the way you can totally see the texture; especially on the right side. As you can see, the left side didn't really go that well. Even after I added ONE TRANSLUCENT layer the texture started to disappear. It was disappointing, but I really like the way the right side looks. Now I know that you have to leave the white acrylic out for a couple hours. And it works just fine.

Here is a bit of a close up of the right side. You can definitely see the texture in this piece; the swirls are the parts that I scratched into the paint with the end of the paintbrush. You can see it worked just fine.


And here is the finished page. I did a TON of layers on top of it. I like the way it looks, though I may just add a bit more color in yellow or orange in pastel on top of all these layers. You know? It just feels a little dull; not very vibrant. If you look at the title, you can see the words; Feed the Flames. The journaling part says: Summer 2011; A time to experiment, create, and EXPLORE!! This was for the first prompt of a free art journaling course. You can find that here: Art Journaling Course. It's a really cool course!!

One last picture before I leave today; a close up picture of the center of the pages so you can sort of see the comparison. See the difference? I love it, even though it's just an experimental page. I hope you guys liked this post; thanks for looking!!
Monday, June 6, 2011
Linky Monday #4

Hello all! I'm back with all of you again with another Linky Monday. Be prepared; I have even more links than last week, if that's even possible. I don't know exactly how many I actually have, but I do know it's a lot. I hope you guys like visiting around; I know I do!! Let's get started then, shall we?
An excellent post/tutorial on doodling on fabric. It's really cool.
Painting/creating your own fabric. This one's pretty sweet too.
Another really cool looking ATC. I love looking at pics of these, and I love this one!!
A really nice post simply full of art journal and scrapbook pages. They are all so inspirational!!
Another dyed fabric post. Oddly enough I've never dyed fabric.
An AMAZING artist's studio. I'm sitting here drooling in my seat right now.
Some experimental art journal pages that Eveline is doing to go along with a free e-course. I'm considering joining.
Some more ATCs. Stunning.
A really pretty art journal page. I love it. Simply love it.
How CUTE are these hand carved house stamps?? Simply adorable, that's how much.
Hand painted faces. I love these. They're so cool!
This is a really cool scrapbook page. Normally I'm not that into scrapbooking anymore, but this one I'm totally loving!! More collage like.
Uhhh yeah. Cute doodled robots alert!! I love 'em. I wish I could draw 'em.
Finished art journals. You gotta love them. Too bad I haven't finished one yet.
How cool is this?? I love finding creative ways to fix mistakes!!
Weekly zentangling challenges. Cool.
First off, he's a guy who quilts. And if that wasn't cool enough, the blocks are to die for!!
A certain type of pen review. For getting words on dark backgrounds.
So that's today's post. I hope you guys enjoyed visiting all those links I had for you today! :)
NOTE:: I know the journal page shown above I've already shown you. Sorry about that. But technically I can't do much about it. :)
One last thing before i leave however; I've decided to host a free art journaling class/course for all you creative people out there! It's going to be called Paint, Stitch, Play and it's going to be all about experimenting in your journals and learning not to be afraid to just let loose and create in your journals!! There will be prompts galore!! More to come!! Talk to you guys later!!
Sunday, June 5, 2011
Collecting Collage Images

One of my favorite things to do in mixed media is sift through all of the images. I love to collect them too. They're really fun to find too. When you start mixed media, you'll find images everywhere. It's just bound to happen. This post is for those of you who are just beginning mixed media, and are trying to find pieces to use in your artwork, OR for those of you that just want to find NEW places to find images. As you advance in your artistic journey, you will start to open your eyes to the things all around you. This is just a short list of suggestions for image locations, and don't be limited to these. Here is a short list however:
- Magazines. This is the most common place that people will look for images. This is the most referred to reference, and these work well for larger, glossier photos.
- Junk Mail. This doesn't sound like a good idea, since a lot of this stuff is JUNK after all. At least that's what they'd lead you to believe. I love a lot of the images you can find in the junk catalogues.
- Catalogues. These have tons of textures and images of people in them. Amazing for mixed media.
- Online Collage Sheets. These can be free or paid for. Either way, these are excellent sources. Sometimes they have color images, and sometimes they have black and white sketches. A lot of the images shown above are from free collage sheets.
- Old books. A lot of books in general have really nice, vintage looking images in them. A lot of them are black and white.
These are all I can think of right this minute, but I hope they help you with finding some things to use in your artwork. Remember. Images are everywhere. You just have to find them.
Saturday, June 4, 2011
ATC Background Tutorial

A little while back I did a tutorial on ATCs. I love to make the backgrounds a bit different on each card. These are some of my favorite backgrounds to use, and they're so simple. They only use a couple of supplies, and they're really easy to make. The photo above shows what they look like. You can make these in any colors you want, but I recommend darker, more vintage looking colors. The style of this technique just goes better with those types of colors.

These are the supplies needed for this technique. I actually designed/developed this technique in order to use up older, dried up old baby wipes. So you're going to need one of those. You'll also need an ATC blank in white, a spray bottle full of water, and ink pads in two coordinating colors. With the inks, I recommend Distress Inks, since they react with water, but if you know of another brand that does the same thing, feel free to use them. I'm using Aged Mahogany and Vintage Linen.

Here's the ATC after I've already put the lighter color (the Vintage Linen), and am starting to apply the darker mahogany color on top of it. I like to use two colors, since I think that it adds more color, texture, and dimension to the finished piece. When you apply the color, either dab the ink on, or rub it back and forth on the pad. Then rub it lightly against the paper in light circles.

Here is the ATC after both layers have been applied. You can see how on the edges it is a bit darker. I like it better that way. It seems to add dimension. I don't know about you, but I like it. You can also make it more even if you like; it doesn't matter to me. I like the look of it. :)

Spray/mist the ATC back with a bottle of water, making sure that some of the dots of water are bigger than others. Let it sit for a minute and...

Scrape or dab it off with the baby wipe. This is what the finished piece looks like! I love it!! I hope you guys try out this technique, and, if you do, feel free to post it in the comments. I'll come and visit you!
Note:: This technique can be used in any way you like; in an art journal, mixed media, ATCs, or any other thing you can think of. It doesn't matter! Just play around. That's what matters.
I hope you guys enjoyed today's post, and I'll talk to you later. Bye!
Friday, June 3, 2011
Creative Ideas 6.1

Hey all! I'm back with yet another blog post for all of you. I was thinking that maybe once or twice a month I could post on here with a few different creative ideas to use in your art. I think that it could be a cool idea, and you guys could post in the comments with your discoveries and blog posts showcasing your finds. We'll see how this goes. I think that it's a good idea, but I guess I'll never know until I try, right? So here we go. Tell me what you think.
- Make an art journal page that you stamp with acrylic paint and bubble wrap.
- Scrape some paint over a page, then let it dry. Scrape another color over top and let it dry as well. Spray with water, then after a minute or so, scrape the water off.
- Paste a bunch of different sizes and shapes of book paper all over the background of a page, then scrape paint and layer over top
- Stamp with ink on top of Mod Podge, then smudge it gently.
- Experiment with lots of layers; try collage, stamping, acrylic paint, color scraping, tissue paper, wax crayons, watercolors, water soluble pastels or crayons, etc.
Tell me what you guys think! Does this sound like something you'd like to see regularly? Or does it seem boring? Let me know!!
Thursday, June 2, 2011
Creative Experiments #2

Hey all! I'm back again today with yet another post on art journaling. One of the things that I said I'd like to accomplish this month was to continue on the projects I had started last month. Today I'm going to go back to the creative experiments posts. I've been working with white acrylic paint, and so far I've only used it once, in order to lighten a page that was too dark using blending. That worked very well, but here's yet another page that uses another sort of "technique." Basically I just took a book that I've been working on altered book that is actually done using a technique called reverse collage. You paint around the photographs leaving some of them intact.
Normally you use black paint to do this, but in this one I used white. It took several coats to actually get it a good opaque color, but you can actually still see through it.
Here's what it looked like after I put the white paint on it. I basically just used it as a base layer so I could do all of my other layers on top of it. Now some of you might have been wondering why I didn't just use my base color as the layering portion instead of the white, since I normally use acrylics in my work as opposed to other mediums. Well, there are actually several answers to that question, the one of lesser importance being that I was trying to come up with ideas for using white acrylic paint. Of course that's a lame excuse. However, there is a better reason.
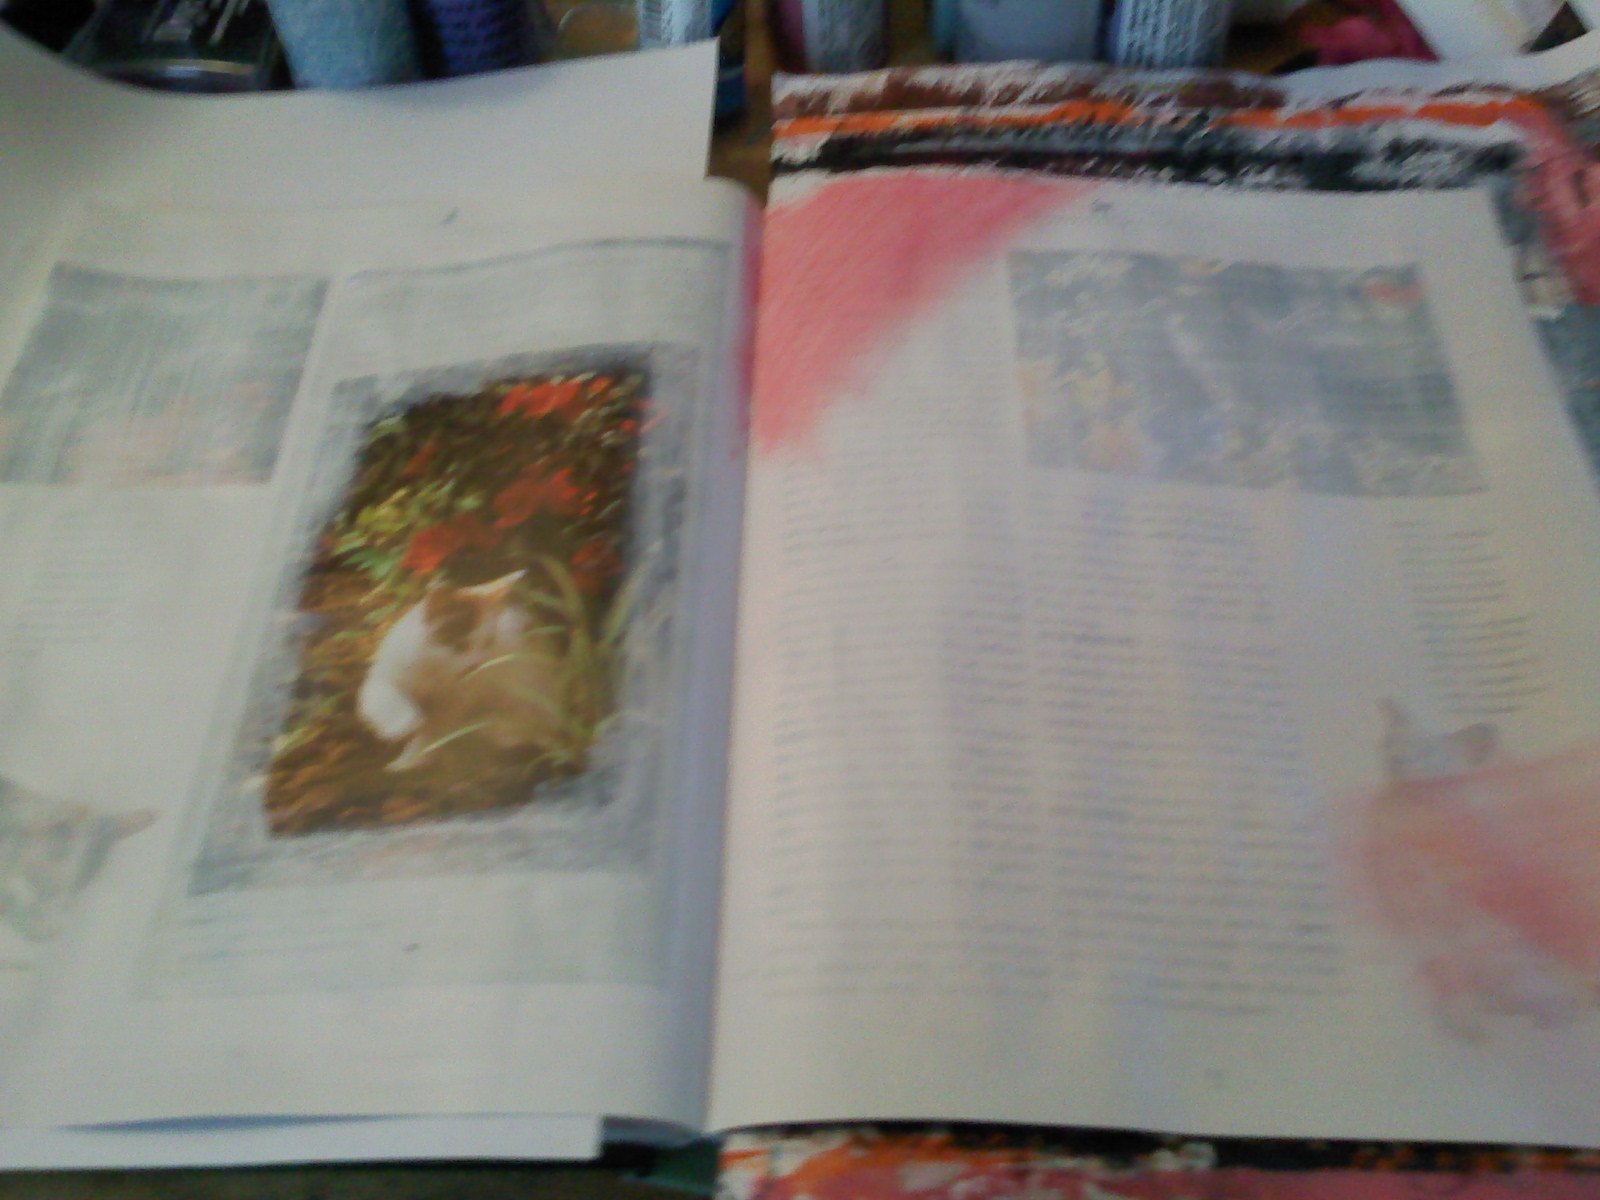
That being that I was wanting to use my water soluble pastels, and I've never heard of them working that well on black paper. Though now that I think about it, that may just be something to experiment with. :) So anyways, in the picture above you can see pretty well how I layered the white paint over the pages of the book, leaving the one really cute picture of the cat in the garden intact. And you can probably also see the beginnings of my pastel background; I got a little overzealous and started before I took a picture. Hehe.

And here, is the page when it's finished. I think I used this photo yesterday, but I gave you a sort of warning. Anyways, yeah this is it. I like it a lot, even though it's a little darker than I normally like. I did a lot of layering, including stamping with bubble wrap and a black wash. There's other layers in there, but those are the two that came to mind. And the pastels of course. :)
Actually, speaking of layers, I tend to use a lot of layers in my work. Currently I am working on a page that has TONS of layers in it, including experimenting with using mod podge as a texture item. I don't know if it's going to work yet, and if it does, I don't know if it'll show, since it is clear; but I figured I'd give it a shot. That's the plan anyways. So I hope you enjoyed today's post; I dunno if I'll be able to make it on tomorrow, but be sure to check incase I do!! See you guys later!
Wednesday, June 1, 2011
ICAD Day #1 - Circles

Just a quick second post today; I did a doodle on an index card for ICAD (Index Card A Day) that is being hosted over at daisyyellow. I used prompt # 8 - circles. I love the way this turned out... just thought I'd share!
My Goals For June

So. It's June now. That's insane! I can't believe that time has sped by so fast. It seems impossible that we're already halfway through the year. It's also hard to think that in exactly one month, we're going to be moving from the place that I've been living all fourteen years of my life. And we're going pretty much across the country. What?? How did this happen? I don't know for sure. It's crazy the way time flies. But since it's here, I might as well make the most of it. Anyways, getting back to the original purpose for this post. I figured that since today is June 1st, I realized this would be the perfect day to post a list of my goals for the next 30 days. I have a lot of things that I'd like to have completed, and I think that if I put it on here I'd feel held responsible.
Something that I've been thinking a lot about lately is inspiration. Inspiration is something that is very important to us artists, since without ideas we can't do much in the way of art. Dede, who is a good friend of mine, often does live streams in the mornings. Recently she has been doing a color inspiration journal, and I started one a bit similar to hers. I love the way she set it up, and it feels like my style as well. She's been using the colors and stuff to make other projects using that inspiration. It's cool.
Anyways, here's a list of stuff that I'd like to do this month... bear with me as I type it all out. :)
- Finish editing my book and then send it in for a free copy (I wrote a novel for NaNoWriMo)
- Work a little bit on my art journal every day.
- Complete 3-5 art journal pages for submissions.
- Make some youtube videos
- Blog every day about my art and life
I would also like to continue work on the several projects I have going on here: Linky Monday, Collage Unleashed Project, Project Runway project, and the Creative Experiments Projects. I actually started work on my Project Runway project the other day, and made some gorgeous fabric out of trash bags. I know it sounds really strange, and maybe even a bit weird, but I promise it actually worked. I ironed a trash bag together, ending up with about a yard of 18" wide fabric. That was from one trash bag. I'll probably zigzag a bunch together. I've also been working on a newspaper dress.
NOTE:: The art journal page above is part of another post as well. Be looking forward to the PROGESS of that page sometime soon.
I'd like to make progress on all of these projects this month. Sound good? I hope so. You'll be reading about it all month. :)
Subscribe to:
Posts (Atom)