Tuesday, January 31, 2012

Textured Art Journal Page


Hey guys! Sorry I was gone for so long, I feel really sorry about that. I'm actually going to go back and write all of the posts that I had planned for you guys. I've just been so busy with homework. I know that is starting to sound like an excuse, but it's the truth. It's up to you guys whether you believe me or not. Anyways. The page that I have for you today was actually a really fun page to make, and I really enjoy the way that it turned out. I was looking through a bunch of my older paintings and I came across one that I absolutely hated. I know. Horrible, right? But since I've talked about this situation coming up on multiple occasions,  I'm sure you guys aren't too shocked right now. Anyways, I took that page and I simply coated it with a layer of lime green paint. Then I let it dry.


After that, I went ahead and put a few squirts of this light turquoise color on the page. Now, I wasn't quite sure what I was going to do with it yet, but I knew that I could come up with something unique. And so, I took my paintbrush in hand, and simply started spreading it out by dabbing repeatedly with the brush itself. It took a little while, but the end result is amazing. I love the texture that this technique created for me, and I'm sure that I'll be using it again. Anyways. That's all that I've got for you guys today, but I'm sure that I will return tomorrow with yet another post. Farewell. :)

Thursday, January 26, 2012

Graphic Art Journal Page


Today I've got another unfinished page for you guys. This happens all the time, I know, but I'm just hoping that you guys are liking it too. :) I just like sharing. This page is a very graphic type of page, which is very different than most other pages that I have done in the past. Normally, I do a bunch of layers, which will eventually end up looking pretty cool. But this was inspired by a class on 21 Secrets, which I enjoyed while it was still alive. Now that one is dead and I'm being forced to work from the PDFs. :) Actually, I don't care as much as I'm trying to make it sound. I think that it's fun, and forces me to use my imagination more than it would otherwise. Also, the colors of this page are a bit different than what I am used to working with. I enjoy using pinks and purples on occasion, but it seems like I'm using them more and more lately because that's what I have left. Yeah. That's the way I roll. Anyways, because it's getting kind of late, I think I'm gonna go. I know that I don't have that much for you today, but I'm hoping to come back tomorrow with a tutorial. We'll see. We will see.

Wednesday, January 25, 2012

Polka Dot Art Journal Page


Hey guys! Jordan is back with you guys today, and I've got something that's actually pretty cool to show you. It's this art journal page. Of course. Again. But I know that you guys love art journal posts, so that's why I'm back. I worked on this page a bunch today, and I really like the way that it turned out. I love the colors, and the way that they work so well together on the page, if you know what I mean. Lime green and black. Two epic colors, one epic color scheme. :D So yeah. Anyways, now maybe I can launch a little bit into how I made the page. It was actually really easy. I actually worked over top of another page, which I've been becoming more and more known to do lately. I took the page, and I painted over top of it with my lime green paint and a paintbrush. I had made some really random doodles on the base with a brown marker, and, as the lime dried, it started to seep through. I know that a lot of people might have put another layer of the paint down, but I'm the type of person who just likes to what happens happen. It happened that way for a reason, so let's not mess it up by trying to do it "our" way. You know what I mean?


Okay. So now let's go onto the next part of the page, which is pretty much the only other part there. But there's a little bit of depth that I want to speak to you guys about. First off, I'm obviously going to talk about the black dots all over the page. You guys have probably seen the stamp that I used to make them in the past, because it seems that I am becoming more and more fond of that stamp by the day. Every time I use it, I seem to create an even greater love for it deep inside of myself. ;) I actually made the stamp myself with a piece of cardboard that I found from a cereal box, and a bunch of fun foam tiny circles that I adhered to the box. I never clean it, I like to let the paint build up on it. When it becomes too much to handle, I'll just make a new one. It was super simple to do. Anyways. Now let's talk about the depth I mentioned. That's going to come to you in the form of the upper left hand corner. See how some of the dots are kind of almost white? Yeah. Let me tell you how I got that. I took my stamp, painted all over with the black paint, and then pressed it down onto the page. Then, there was something important that I needed to do in the other room, so I left it. Without even pulling it back up. It was kind of difficult to remove when I returned, but now I love the effect. Yeah. So anyways, that's all I've got for you today, and I hope to see you tomorrow! Adios amigos!!

Tuesday, January 24, 2012

Textured Art Journal Page


Hey guys! I'm here today with just a really short post. It's getting kind of late, so I thought that I could just post now and get this sort of over with, if you know what I mean. I just have a single page to share with you guys today, and it was a page that I was really enjoying working on. It's blue and green like a lot of pages that I do, except this one has a little bit of added black and a TON of texture. I don't even really know how I got the texture I did. It's kind of an odd thing; that I don't even know. It's also just a little bit disappointing. Because now I don't even know how to recreate it. I think what I really need to do is start keeping better track of what it is that I am making. Then maybe I won't forget how I did something. I did just a couple of layers on this today; very mundane layers. But I'm already getting ideas for more of them. But I do think that some of the texture comes from masking tape that I laid on the base of the page. I don't know why I put it there anymore, but I do know that I like the effect. But anyways. That's all I've got for you guys today, and I'll see you tomorrow. :)

Monday, January 23, 2012

Collage Unleashed - Odd Painting Tools


Hey people!! I'm back, and although it's very late yet again, I am here. I'm hoping that tomorrow I'll be able to get the post to you earlier in the day, but the way I figure it, later in the evening is better than not at all. Am I right? :) Maybe some Saturday I should just do a bunch of posts and schedule them to post. Then every day I can make a new one and schedule that one too. Huh. Interesting. That might actually work. We'll see. We will see. So today's post is another in my work through of the book Collage Unleashed by Traci Bautista. I've done these posts many times before, and I love how I can incorporate her techniques into my work. It makes me feel special. :) So anyways. Back to the topic at hand. What I decided to do today was sort of experiment with painting with odd tools. She has a long list at the end of Chapter 1 (I haven't worked through all of it yet, I just thought this would be a cool part to look at) of a bunch of different things that can be used to create new and unique textures. I picked three different things to work with, and added three different layers to three entirely different pages. Let's start with the chopstick, shall we?

The first thing that I really wanted to focus on was the chopstick. It's a plastic one, from a fairly nice set that we got at one of those chinese restaurants. I thought that it would be cool to try and use it for a page with texture, so I took out my trusty pallet, filled one of the channels with a nice turquoise acrylic and then just dipped the stick it. Then I just scraped it all around the page. It took a little bit of work to get it to the point where I liked it, but when I finally got there, it was definitely worth every bit of effort that I put into it. So I think that using a chopstick for texture was a great success. For sure.


The next thing I used was a toothbrush. Now, I've used toothbrushes before in my work, but they've definitely been becoming a lot more prominent in my recent pieces than they have in the past. For this page, I decided to use what was left of the blue paint from the last page, so anywhere that you see that turquoise color on this spread was done with the toothbrush. I really appreciate and respect the texture that the toothbrush gives, but personally I have found two faults with it. One, I find that I press too hard when I'm working with it and will often times work my way through the paper. The second problem with it is the fact that it just doesn't spread the paint very far. The paint gets caught up in the bristles, and won't come out, and I think I end up wasting a lot more paint than I'm using. Which is obviously disappointing.


And now for my last and final page. Here I have a spread where I added a layer of texture and color with a ball that I made out of masking tape. This is probably the most interesting texture that I have gotten thus far on the pages, even though this particular page isn't really my favorite. Basically I just took a long strip of tape off of my roll, crumpled it up into a little ball and used it as a stamp. I tried to use it to spread the paint around the page, but it just came across as messy and sloppy, which certainly wasn't the message that I was trying to convey. Obviously this page needs a lot of work, as do the rest of the pages I had here. But I am having fun experimenting and sharing it on here with you guys. And so, until we meet again, I bid you a farewell.

Sunday, January 22, 2012

Random Pages I


Today I'm coming at you with a bit of different type of post. I'm not showing you stuff that I want to work on, or stuff that I've worked on recently. I'm not showing you a tutorial, or a video, or some part of some series that I may have been doing. Today I have something a little bit different. I want to share with you some pages that I've already done. Just a couple. Two. But I feel like they both express my personal style. In two entirely different ways. Let's start with the one above. I made this page quite a long while ago, because it was actually one of my first pages when I started art journaling. I think that this page really shows you who I am. In one aspect of my life. It's a dark, dreary, almost depressing looking page, and the quote has a slight feeling of eeriness to it as well. But the reason for that is that it's out of context. And you don't know the characters. (Isn't that your Dad's camera that he said you touch it, and die? - Dukey, Johnny Test) It's a quote. From a cartoon. And it's spoken by a talking dog that was genetically engineered by the boy's older twin sisters. His response is simply "Yes."


I think that this page represents a very different side of me. And there are, in fact, different sides. While the page above shows the somewhat morbid (as my Mom likes to joke about), but still humorous side of me, this blue and green page shows an entirely new part. I like to be funny. Happy and excitable. And I always want to be a fun person to be around. I think the bright colors of this page really express that. Blue is my favorite color, and green is my next favorite, so that is also incorporated in here. Even though it is so very different from the first page, these are both very realistic representations of me. That's something that I wanted to explain. Sometimes you don't have to be only one person. Sometimes a mix of two very different types of personalities makes a person more interesting. Being yourself is what matters. Don't be afraid to be yourself.

Saturday, January 21, 2012

Creative Experiments 1.6


Here I am, back with you guys today with yet another creative experiments post. I love these posts; I guess that I just love being able to find the versatility of a certain supply. As you guys have surely seen before, I've done a bunch of different things with this particular supply. White acrylic paint. That's one of my favorite things to use to tell you the truth. Today I decided to do something with stamping. I already had a page in my art journal that had a dark blue wash on it. I had been making another page and had a dark color of paint. Then, when I was finished working on that page, I still had some paint leftover. So I wet down my pages, and then just painted over the top of it. Then I let it dry. That was a few days ago. Now today, I decided that I wanted to do this Creative Experiments post, and this page was just calling to me.

Basically, I just poured some white acrylic paint onto my pallet, painted it onto the bottom of a paint bottle, and stamped random circles all over the spread. I really love the way that it is looking, even though I don't really know what I'm going to do after this. Sometimes when I'm working on art journal pages, I don't really know exactly what I'm going to do, because I really like the way a page looks after just a few layers. So sometimes I'll force myself to add more layers, and other times, I'll just slap a title on and be done with it. That's sort of what I was thinking I was going to do with this page. I'm still not so sure, but we'll see. We will see.

Friday, January 20, 2012

Layers


Hello, hello, hello! Today's post is going to be a somewhat short one. I know that my whole "scheduled posts" thing is going downhill fast, but we'll see. We will see. For you never know what tomorrow holds. I am only responsible for today. Today I made myself sit down and make some art. I know that sounds kind of rough, and a lot of you might not believe it. But here's the thing. We all suffer from artist's block. It's horrible. But we do. I'm having a slight case of it right now. It's hard for me to want to find the time to create, even though after I do, I'm glad I did. Today I did quite a bit of doodling with ink, acrylic paint layers, a layer of glitter, a wash, a masking tape layer; I really wanted to focus on this ONE page today, rather than fumbling around with all of my other stuff.

Normally I'll skip around a little bit in the whole deal, but today, I really felt that I wanted to see progress. And that will happen to me every now and then. It will. That's a fact. I needed to see something change. I didn't care what it was, but it needed to be something. Normally when that happens, I'll start a new page. But that's a bad habit. A really bad habit. And I'm trying to break that. Well, that's about all I've got for you guys today, but I do hope that I'll be able to get you guys a nice long post tomorrow, since it is a Saturday and everything. I probably will. :) See you guys later.

Thursday, January 19, 2012

India Ink Doodles


So today I was experimenting a little bit with india ink. I've never really played around with this so much before, but I've really enjoyed it thus far. I know when a lot of people work like this, they'll use a calligraphy pen to make thinner lines, but I decided to try this with a really thin paintbrush just dipped into the bottle of ink. I did the piece above on a basic piece of copy paper. That's something that I really enjoy doing, as it's a cheap alternative, and I just love the different effects that you can get on it.


And on this page, I'm showing you the page that I've done another layer on. I showed you this page a couple of days ago, and I just added the ink doodles today. I love the way that it looks, and I did it on top of some oil paint, which gives the page this AMAZING texture, even though it takes forever to dry. On occasion, though not as often, oil paint IS worth it. I'm not really sure all what I'm going to be adding to this page, but that is what I've got today. And I'll see you guys tomorrow.

Wednesday, January 18, 2012

Watercolor and Acrylic Background Tutorial


Today we are going to be focusing in on another tutorial. This was actually scheduled for yesterday, and yesterday's was for today, but I decided to switch it up a little. Normally it's going to be "Tutorial Tuesday", but I guess today it's going to be a Tutorial Wednesday. That's not too bad. Anyways. The tutorial that I'm going to be showing you guys today is how to mix different mediums to create one cohesive piece. That's one of my favorite things to do. Mix different kinds of materials in one thing. That's why they call it mixed media after all. Okay. So first things first. What we're going to be making. You can obviously do this technique anywhere that you want, but the easiest way for me to do it in a tutorial format would be to show you on plain pieces of copy paper. You could do it on cardstock, mixed media paper, in a journal or sketchbook; anywhere that you would normally use any other technique that you find floating throughout the internet. Let's get started.


The first thing that you're going to do here is prepare a pallet. You've seen me doing this on multiple occasions, so you're probably pretty used to this by now. Now let me give you a really quick run through of the supplies that you are most likely to use. You're going to want a little bit a tube watercolors. This forms the background, and is used in many layers throughout the technique. Next, you're going to want an acrylic paint in a similar, but NOT identical color. If it's identical in shade, then, in my opinion, it will not have enough variation to make an interesting piece. You could try it though; I haven't yet. The last type of paint that you're going to be using is just a plain white acrylic. I am using a poster paint, but you could use any kind of acrylic that you like. You're also going to need some paper (or whatever surface that you are going to use), and a paintbrush. The paintbrush that you use for this technique NEEDS to be one with the natural bristles. The roughness of them gives the right texture that we need for this technique. A softer brush will not work.


The next thing that you are going to do is mix a little bit of your tube watercolor with water, and spread it all over the page. Make sure that you are very haphazard with where you are placing your marks, and don't over think it. Just play with moving the color around on the page. I cover almost the entire background in this first layer, but you can certainly do a lot less if you wish. This is just this particular page. I first came up with this technique when I was just playing around with a bunch of supplies, so it's a very experimental technique that is very open to suggestions.


The next step is going to be to add some white acrylic paint to the page. Again, be very spontaneous, and don't worry about what comes next. I added some layers of the watercolor on top of this, and then alternated back and forth, blending a bunch, and just trying to come up with an effect that I enjoyed.


To finish off the technique, just work with the supplies you have. I added the acrylic paint, and mixed that with a little bit of the white paint. Then I took a paper towel and lifted some of the paint up off of the page, and then dipped it in watercolor and dabbed it over the page. I also added some more layers over top of that, and finished off the page by putting some little rectangle splotches of watercolor over the page. This technique will be very different each and every time you try it, so be prepared for that when you do it. As you can see, this blue page is a lot different than the pink one that I showed at the beginning of this post.


I don't really know what's up with me lately and making big batches of colorful papers, spreading them out on the floor, and taking pics of them to share with you guys, but I guess I just love the way they look. These are all pages that I did today in about a 45 minute time slot. As you can see, you don't have to have a lot of time to create a bunch of quality backgrounds.


This is just another angle of a couple of the pages, and a few others. Some of these were done with this technique, and others just used portions of it. Some used none at all, and were just made because of the fact that I had leftover paint on my pallet that I wanted to use up. That's another thing that I tend to do. I hate being wasteful, so I'll make tons of other papers to make up for the paint that I would otherwise just throw away. That's what I've got for you guys today, and check back tomorrow for yet another post.

Tuesday, January 17, 2012

Creative Ideas 6.3


So here we are again. In the same situation that we find ourselves each and every day. I'm sitting here at my screen. And you're sitting there at yours. :) I'm bringing back to you guys another series. I know that you've seen this one before, and I'm trying to bring it back. It's the Creative Ideas posts! I always loved these posts, where I would give you a bunch of ideas to use on your pages, and then you would work on them, and post them in the comments. And then I would get to go and see all of the amazing creations that you guys made from  my prompts. :) I loved it. I don't know what made me stop doing it. But now I'm bringing it back. And so, without further ado, I'll give it a go ahead.


  • Flip to a random page in your journal, add a couple of layers to it, and post before and after pictures for all of us to see.
  • Look at a painting. It may be a well known one, or something that a friend of yours created. In any case, it can't be something that you made. Draw your inspiration from that piece.
  • On the opposite side of the spectrum, look at an old piece of yours. One of the ugliest pieces you've ever done. I know you have them. I sure do. It's up to you to decide which one. Now take that, and find something you like about that page. Build another page around that element.
  • Make a page with the only colors being muted earth tones, and a single jewel tone of your choice. 
  • Write random techniques on a few slips of paper, and put them into a jar. Choose a few color combos and put them into another jar. Then take ideas of themes you have for pages and put them into a third jar. Draw a slip of paper from each and build your page around that. 
  • Make random marks on your page with any type of tool that you can. Use a pencil and scribble wildly, or use a crayon and an oil pastel and try to blend them together. Use this wild, unforeseeable base, and add layers to it, creating a page intuitively, and not thinking about what you do. 
  • CREATE LIKE A TODDLER! Even I, who am still in my teens, has trouble with getting "caught up" in the product, and don't think enough about the process. Have fun, get messy, and don't worry about what comes next!
I hope you guys enjoyed these prompts. Have fun with them, and have fun creating!! 

Monday, January 16, 2012

Pallet Cleaning Tutorial


Hey everybody. I'm back with you guys today, and I've got something that I would call kind of cool. Although I'm kind of biased in that aspect of course. :) So today I've got a little type of tutorial for you. I know that a lot of you out there in the painting and art world use pallets to hold your paint. I don't really know how many of you let the paint cake up in it like I do, but I'm going to show you a fun, creative and useful technique to clean it, if you do this. It's fast, it's easy, and it's not as wasteful as just dumping all of that excess paint into the drain. Plus, that's probably not the best when you want to keep your drain unclogged. So let's get started.


The first step is to choose which section of your pallet that you want to clean out first. But let me note first that this method of cleaning is a bit slower, but it's a cool technique in the long run. After you've chosen the section that you want to clean, you're going to dump a little bit of water into that section. Then, you take a paintbrush, and mix it around. The paint will mix with the water, coloring the water and dissolving the paint into the water. I must tell you that this doesn't work with all types of paint, but I always find that it's at least worth a shot.


Then, you just load up your paintbrush with the paint and the water, and spread it over some paper. It works the same way as a color wash does, and gives you lots of colorful, pastel like pages to use in your work.


Here's a pile of papers that I did just today off of my pallet. They always seem to turn out nice and colorful. Just a hint, darker colors work best for this technique. That gives it a bit more colored pigment to mix with the water, and it doesn't turn out as just being a hint of color on the paper that is barely even there. Anyways. That's the tutorial for today. I hope that you guys enjoyed it. One last tip though, is that you can use these papers and scrape paint on top of them, stamp on them, stencil them, spray inks, and in other words just layer over top of them. A lot of times they can turn out really well, and you can never tell that they were made from leftovers. And there's no shame in that.

Sunday, January 15, 2012

Collage Unleashed - Color Scraping


So today I started my run through of Traci Bautista's "Collage Unleashed" book where I left off. Color scraped pages. I love the way her pages look, but I took a break from all of my series I had going. But, I'm trying to start some of them back up. This is one of them. Something that Traci does with her pages is use a lot of color through color scraping papers that she then uses to create unique, one of kind journals. I thought that it might be fun to work on some of these pages. I've tried them before in the past, but they have never really turned out right. Anything I do that's inspired by her either ends up too light or too dark. But this time, for some strange reason, these turned out great! I love them so much, and I'm glad. I guess, like they say, practice makes perfect. Though these certainly aren't perfect, I'm really happy with them never the less. I used a lot of acrylic paints, stencils and stamps on these pages, as well as scraped some stuff around on the page.


Here are the two pages that I did that I really liked. On the right, the base of the page was a little bit dark for my liking, so I ended up just lightening it up with the paints I used on top of it for the stamping and the stenciling. Using light colors on a dark background makes it look better, especially if you don't enjoy the way the background is looking. On the other side, I really liked the color scraping below the stamping, so I had to be very careful that I didn't ruin it with the excess layers and stuff. I used a foam flower stamp with a brown paint and a piece of bubble wrap with some white paint.


The rest of the pages that I have made are just basically made from the leftovers from the other pages. Take these two for example. I laid these pieces of paper behind the originals to catch the paint that I was scraping off the edges. That way I didn't get paint all over my desk. That was just the solid color that you see in the background. The redish/pinkish color that you see over top of that is a wash that I did when I had some red paint leftover on my brush from doing some of the original painting. I dipped my brush into my water and just spread it all over the top of my papers.


And here are another two. These were done pretty much the same way as the ones above, but they don't have full washes on them. The one on the left actually doesn't have one at all, and the one on the right is only partial. I'll probably work on these gradually as I do other art journal related activities. Because that's the way I roll. ANYWAYS, that's all that I have for you guys today, but I have something really cool planned for tomorrow. I hope you come and check it out!

Saturday, January 14, 2012

Beginner Art Journaling Supplies


Hey everybody! Jordan here, with yet another post to share with all of you. I know that I've been doing pretty short posts lately, so I thought that I might make it up to you by giving you more of an extra long post today. It is Saturday after all, so I can deal with it. As you have probably seen from the title, today's post is about the basic supplies that you can use to art journal. I'll probably have a separate list some other time, about all of the advanced supplies, which I also like for art journaling. I'm not going to go in depth in each supply. But I promise you, I will do them separately as well and link back to here. So let's get started shall we?


Journal: One of the first things that you're going to want to have is, most definitely a journal. I love composition books, as you followers of my blog know. I think that it's the cheap aspect of them that really attracts me, but there are other reasons too. They are very highly customizable, and you don't feel BAD decorating them. Say you buy a really expensive moleskin. It will almost feel like you're defacing it to put stuff on the cover. Or even on the inside. That's another reason for me buying composition books. Since they are so cheap, you don't feel like you need to be perfect while playing around, and you won't be AS scared of the blank page, since there are already lines on there. Of course, you can easily get rid of those by painting over it. Plus, I just love that there are so many pages. 100 sheets, 200 pages. Of course, you CAN choose other types. It's your journal. Do as you wish.    


Paint: Next up on my list, we're going to go with paint. Now, not everyone uses paint in their journals. But I'm making this list to go with the supplies that I find myself using on almost, if not every, art journal page that I make. If you just go to the art supply store and look around, you will probably be intimidated by all of the kinds of paint that you will find there. But don't be overwhelmed. Paint is one of the most fun supplies to search for and buy. There are so many different colors and shades of those colors, that just simply browsing them makes my head go ablaze with ideas, and just makes me HAPPY. I don't know why. But I'll have another post on this for sure. I might have to do a post on each kind of paint. I know. It's sad that I'm so obsessed. But at least I won't run out of blog ideas... ANYWAYS. Back to the subject at hand. There are so many different kinds of paint; craft acrylic, tempera, fresco tempera, oil, watercolor pans, watercolor TUBES, acrylic tubes, student acrylics, ARTIST acrylics, artist watercolor tubes, poster paints, gouache, and so, SO much more! Paint is the ultimate craft supply.    


Pens and Markers: Next up, we have our pens and markers. Now this is a bit of an interesting aspect of the art journaling world. Obviously there are many, many, MANY different kinds of pens to use. And lots of different colors too. It's easy to get lost. But, when you are just starting, I recommend holding off on the colored pens. YES they can be fun to use. Most definitely. But so are black and white. And they have many more uses than the colored ones. In this picture here, I have Sharpie Paint Markers, Sharpies, a ZIG calligraphy marker, a Sakura glaze pen in white, and a black Sakura GellyRoll. These are the ones that I find myself coming to most often. Of course, feel free to explore the vast world of pens and markers. They're out there, that's for sure. 


Glue: Next up, we have glue. There are many different kinds of glue as well, but this topic is much more scarce than the others. I left a couple kinds out of this purpose on accident, but I'll mention them here. One, we have Mod Podge. This brand is very commonly known, and has many different uses. There is Allene's Tacky Glue. Most crafters have at least heard of it, if not bought a bottle or two. If you haven't, it isn't a big deal. This glue does come in handy quite often however. You also have HOMEMADE Mod Podge, school glue, glue sticks, and scrapbooking tape runners and glue dots. All of these have come in handy to me at one time or another.     


Spray Bottle Filled With Water: Ah yes. Even though many people do NOT consider this a necessity, I in fact, do. I love my spray bottle, and used my old one so much that I wore out the spraying tip so much that I broke it. We went through a lot together, so I held onto it, and put something else in it to spray, while I got a new, bigger spray bottle in the travel isle of Target for a buck. I'm sure I'll go through quite a bit with this one as well.


Scissors: Scissors, of course, are important to the creative process. No matter how much you love the raw edge of a torn piece of paper, you will always come to the point when you want a nice clean edge to a piece of paper, or a shape. For instance, a circle. It's not easy to tear a perfect circle. Not that it's easy to cut one either...     


Paper and Fabrics: Next come papers and fabrics. Or any sort of collage material to tell you the absolute truth. I left out a lot of my collage papers and fabrics in this photo; I just wanted you to sort of see what some of the pieces that I use look like. I'll save leftover papers from projects, wrapping paper, greeting cards, pages from books, pictures from magazines, fabrics from clothing I've outgrown, receipts; any piece of paper or fabric that I find in my everyday life. There are many more kinds than this obviously; there are so many different kinds that it would literally be impossible to list all of the different kinds out there. I'll definitely have to do a separate post for all of you guys about papers and collage materials; that would be really fun!


Paintbrushes and Painting Tools: The next thing then would be paintbrushes and other painting tools. When you first hear the phrase "painting tools", I am almost positive that the first thing that comes to your mind would be paintbrushes. And while those are, in fact, one of the most COMMON painting tools, that doesn't necessarily meant that they are the only ones. But let me focus on them first anyways. I use approximately six different brushes; seven if you include the foam brush. But I have a 1" flat brush, a 5/8" flat brush, two 1/2" shaders/angular brushes, a 1/2" flat brush, and a glue brush that doesn't have a size; it came with a kid's paint set. There are also pallet knives, which you can buy fairly cheaply at Michaels, and an old toothbrush can also be used to spread paint. The last thing that I'm going to share in this subject is an old credit card. These have practically endless uses, and I have used mine so much that it's literally about to break in half from so much use.


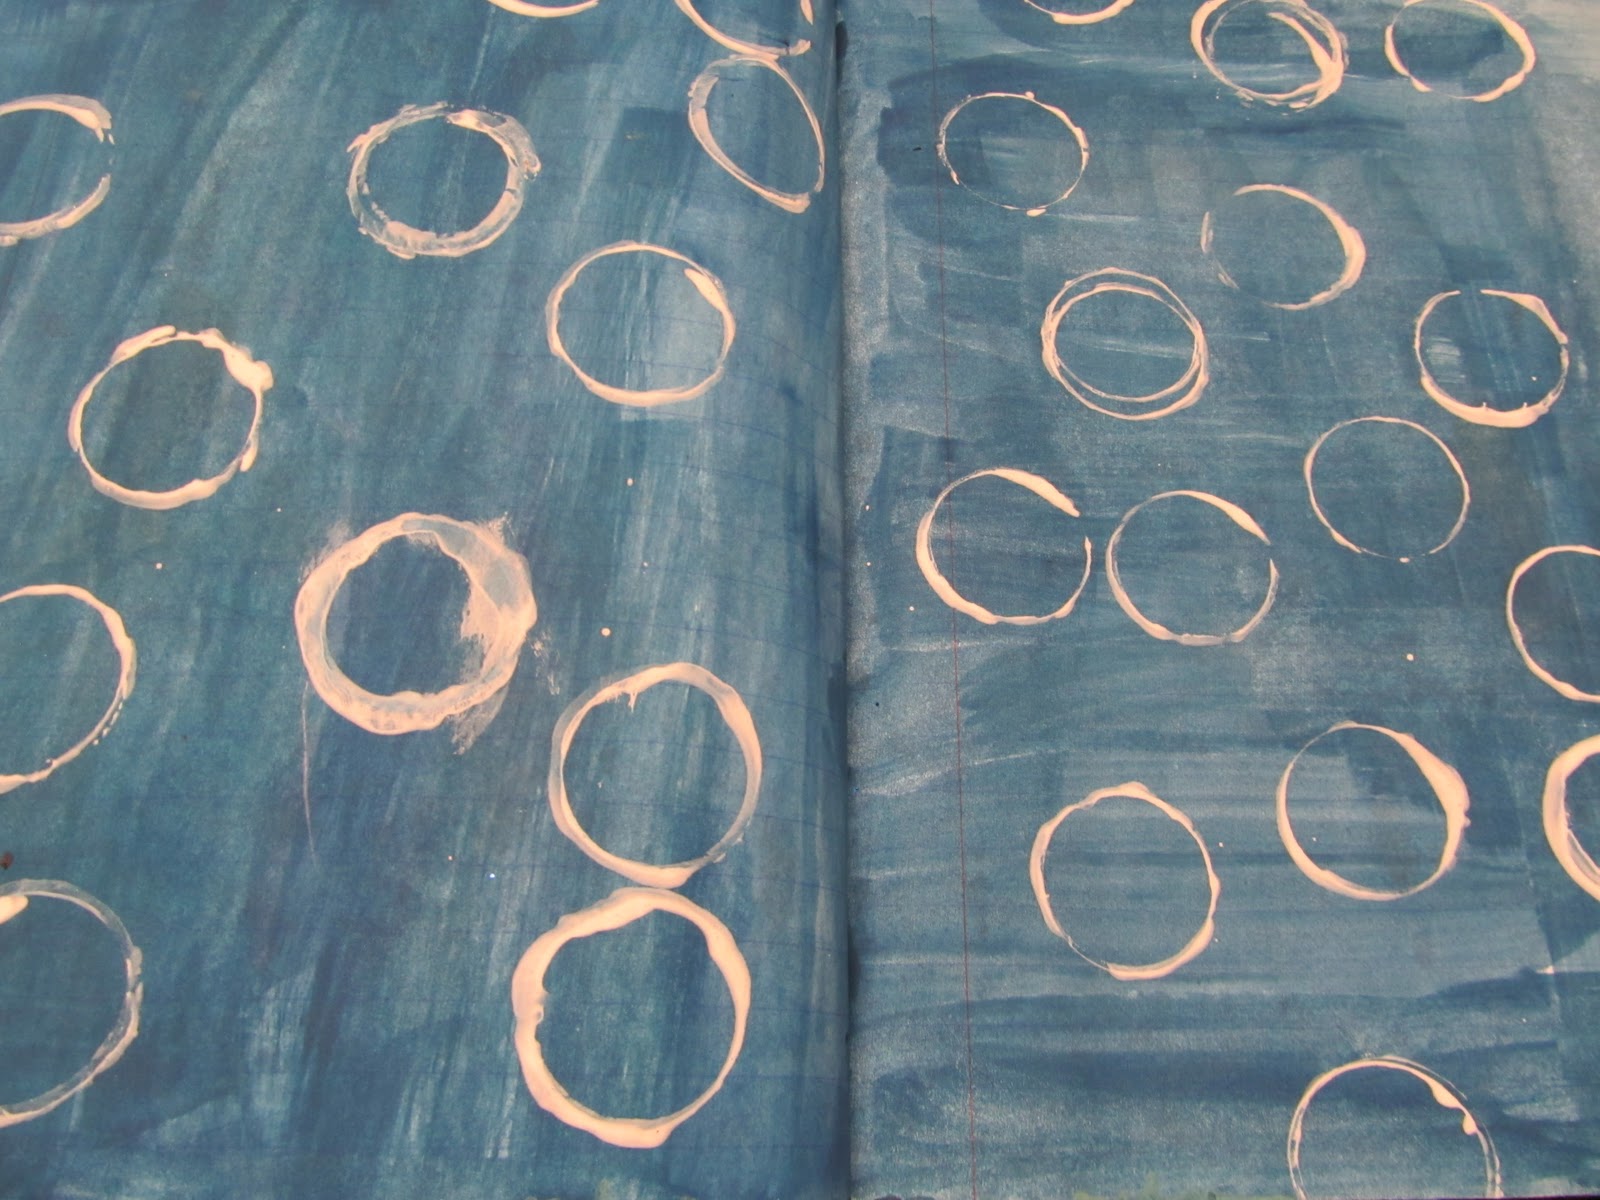
Stamps: Last, but certainly not least, we have stamps. I know that a lot of people would argue with me about stamps being a necessity, but I'm going to stick with my facts that I've found, and that would be that they most definitely are. There are many different kinds of stamps to use, of course, and a lot of mine are either homemade or found. But I do buy some too. The ones that I buy are normally one of two kinds. The $1.00 stamp sets that you can find at Michaels. Or the cheap foam stamps. I can't make those, so that's why I buy them. But there are other, cheaper alternatives as well. Or rather, about the same price. But they're more custom. I make eraser stamps using cheap erasers and an exacto knife, and  cheap, sticky-back foam that I adhere to cardboard from cereal boxes. Of course, you can also use bubble wrap and other pieces as stamps as well.

Yeah. That was a pretty long post today, and I thought that I had lost the whole thing really close to the end. But luckily, I found it pasted into the search bar of my computer (it does that when text is highlighted). So yeah. Anyways, that's all for today, and I'll see all of you guys tomorrow! See ya!

Friday, January 13, 2012

Doodled Art Journal Page


Hey guys. I'm back with you guys once again. Sorry that I'm so late getting to you all, but I've been having tons of technical difficulties today. First off, I was trying to get a video to give you guys, but it didn't work out, and not only did it not post to youtube after hours of trying to get it on there, now it's too late for me to try any longer. Also, I've written this post once before already, but the entire web browser didn't respond and then just automatically shut down. So I'm sure you guys know how I'm feeling right now. But I'm just glad that I'm able to get to you guys at all. Even if it is kind of late. So we can start off by talking about this page. I loved working on this page. LOVED it. When I started it, it was very simple. A gray paint as the page background that I simple spread all over the place with a paintbrush. The pink was a pallet knife that I used to spread the paint, and the brown was some that was leftover from another page; I used a paintbrush to spread that too.

The doodling was the most enjoyable part of this page. One, I love the way it looks. It's so fun and inviting, and has an almost playful demeanor. I love the way the white compliments the page, and I found the pen to be a pleasure to work with. I used a Sharpie poster paint marker, and I found them to be very enjoyable. Even though I've heard mixed reviews about them, I've had nothing less than an excellent experience while working with them. They're amazing. Plus, just a fun thing to add to my repertoire of techniques and collection of supplies I have now to play with. And that's that. I'll see you guys tomorrow!

Thursday, January 12, 2012

Creative Experiments 1.5


Hey guys! I'm back, once again, and this time I'm here with a series that I decided to bring back. I had it going a little while ago, but I'm planning on doing a more planned version of the blog now for you guys! I think you might be able to follow it a little better, and I think that I'll have a lot more fun working on it! So where I just left off with this series, I was playing around with white acrylic paint. I was messing around, and trying to use it in as many ways as I could possibly think of. Sadly, I lost my previous list of ideas for the white acrylic paint, but I made a new one, and I was playing around with one of my new ones. I had the idea that if I mixed tube watercolor with the white acrylic paint that it might come up with an effect that's sort of like gouache. Even though it kind of worked, it wasn't the best reaction in the world.

The page on the right (the green) is actual gouache. The way you use gouache is pretty much like watercolor, although it's very much more opaque. I love it. The yellow on the left side is the watercolor and the white paint. As you can see, it's pretty transparent. But not nearly as transparent as watercolor. So it's pretty cool; I came up with a kind of paint that's kind of in the middle in the transparency state of mind. 


And here we have that canvas that I showed you guys a little while ago. I added a few more layers of paint, doodling, sprays and such, and I really like the way it's turning out. I think I still might do a little bit more with it, but I'm still not quite sure. But that's all I've got for you guys today, and I'll see you tomorrow!

Wednesday, January 11, 2012

Art Journal Layers


Hey guys! I'm back with a few more art journal pages that I've been adding onto lately. It seems like the more that I work in this journal (the big, fat one that I started first), the more i start to skip around. I'll flip to a random page, and, if it is unfinished, I'll see if I want to add something to it. Maybe some doodles or some paint, or a few pieces of paper as a layer. On this page right here I used some new oil pastels that I bought at Michaels (Cray-Pas) to do some doodling. I used the light blue to do the circles around the punched out papers, and the red lines with the half circles.


This is just a more close up picture of this same page spread. You can see the doodles that I did.


And this pages right here is just another page that I've been working on lately. I had the background here for a while, and then I added int the blue paint, the black crayon swirls, the clock printout, and some sumo ink mixed with water that I sprayed over the page. That's a bit of a new technique that I've been trying to experiment with a little bit. It's still in progress, but I'm starting to try and perfect it. :) Well, that's all that I've got for you guys today, and I guess I'll see you guys tomorrow. Bye!

Tuesday, January 10, 2012

Traci Bautista Inspired Page


Hey guys! I've been experimenting a bit in my journal today and for a few days now. I've been having quite a bit of fun in it too. Traci Bautista is hosting a free e-course over at the Strathmore Ning site, and I was just experimenting a bit with the week one prompts. This page isn't finished at all yet, but these are just some of the first few layers. I have quite a bit down. I don't really know how to count these layers, since the entire style and work process is way different than what I normally do, but I still had a whole bunch of fun. This is what I normally do when I'm working on my journals. I take these courses (free and paid) and I'll experiment with their styles in my journal. And after I've done that for a few pages (as few as 5 or as many as 20), then I'll find small ways to incorporate their style into my work. An example of this would be Traci Bautista's style. I love it. So much. But I really enjoy my style as well. Since this is the first spread that I've really done a full out Traci style on, I don't really know what details of her work that I'm going to incorporate into mine yet.

But I can list a few of the things that I definitely like about her work. I love the bright colors that she uses. She can combine the colors into the most amazing combinations. Some of the most unexpected things ever. But they work. Something else that I love about her work are all of the amazing patterns that she uses. She will have the most graphic, vibrant doodles. I just love the whole vibe. I'll probably end up adapting the paint doodling. That would probably make a pretty cool layer for my pages. That's what I do. I take the stuff from it that will make cool layers. Because you guys know that I love layers. :)


I just thought that I'd share an extra picture with you guys today. Normally you guys just see my pages, which I hope that you're glad to see. But I thought today I would share with you guys a picture of the same page if you just zoom out a little bit. I just thought that I'd show you my workspace while I'm working on a piece. Some people are perfectly tidy when they work, but I just can't understand that. If I break every three seconds to put something away while I'm in the middle of a page, then I'll totally get out of the groove of my whole page. I like to work very quickly and spontaneously, and I can't easily do that if I have to stop at regular intervals. Well, that's really all that I've got for you guys today, and I'll see you tomorrow!! :) Bye!

Monday, January 9, 2012

Watercolor Spread


Hey guys! I'm here again with you guys, and so far I've been doing pretty good on the whole daily posting deal. I know that I generally have been posting later in the day than I have in the past; maybe when we have breaks at school and stuff it will be a little bit earlier. I know that I don't have that much to share with you guys today, but I'm going to give to you what I have. I only have a single spread. On this page I used a bunch of stuff that I bought yesterday; some of the watercolors and acrylics, and I did a lot of experimentation with different brush strokes and scraping some white paint over top of the page. I'm sorry that today's post isn't all that long, but that's all I've got for you guys today. TOMORROW however, I'll come at you with a nice and long post. :) See you guys then.

Sunday, January 8, 2012

New Materials and a Canvas


Hey guys! So I'm back with all you guys once again today, and I've got a couple of things to share with you. I went to Michaels today, and got a whole bunch of stuff, plus started painting my first canvas!! The first part of my blog post today is going to be about the canvas, and the second part is going to be about the stuff I bought today. Okay. So let's just get started here, with the canvas. I did this canvas pretty much the same way that I do the rest of my art; lots of layers, bright colors, and distressed effects.  I've been experimenting with a new technique, and that is sort of shown on this piece, but I still need to perfect it a bit before I tell you what it is. For now, you're just going to have to deal with the look of this piece as to see how it works out. :) Now I'll go through a few of the layers I did on here.

I started out with a layer of lime green paint as the base. I love the way this color looks. Then I took a piece of plastic canvas that I had bought and stenciled a circle through it. I added a little bit of text stamping, and, after letting those layers dry I sprayed some glimmer mist over top of it. I made a wash, then added the two layers of drips. And that's where I ended the layers. I know that more layers will be added in the very near future; I was already prepping some more stencils to use on this before I took the picture. Now let's continue on to the stuff that I bought at Michaels.


This is the first set of stuff. I got quite a bit of stuff, so I had to separate it all into three separate piles to photograph so that you could see all of it. In this stack I have a piece of plastic canvas, 2 Sharpie paint pens (a white and a black), a drawing set, a 36 pan watercolor set, a dollar set of clear stamps, a set of 12 tube watercolors, a set of 12 acrylic paints, and a 16 pack of Cray-Pas. Some of this stuff I've never worked with before in my life, so there will be quite a bit of experimentation that you are going to be seeing on this blog in the very near future. I love, love, LOVE experimenting, especially when I get to play with new supplies. So I'll probably be doing that quite a bit.


This next picture is really quite simple, but I really wanted you to see it. I got a 2 pack of 8"x10" canvas' for $5.99. Plus, they were buy 1, get 1 free, so I pretty much got each one for $1.50, which I consider pretty good for canvas'.


This is the last picture of the stuff that I bought today. This is more the paint materials. I got a big thing of white tempera paint because my white paint was gone. Then, I got six different paints for 59 cents each. I really wanted to get one of each color; a pink, a red, an orange, yellow, green, purple, brown, black, and a gray. I had picked out one of each anyways. But what ended up happening was that I had to put some back because I wanted to have some money left on my gift card. And I did. I have about thirteen dollars left on a fifty dollar gift card. So I got all of that stuff, including one last thing of black glitter glue, which is also shown in the picture above for a grand total of $36.18. I would say that I got a lot for my buck. What do you think?

Well, that's about all that I've got for you guys tonight, and I'll see you tomorrow! Bye!!
Related Posts Plugin for WordPress, Blogger...