Showing posts with label stamping. Show all posts

Sunday, February 10, 2013

Superbowl 2013: Daily Art Journal Page


Hello everyone! What's going on? Hopefully you've all been doing what you enjoy over the weekend, whether that be art or something else. I personally have been working on a few art journaling pages, and have been watching a few of my favorite shows. I finally got Season 7 of Doctor Who (the first five episodes) from the library, and I watched the first two today. I love it so far. That is one amazing show. 

Anyways. I just got around to making a Superbowl page in my art journal, even though I've been considering doing it for quite some time. I'm not really sure what've been holding me back for this long, but I'm glad that I did. 


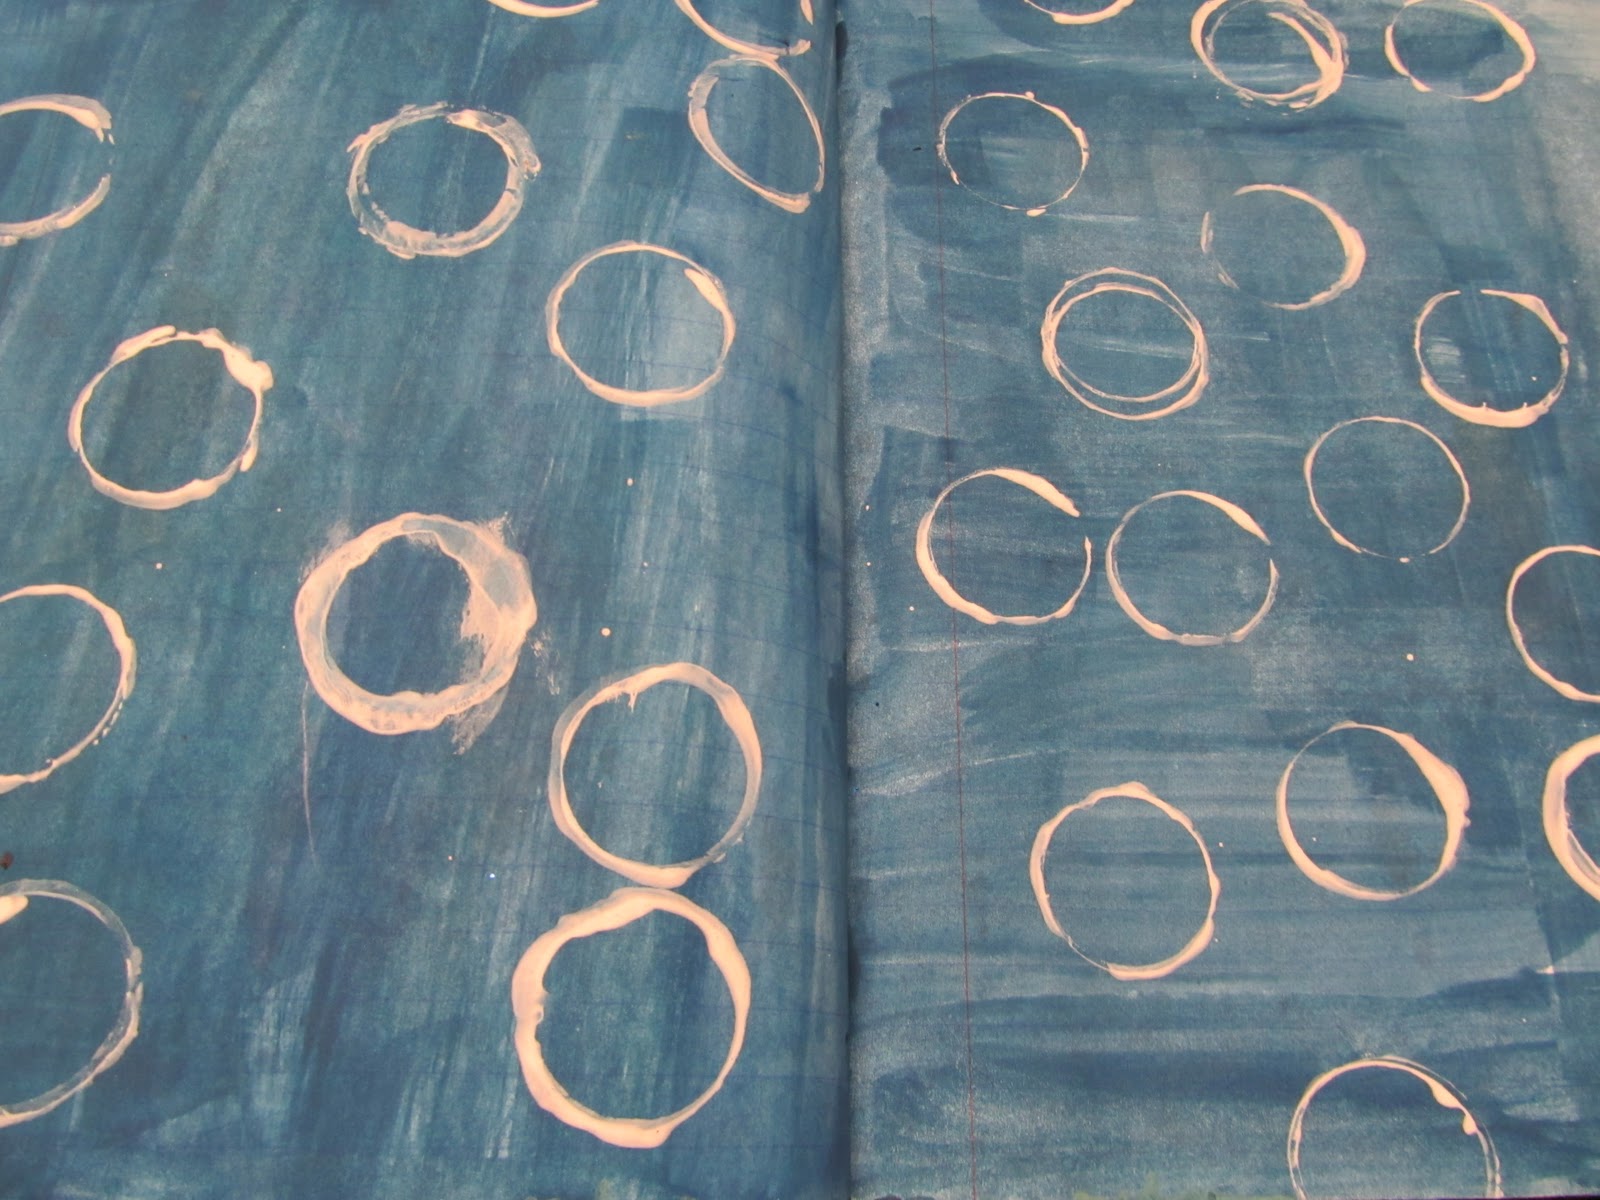
Basically, I just went with the colors of the Ravens, as they were the team that won. If the 49ers would have won, then I would have gone with their colors. Eventually I'm going to add some journaling to this page as well. The funny thing is that I didn't even watch the Superbowl game. I was too busy playing basketball and video games with my guy friends. Which made me think that it was comical that  I even decided to make a page for the event. However, as I felt it was a major event, and something that happened in my life, I needed to document it. If I would have been keeping a regular journal, I would have written it down in there. Why not in my art journal as well.

I will also say that I have another page/spread planned for doing on what I ACTUALLY did for the Superbowl. ;)


Here's just a bit more of a close up of the detail in the layers of this page. At first, I was having a lot of difficulty with the colors, as they kept getting muddled. As purple is made up of red and blue, when I added the yellow/gold color, I would get brown, since the 3 primary colors were getting mixed together. However, I eventually managed to pull it off, after much layering and patience. 

It's certainly not my favorite page in the world, but I can definitely cope. 

Thanks for visiting guys, and I'll talk at you later!

Tuesday, February 5, 2013

Power: 52 Sparks Page


Hey guys! What's happening?

I'm back with you guys again today, with yet another art journal page. Personally, I've really been enjoying the daily art journal pages I've been doing, and it seems that every time I create something, yet another idea pops up into my brain. I just love it so much.


 Today's page is just a bit different than what I've done in the past. Today's page is composed of a ton of layers. I'm not exactly sure what got me to that point, to be completely honest, but I did what I was feeling. And apparently I had a lot of pent up emotions stuck inside of me. Every time I would add a layer, I would love it just that much more. I started with a layer of collage, then the layers of paint, ink, tape, stenciling, and other things followed soon afterwards. 


The 52 Sparks prompt was this: How do you feel when you are alone?

I didn't exactly know how to answer this question, but I decided to give it my best shot. For now, I decided to just put down power. However, I think I may add some letters later on to make it say "Empowered." I feel like that might be a little bit closer to the truth. However, at the same time, I also will feel very frustrated if I am by myself for too long. I think that might have part to do with my personality, and part to do with the fact that I'm a teenager. Not quite sure.


Anyways. Yes. That's what I have for you guys today. I'm so glad that I'm back into art journaling daily now; it just makes me feel so good. I don't even know how to explain it. One of the things that I love the most about it however, would have to be when I'm working on a page and remember something that I used to use all of the time, but have forgotten about. That's what happened with this page and the flower stencil. I forgot I even had it. Then, when I was working on background, I remembered it. And then I went to seek it out.

Overall, I had a lot of fun working on this page. Make sure you check out Dale Anne Potter's 52 Sparks, and I'll talk at you guys later!

Wednesday, January 23, 2013

{{Face Your Fears}} - Art Journal Spread


Hey all! Jordan here. 

I've got a couple of pages to share with you today. Or rather, just a spread. I guess it could technically be considered a couple of pages if I wanted it to be. Personal preference. That's what I'm going with.

With this page, I would like to make a quick note. I actually started this page a couple of days ago, during a live stream I did. This was on Monday. I loved doing the stream, and I think I was on for about three and half hours. I did quite a bit during this stream, and I got fairly far into this page. However, until today, I hadn't touched it since.


Then today, I walked into my room and saw it sitting on my desk. And I knew that I had to finish it up. It was staring at me, and was calling my attention to it. The only problem came when I didn't know how to continue on with it.

However, after a bit of experimenting, and flipping through magazines, I finally decided to glue an image down, throw a wash over it, and add a title and some journaling. Then I would call it done. And I really like the way it turned out.


Here's a close up of some of the detail on the left page, where the title is located. This is one of my favorite parts. I love the ironic quality it has to it, even though it was completely unintentional. I put the "face" part of the title over the face of the girl.

I'm not really sure how that came into being, but I'm not complaining. I'm really loving it.


Also, here's just a bit more detail on the journaling. Again, I did it on my typewriter, except here I took one of the words and stamped it out. I love the way that turned out as well.

Overall, I am very satisfied with this page. Very satisfied. Quite frankly, I love it. There's a possibility that it's my favorite page since I've started up art again. However, that's arguably happened to me every time I've sat down to create a page. 

Anyways. I hope you guys enjoyed, and I'll see you tomorrow!

Tuesday, July 10, 2012

ICAD Update


Hey guys. Sorry for the missing post yesterday; since I'm a bit OCD, I may go back and fill that gap in. But, some of you who follow me on twitter will know that I wasn't feeling all that good. I just wanted to go to bed. I did the art, just didn't feel like blogging about it. Today I would like to share with you guys a couple ICAD cards that I did. Tomorrow I will be back with you guys with my 30-30-30 challenge; the very final pages. And I'll probably do some collective photos as well.


These two ICADs I did are extremely similar to one another. This is the one that I did first; yesterday. The following card was inspired by it, since I became so fond of it. It was composed of several layers of patterned paper; the bottom, thicker scrap was sent to me in a RAK. The thinner strip layered on top of it is actually a photocopy of one of my art journal pages that I cut up to use in other art pieces. And other art pages as well. Then there's the photo that was printed off of a collage sheet on the internet. And a definition that I cut out of a dictionary page. And, of course, the background was stamped. I used a clear stamp with a dark red ink pad.


Like I said above, this ICAD was inspired by the one above. Even though I'm not quite as fond of it as I am that one, I do still enjoy the look of this one.


It was assembled in very much the same way as the first. Simple layers of paper and images printed off of the computer. I would have much rather used my own images, but I haven't yet gotten to the point where I have them readily available, just at my fingertips. That's what I'm planning on doing the next couple of days, in addition to my color challenge that I am working on, and my other challenges. Getting some nice drawings and things under my belt that I can resize to use again and again. We'll see. I want to do some black and white and some color. I don't know exactly where I want to go with it yet, either. However, I do know what else I need to work on. Summer of Color. I'll probably do that tomorrow too.

Monday, January 23, 2012

Collage Unleashed - Odd Painting Tools


Hey people!! I'm back, and although it's very late yet again, I am here. I'm hoping that tomorrow I'll be able to get the post to you earlier in the day, but the way I figure it, later in the evening is better than not at all. Am I right? :) Maybe some Saturday I should just do a bunch of posts and schedule them to post. Then every day I can make a new one and schedule that one too. Huh. Interesting. That might actually work. We'll see. We will see. So today's post is another in my work through of the book Collage Unleashed by Traci Bautista. I've done these posts many times before, and I love how I can incorporate her techniques into my work. It makes me feel special. :) So anyways. Back to the topic at hand. What I decided to do today was sort of experiment with painting with odd tools. She has a long list at the end of Chapter 1 (I haven't worked through all of it yet, I just thought this would be a cool part to look at) of a bunch of different things that can be used to create new and unique textures. I picked three different things to work with, and added three different layers to three entirely different pages. Let's start with the chopstick, shall we?

The first thing that I really wanted to focus on was the chopstick. It's a plastic one, from a fairly nice set that we got at one of those chinese restaurants. I thought that it would be cool to try and use it for a page with texture, so I took out my trusty pallet, filled one of the channels with a nice turquoise acrylic and then just dipped the stick it. Then I just scraped it all around the page. It took a little bit of work to get it to the point where I liked it, but when I finally got there, it was definitely worth every bit of effort that I put into it. So I think that using a chopstick for texture was a great success. For sure.


The next thing I used was a toothbrush. Now, I've used toothbrushes before in my work, but they've definitely been becoming a lot more prominent in my recent pieces than they have in the past. For this page, I decided to use what was left of the blue paint from the last page, so anywhere that you see that turquoise color on this spread was done with the toothbrush. I really appreciate and respect the texture that the toothbrush gives, but personally I have found two faults with it. One, I find that I press too hard when I'm working with it and will often times work my way through the paper. The second problem with it is the fact that it just doesn't spread the paint very far. The paint gets caught up in the bristles, and won't come out, and I think I end up wasting a lot more paint than I'm using. Which is obviously disappointing.


And now for my last and final page. Here I have a spread where I added a layer of texture and color with a ball that I made out of masking tape. This is probably the most interesting texture that I have gotten thus far on the pages, even though this particular page isn't really my favorite. Basically I just took a long strip of tape off of my roll, crumpled it up into a little ball and used it as a stamp. I tried to use it to spread the paint around the page, but it just came across as messy and sloppy, which certainly wasn't the message that I was trying to convey. Obviously this page needs a lot of work, as do the rest of the pages I had here. But I am having fun experimenting and sharing it on here with you guys. And so, until we meet again, I bid you a farewell.

Saturday, January 21, 2012

Creative Experiments 1.6


Here I am, back with you guys today with yet another creative experiments post. I love these posts; I guess that I just love being able to find the versatility of a certain supply. As you guys have surely seen before, I've done a bunch of different things with this particular supply. White acrylic paint. That's one of my favorite things to use to tell you the truth. Today I decided to do something with stamping. I already had a page in my art journal that had a dark blue wash on it. I had been making another page and had a dark color of paint. Then, when I was finished working on that page, I still had some paint leftover. So I wet down my pages, and then just painted over the top of it. Then I let it dry. That was a few days ago. Now today, I decided that I wanted to do this Creative Experiments post, and this page was just calling to me.

Basically, I just poured some white acrylic paint onto my pallet, painted it onto the bottom of a paint bottle, and stamped random circles all over the spread. I really love the way that it is looking, even though I don't really know what I'm going to do after this. Sometimes when I'm working on art journal pages, I don't really know exactly what I'm going to do, because I really like the way a page looks after just a few layers. So sometimes I'll force myself to add more layers, and other times, I'll just slap a title on and be done with it. That's sort of what I was thinking I was going to do with this page. I'm still not so sure, but we'll see. We will see.

Monday, December 12, 2011

Art Journal Prompt Page


Hey guys! I'm back here with you guys today with a page that I was working on today. I started another journal (I know, again. I need to stop that. But I'm out of blank journals now, so that should help) a few days ago, and I'm filling it using the questions from the 5,000 question survey as prompts. I think that it's really cool, and I'm really enjoying the process. This is something I just started today, and I love the way it looks. I'm not sure if it's done yet or not. I think I'll add a title and some journaling yet. This is the fourth page in the journal. I worked on this for about an hour today, and already I'm this far. :) I think it's pretty cool.

I kind of like the color combination, even though I didn't have any type of idea for the page when I started it. It just sort of evolved on it's own. It's cool. I don't really have all that much to tell you today, but I just wanted to share this one page with you. And I'll see you tomorrow. :)

Sunday, December 11, 2011

Layering With Leftovers


Hey, hey hey everyone! Jordan Hill is back in the blogosphere, and happy and excited as ever to share MY art with YOU! Okay, I know that intro sounds a little bit corny, but I figured that you needed something to make it up to you from me not being on here for who knows how long. But in addition to perhaps adding a little bit of a chuckle to your day, I'm giving a content full post today. I'm going to show you how to add some layers to some of your pages, and how you can use the leftovers from a specific page to do so. In order to do that, I'm also going to be giving you a couple photos of some current work that I've been working on today, so you'll get some of my current work! Let's get started, shall we?

If you look at the photograph above, you will see one of my most current pages. When I was first doing the base layer of journaling for this page (something that I will focus more directly on in a different post), something called to me. It told me to make a pretty pink and purple page with lots of hearts; using a stencil of course. But, being me, I proceeded to make fake nauseous sounds to myself, thus making myself look like a total fool. As I am not fond of pink. If you know me, then you will know that this is so.  However, as that is where my muse was telling me to go, I proceeded to do so. After probably thirty something layers later, I couldn't stand it any longer. It looked horrible, and I hated it. So I went over it with a translucent yellow poster paint. AND I LOVED IT! I did this layer today, as I made the decision last night, and decided to sleep on it. After that, I added some polka dot stamping with a burnt orange color. Then, to finish off the page, I stamped the title with a bright, contrasting blue with foam stamps. However. As I completed each step of the page, I was left with some remainder paint. The rest of this post is what I did with it.


The first thing I would like to focus on was the layer of translucent yellow. Yes, that was the finishing touch to my previous page, and I love to use it to tie all of the layers together. However, that does not mean that you can't use it in the layers of a page in the very beginning. For example, with the yellow, I flipped to a page in one of my other journals, and found a page that only had a single layer on it thus far. It was a layer of light pink paint over the entire page. I thought the colors worked well together, and I then stenciled on multiple flowers to create a layer and a new beginning to a page.


Now we proceed to the burnt orange polka dot stamping. I used that as the next to last layer in my latest page. However, I'm not sure how many more layers I'm going to have to put on here before it's done. It may be almost done. Or it may be just the beginning. If you were wondering, I did use a stencil for the gear portion of it. A gear stencil that I made myself, mind you. I used a Cricut cartridge by the name of Paper Lace 2. I just cut the stencil at size 10 1/2", because it wouldn't let me do it any bigger. If you were wondering, this page was previously showcased in it's VERY beginning stages here.


 And last, but certainly not least, we have the color that I used to put the title onto my page. I used it as the very beginning of a page. A fresh new start. A new beginning. A beautiful, beautiful beginning. I love the way the color works with my personal style, so I know that I'm going to be able to do a lot with this. But anyways. That's really all I have for you guys today, and I hope that you enjoy it! :) See you later!


Sunday, September 18, 2011

Art Journal Cover - Volume 001


Hey guys! I finally managed to get on here after a LONG day of practicing volleyball.
I literally left at 10:30 and didn't get back until 5:00.
Very tiring, but I had some time to reenergize, and now I'm on here again. ;)

Sorry I didn't post yesterday, but sometimes my Saturdays sort of slip away from me.
I keep putting stuff off because I think I'm always going to have time.
But as we all know, this certainly isn't the case.
Unfortunately.

Anyways, enough with the apologies and the comments about my social life.
Let's get down to business. 
The artsy-craftsy part. :)
You know what I'm talking about.

Today I did quite a few things.
But I'm only going to share two of those with you guys today.
The first being a journal COVER.

This is pretty different from I normally post;
I normally do art journal PAGES and maybe an altered book page.
Depending on my creative mood that day.
You know how it is.
Some days you've got it, and others you don't.
And you just have to push through. 
Anyways.

Yes. 
I have an art journal cover for you guys today.
In the past, I've actually never done fancy covers.
I generally just paint them black, and use a bright color for the spine.
It's a nice simple look, and it's fun.

But today, as I start a new art journal for a course I'm doing on Wild Precious.
I just thought it was appropriate.


Here's a picture of it a bit closer up.
For my first 'Volume' I also found it appropriate to do it in one of my fave color combos;
Turquoise, Black, and Red.

Mostly turquoise, a little bit of black, and hints of red.
I know this is a common combo.
But I love it.
It's so perfect to describe my style.

Bright and airy, yet sophisticated.
It works well in a grungy layout.
Or in a clean and simple one. That's good.
Because I do both.

This is more of a grungy cover, and I do a lot of my stuff that way.
But sometimes I do go simple.
Anyways. 
I did a lot of layering of stamping with paint on this cover.
I thought that it should be perfect because I would have to be looking at it for as long as I'm working in this journal.

Another thing about this journal is that I'm thickening the pages.
While in the past I haven't.
What I'm doing this time is gluing two pages together.
And then collaging a bunch of phone book papers on top of it.
Then add gesso.

The pages are super thick, and AMAZING texture is added.
So far I haven't worked in it yet,
But since I did some prepping I probably will soon.


The second thing I have for you guys today is an ICAD card.
I know what you guys are thinking. 
FINALLY!
I know. 
I'm totally physic. 
I'm just cool like that.

Anyways.
I did this card today using a technique that had been left in the comments section of one of my posts.
Before I go one, let me say one thing about comments.
Thank you for leaving them.
They inspire me, and I really do read EVERY SINGLE ONE.

I do a blog run through, just to see them.
Thank you. 
They are so inspiring, and if you leave me a technique to try, I WILL try it.
Try it.
Leave me a technique in the comments.
Anything. 
I will get back to you on it.

Anyways.
Back to the point at hand.
One of my viewers left me this comment, and I was so intrigued I had to try it.
Basically what you do is you take your base.
And color all over it with different color of crayons.
Be completely random.

Then paint the whole thing with black paint.
Then scrape all the paint OFF.
I used a toothpick.
And that's it.
Isn't the effect cool for such a simple technique?
I love it. :)
It almost looks neon.
And if I haven't said it on here before, I LOVE neon.

So yeah.
Anyways, that's all I've got for you guys today, and I hope to see you tomorrow!! 
Bye!!

Monday, September 12, 2011

Altered Book Page + ICAD #10


Hey guys! Even though I finally managed to get on here after a full day of school and homework, today's post is going to be fairly short. I didn't have all that much time to be creative today, so the altered book page I'm showing you is from a few days ago, and the index card is actually the only thing from today. Sorry about that. Sometimes I get really caught up in work and stuff and today my teachers totally killed me with homework... so. Yeah. Anyways, let's get right to it shall we? If you look above at the first photo, you'll see an altered book spread that I've been working on. I love the way it's turning out actually, and I think it's a lot of fun to mess around with. The texture of the pages in the book I'm altering are actually quite heavy in comparison to the pages I generally work on, even though they are glossy. Sometimes the glossiness of them makes them difficult to work on, but I find it a unique challenge to work with. In my opinion, that's how I learn. If I have problems with something, just work more with it until you can figure it out. You know what I mean?


And my index card of the day. :) This is a bit of a continuation of the card I showed yesterday. That's sometimes how I work on my cards. I'll work a bit on a background, and then just layer over top of it. This card was basically composed of layers of stamping. I actually really like the way it turned out. I started out with the experimental, my own technique background, and then used a foam stamp and black paint to stamp swirls over the top. Then, over top of that I used a hand carved eraser stamp and some light teal paint. Then I collaged the word in the corner. You know the deal by now. This was pretty fun... now that I think about it, there might have been a class on 21 Secrets about layering stamping. Hmmm... I'll have to check it out. :)

Speaking of techniques though, I looked at the techniques that a couple of you guys posted for me yesterday. :) They sound so cool! I'm ready to try some experimenting now, and I'm waiting til I can find the time to do that. Also, I'm glad that I'm inspiring you all... comments make me feel that my blogging is actually worth the effort, and that there's actually a PURPOSE for me doing this. :) Now it's more than just a personal record. It's a personal record that I'm sharing with others. Also, if you're inspired by me, and you have a blog, I would LOVE it if you would post on your blog and leave a link in the comments. You don't even have to link to me. :) You just get a free linky in my comments, and I get to know that I'm giving people inspiration. :) Thanks for looking, and I'll see all of you tomorrow!

P.S. Check in tomorrow for the final reveal of my one on one challenge with the one and only DEDE! :) I'm working on putting the finishing touches on her page. :)

Saturday, September 3, 2011

Paper Beads + Index Card #2


Hey guys! I'm here again with another post!! Today I worked on quite a few things, since I actually had a day off of school today. :) It is a Saturday. Actually, this is a three-day weekend; I'm off Saturday through Monday, and go back on Tuesday. So happy that I finally get a chance to relax after a long week. You know what I mean? Well, anyways, I was working on some paper beads today. I used to make these a lot when I was younger, but they never looked this good. I've been using just plain old magazine pages. It's pretty cool. You can just see the edges, which makes it an awesome effect. I don't really know if you can really see the details in this picture that I have. You could try enlarging the picture though. I started this afternoon and so far I've made about 75. In the picture above, I am showing you 2 strands of 35. There's another strand I started somewhere else. When I actually want to use some of these in a piece of jewelry, then I can just cut the strand a bit, and then just pull off whichever ones I like or want to use. I've seen quite a few professional looking pieces using homemade paper beads. I think I'll find some ways to play with that. :)


And here's my index card of the day. I was just playing around with some different paints and layers with this card. i love the colors of this, and the cool stamped pattern on the side is one that I carved myself. I love the way that one turned out. Plus I did this really cool distressed/crackle paint texture with the blue color. It sort of came out that way, even though I wasn't even trying to. It just turned out that way. The way I did it was that I took some glue (just plain regular roseart) and spread it all over the surface of the card. After a minute or so, I let it get a little tacky, and then put some paint into it. I spread it all out, and then put a piece of paper over it and then pulled it up. I got a cool background, and after the glue dried, it crackled, and turned out really cool. I'll probably add a title, but after that, it'll be done. And that's all I've got. :) See you guys later!

Wednesday, August 24, 2011

Art Journal Experiment and an Altered Magazine Page


Hey guys!! I'm back here with all of you once again! I'm glad that I'm actually managing to get on here with school and all. Since that has started, be expecting daily posts (hopefully), unless I decide to bail on that idea. Just be expecting them later on in the day, okay? :) Okay. So you you guys remember that page that I showed you guys yesterday? The yellow one that I couldn't decide how to continue the layers? Well, I found out a good way to figure it out! I have a color copier that is currently sitting in the garage. It's a huge thing, and really clunky. But it's beautiful. In it's own special way. :P I like to use it for art journaling, and this is how I did it. I ended up making color copies of the page I was a bit unsure about and then I just did the choices on different copies. The first time I masked off pinstripes and then painted them black. Something that must be noted is that the color copies came out a LOT more green than the actual piece. In the real piece it's more of a deep yellow than a lime green. But I went with it anyways. It was more the technique that I was going for.

The second thing that I did was stamping with bubble wrap. This is actually one of my favorite things to do on my art journal page, and when I looked at it, I could just see it. But I was still having trouble deciding between the two. Thus the experiment on the copies. :) I really liked the way the bubble wrap looked. The way I got the effect I did was I took a piece of bubble wrap and kind of tore it into a weird shape. That way it didn't look too staged. Anyways, I applied a TON of black poster paint to it (I use poster paint a lot in my work) and stamped one clear(er) image in the upper left hand corner. Then I used the same application of paint to off stamp the rest of the page. I LOVE the effect. :) I decided that this was defiantly the one I wanted to use, and so: here's the result:


I love the way it turned out. It reminds me a lot of my style, or what I think my style should be. Messy, and worry free. Although most of the time these pages come out of my head when I'm stressed. Luckily I don't think that's the case with this one. I love the grungy effect the stamping gives the page, and I love the way it sometimes pulls up paint as well. Also, since this is the original, this is the ACTUAL color of the page. See how it's kind of a dark yellow compared to the limeish color of the copies? I don't really know what I'm going to do from this point, but I'll probably work my way through this page on this blog. Ha. I'll do a layer and then post it along with some other stuff, then another layer. That would be funny. :)


Finally, I have one last thing to share with you. This right here is something that I've been working on for my 21 Secrets class. It's an altered magazine page. You tear pages out of a magazine or catalogue and then just do a bunch of stuff with it. So far I haven't done that much to it; there's actually only two layers on there, but I think it's looking pretty cool thus far. If you look on the left side, you can see where I tore this page out of the magazine; some people may decide to trim this up, and others may not. They may just decide (like me) that they enjoy the raw edge and the playfulness and the non-perfectness that it perceives. That's all I've really got for you today, but I'll see you guys later! Bye!!

Tuesday, August 16, 2011

Stenciled Art Journal Page


Hey guys! Guess what? I'm here for the day once again. :) I think the page that I've been working on today is one of my favorites. I know that I've said that pretty much every day for the past few weeks, but it's really true. It's really weird, but the more I art, the more I love the pages I've been working on. In the photo above you can see that I did a darkish blue background and then did a bunch of journaling on it. You can see it's rather rough, and I'm not being careful at all. Some letters are missing in a lot of the words, but for me, the journaling part is simply so I can get all my emotions out on the paper. It also doesn't really matter what it looks like since I normally cover it up later on anyways. After that I blended gesso over top of this layer with a brush.


And here's it after a few more layers. I put some stamping in there with a little bit of patterned paper that I somehow managed to blend into the background with paint. Then for the part that you really see the most of on this page. And that would be the stenciling. I cut out my own full stencil sheet on my cricut. I ended up with a nice stencil and a pretty big stack of circles that I can use in my journal. It's pretty cool. Basically, to do this, I placed my stencil on in a cool arrangement, and then painted all the circles white. I decided that it wasn't good enough, so I did some random circles in a light teal color. I love the way it turned out.


Just one last close up before I go. Here you can see a better example of the stenciling. You can see the texture of the periwinkle colored stamping behind the circles. I know I've said it before; several times in this post even; but I REALLY love the way this turned out. :P But I'll see you guys later! Bye!

Saturday, August 13, 2011

Does This Look Familiar to You??


Well? Does it? :P It should. This is my page from yesterday. I just added a bunch onto it. Yesterday, I just had the background and the journaling down, and today I added some more. I added the photo, the strip of masking tape, and the piano embellishment. I also added the border along the side. That's probably my favorite part of this page, so I'll show more on that later. I just thought it would be cool to show you guys how I really work on my pages. Flipping back and forth between multiple sheets, and playing with the effects I can get. Also, I wanted to show you guys the depth you can get. This page probably took me 3-4 days to complete, but I love it a lot; maybe more than a lot of the pages I've completed in one sitting. I just think that once you give it time to sit, then it's more 'marinated' in your mind.


Here's a better look at the embellishment/photo cluster. Sorry the angle isn't that flattering, I don't really know what happened there. But anyways, I started out with the photo. I tried a few other pictures, before I decided on this one. There's something about it that just complimented the page. Once you set the picture on the page, you can tell exactly when it works, and when it doesn't. I put on the masking tape and all the doodling. But it just didn't seem finished, if you know what I mean. So I sorted through A TON of my embellishments before finally deciding upon this one. Now onto my absolute favorite part. The border.


And here's a closeup of it. It started out as just an accent, with the stenciled black partial circles on the side. I liked it then, but it just wasn't right. It felt strange. Different. Foreign. So what I ended up doing was taking a white gel pen and putting dots around the edges. It was pretty cool then, but I felt like it needed something more. So I took one of my favorite acrylic stamps, and used white acrylic paint to stamp it on the inside of the circles. It was then perfect.

So that's what I've got for today. A bit of a longer post, and it was fun. :) See you guys next time!

Friday, June 3, 2011

Creative Ideas 6.1


Hey all! I'm back with yet another blog post for all of you. I was thinking that maybe once or twice a month I could post on here with a few different creative ideas to use in your art. I think that it could be a cool idea, and you guys could post in the comments with your discoveries and blog posts showcasing your finds. We'll see how this goes. I think that it's a good idea, but I guess I'll never know until I try, right? So here we go. Tell me what you think.

  • Make an art journal page that you stamp with acrylic paint and bubble wrap.
  • Scrape some paint over a page, then let it dry. Scrape another color over top and let it dry as well. Spray with water, then after a minute or so, scrape the water off.
  • Paste a bunch of different sizes and shapes of book paper all over the background of a page, then scrape paint and layer over top
  • Stamp with ink on top of Mod Podge, then smudge it gently.
  • Experiment with lots of layers; try collage, stamping, acrylic paint, color scraping, tissue paper, wax crayons, watercolors, water soluble pastels or crayons, etc.
Tell me what you guys think! Does this sound like something you'd like to see regularly? Or does it seem boring? Let me know!!

Thursday, June 2, 2011

Creative Experiments #2


Hey all! I'm back again today with yet another post on art journaling. One of the things that I said I'd like to accomplish this month was to continue on the projects I had started last month. Today I'm going to go back to the creative experiments posts. I've been working with white acrylic paint, and so far I've only used it once, in order to lighten a page that was too dark using blending. That worked very well, but here's yet another page that uses another sort of "technique." Basically I just took a book that I've been working on altered book that is actually done using a technique called reverse collage. You paint around the photographs leaving some of them intact.

Normally you use black paint to do this, but in this one I used white. It took several coats to actually get it a good opaque color, but you can actually still see through it.


Here's what it looked like after I put the white paint on it. I basically just used it as a base layer so I could do all of my other layers on top of it. Now some of you might have been wondering why I didn't just use my base color as the layering portion instead of the white, since I normally use acrylics in my work as opposed to other mediums. Well, there are actually several answers to that question, the one of lesser importance being that I was trying to come up with ideas for using white acrylic paint. Of course that's a lame excuse. However, there is a better reason.

That being that I was wanting to use my water soluble pastels, and I've never heard of them working that well on black paper. Though now that I think about it, that may just be something to experiment with. :) So anyways, in the picture above you can see pretty well how I layered the white paint over the pages of the book, leaving the one really cute picture of the cat in the garden intact. And you can probably also see the beginnings of my pastel background; I got a little overzealous and started before I took a picture. Hehe.


And here, is the page when it's finished. I think I used this photo yesterday, but I gave you a sort of warning. Anyways, yeah this is it. I like it a lot, even though it's a little darker than I normally like. I did a lot of layering, including stamping with bubble wrap and a black wash. There's other layers in there, but those are the two that came to mind. And the pastels of course. :)

Actually, speaking of layers, I tend to use a lot of layers in my work. Currently I am working on a page that has TONS of layers in it, including experimenting with using mod podge as a texture item. I don't know if it's going to work yet, and if it does, I don't know if it'll show, since it is clear; but I figured I'd give it a shot. That's the plan anyways. So I hope you enjoyed today's post; I dunno if I'll be able to make it on tomorrow, but be sure to check incase I do!! See you guys later!

Monday, April 11, 2011

Art Never Ceases to Amaze Me


The title says it all. Art never ceases to amaze me. Never had and never will. It seems that the more I work at it; improving my technique and have fun messing around with paint and supplies... the more things happen. Good things. The feeling of freedom you get when you accomplish something. The accomplishment you have when you finish something. The pleasure of browsing through an old art journal and seeing the progress. Page by page. It all comes together and you can see your art journey to where you are today.

The page above is probably one of my very favorite pages I've EVER made. It's also the most recent. You think about that for a minute. It seems that almost every time I create a new page, that is officially my new favorite. It's art. And art never ceases to amaze me.


Take today's daily card for example. If you look back to when i first started up making my cards only a week or two ago, they didn't look too good. They weren't very enjoyable for me to look at, since every time I saw them I was reminded of how much I hated them. But now you can see I like them better. As you work at it, you gain more confidence in your work, and will enjoy working with the materials more than you quite care about the finished project. And sometimes... sometimes what looks like something normal - like the card above for example. Well...


It's not very normal at all.

Sunday, April 10, 2011

From a Sketch to a Card


So I'm back here with you all and a whole 'nother post. Yeah. I just said that. I guess I'm just getting desperate for some new intros... it's sad, I know. So anyways, here's a page that I've been working on a lot lately, and I really liked the way it turned out. Actually, I had started the page a while back, and have pretty much just been adding to it since then. I like it as it is right about now, so this is probably the last time I'll mess with it.


Here's a close up of the title, since I LOVE the way it turned out. I used a bunch of foam letter stamps that were sent to me by a friend of mine as a RAK (thanks Dede!!) and I love the way they look. The tall, stretched out look is totally my style! Here, you can sort of see the faded texture/color to the background that I simply love. It's just hard for me to get it like this. However, when I do get one to turn out, it just makes it that much more special. :)


Last, but certainly not least, I've got a card to share with you guys today. I simply love the way this card came out. I used one of my favorite color combinations (you've probably already detected this from the short time on this blog); lime and black. With lots of white space. I worked from a 365 Cards challenge...


A sketch!!
I love using sketches, and you maybe can see where the idea for this card came around. I basically turned the sketch on it's side, and used the bracket in place of the half hexagon. I love it. It's fun using sketches, at least to me. I love the thought of sketches, and they're just so fun to use. If you haven't already, I suggest you try them!!
Related Posts Plugin for WordPress, Blogger...