Showing posts with label paper. Show all posts

Saturday, January 7, 2012

21 Secrets and an All Paper Collage


Hey guys! I'm back with you guys, and am sharing with you a couple of things. Two pages in my art journal and an all paper on cardstock collage. But more on that collage thing later. Let's get things started here with a couple of art journal pages that I've worked on. These two pages here are from two entirely different courses on the 21 Secrets course (which I am still working on BTW, just without the videos), and aren't eve supposed to be a spread. I thought that I would show you in one picture and just talk about them as separate pieces though, and I thought that it would be quicker and take up less picture space if I did them separately. Okay. So let's start with the one on the left. This is from the daisyyellow course on the thing and she called this a Layer Cake. I really enjoyed making it, and it turned out very grungy and spontaneous, which just happens to be the way that I tend to work anyways in real life. I thought it very cool, and I loved that it seemed to just be a good technique/idea to add to my repertoire. It isn't quite finished yet; I still have to add the title and journaling and stuff, but I still like it a lot.

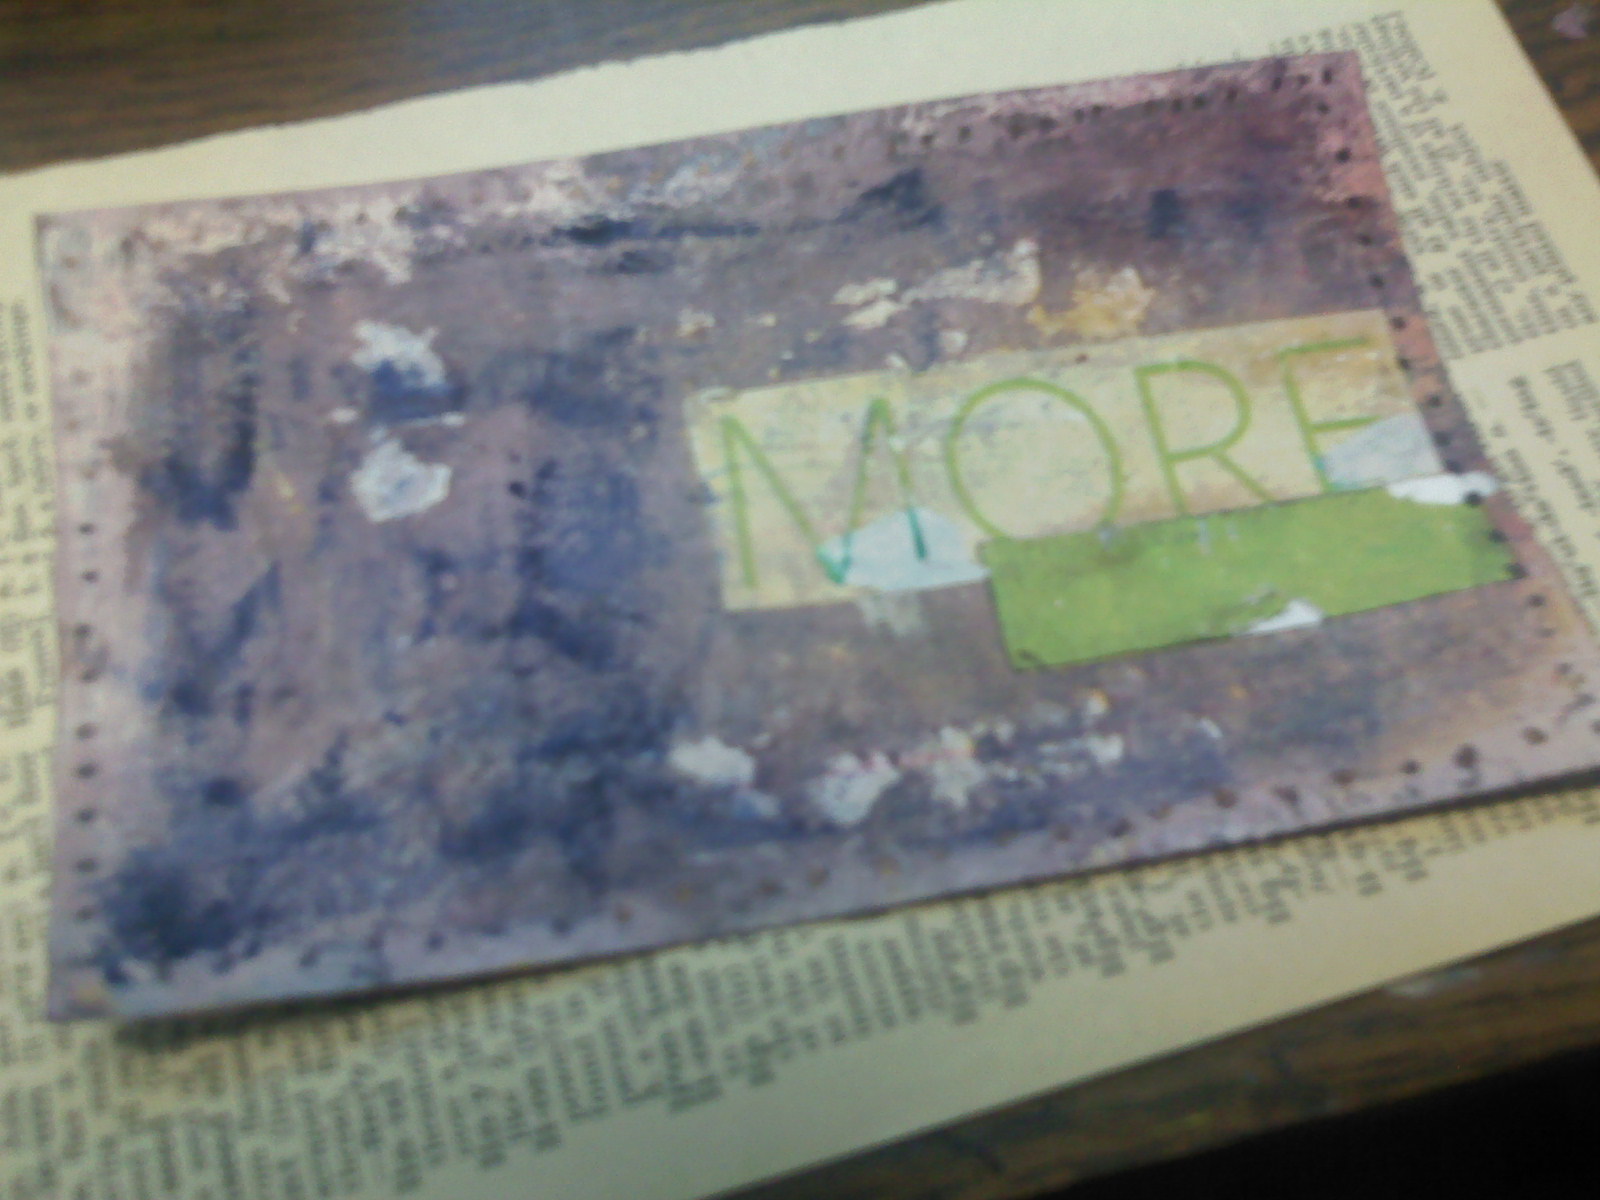
The second page there is actually another page that I did for the Fearless Art Journaling course. I love her techniques, and the way that it looks it just amazing any way that you end up looking at it. She talks about being very spontaneous with your work, and especially just going with your gut feeling instead of stopping every second or two to think over what you just put down on the page. This two is very much the way that I work, and I really enjoyed working on this page. By the way, I do know that the actual saying is "Less is More", NOT "More is Less." But I thought that it sort of worked vice versa as well, and went along with the same train of thought. I just thought that it might be an interesting thing to work with to see how it turned out.


And here I am showing you an ALL-PAPER collage that I did. As you've probably seen so far on my blog, I am very fond of paint in my collages, so the mere THOUGHT of doing a collage with nothing but paper was kind of stressful to me. But the thing is, you can sort of use the same guidelines as you do with paint. You can be spontaneous and quick, and try not to worry about what you are doing. I've done two so far; the one above is my second that I started yesterday, gluing down a couple of pieces, and finished up today. I did most of it today, so that's the date that is on the back. I found it very fun and a sort of interesting mix up from what I've done in the past. If you tend to use a lot of paint in your work, and find yourself stuck in a sort of rut, where you feel like you're doing the same thing on every page, I highly recommend this. But that's all I've got for you guys today, and I'll see you tomorrow!!

Friday, September 30, 2011

Paper/Fabric Collage Fodder


Hey guys!!
What's going on with you guys today?
I haven't done much crafty stuff today, but I did take a few pictures for the blog.
I pulled a bunch of stuff out of my pile of supplies, and made a few piles. 
I've now officially decided to start a sort of series on collecting supplies for working in an art journal.
In other words, an series on collecting art journal fodder. 
For now, I think I'll just share with you guys what I've found so far.
Then I'll do other occasional posts about how to find and collect these things.

Are you guys ready for this?
Okay then.
Let's do it then.
Let's look up at the picture above at the first little collection I found.
I just pulled a few of the first things that came to my hand. 
I have a piece of magazine picture.
Some apple stickers.
Some printed black and white borders.
Some color scraped fabric.
Some watercolored book paper.
And a strip of colors.


There isn't as much in this picture, but I still like this selection.
I have a dyed paper towel.
A butterfly die cut.
Some pink polka dotted tissue paper.
A pulled photo paper.
And a homemade stamp that I made using craft foam and a toilet paper tube.

This was so much fun finding all of this stuff out of my stash;
So far I've just stacked it all up in a giant stack,
But I'm planning to start organizing soon.
I'm gonna try sorting by color in some type of horizontal paper storage.

But that's all I've got for you guys today.
And I'll see you guys tomorrow. :)

Wednesday, September 21, 2011

Collage Fodder Pages


Hey guys!!
I'm back, and this time with some collage fodder-ish pages.
Ha. 
You guys are such enablers.
Thanks to Kerri and Dede, I ended up making about 12 paper for Dede's paper swap she's been hosting.
You basically just make a bunch of papers in an 8 1/2 x 11" size, and send them to her. 
Then she swaps them out.
You can probably contact her on her blog for details I suppose.

Anyways, I had a lot of fun doing them so please;
DON'T STOP ENABLING ME!!
:D
But to be serious, I did have a lot of fun on these pages.
They encouraged me to play and mess around and just have some all around fun.

I did some color scrapings, some magazine pages, some scrap material pages (tutorial MAY be coming soon) and some monoprints.
Monoprints are seriously my new favorite thing to do.
Link to any tutorials you know of in the comments if you would.
I would literally be eternally grateful.
Ha. 
Now we're in the Toy Story movie.


Anyways. 
Here's a second batch that I was working on.
I think that they all turned out pretty cool.
One of the ones in the first photo I actually have posted on here before, but I decided to post it again.
I used all kinds of paper too. 
I used copy paper, cardstock, lined filler paper, paper from a dictionary, and photo paper.
The ones above show the cardstock, filler paper, and copy paper.

The others I'm going to save for another day.
I did a bit of experimenting with different techniques on some pieces from a dictionary;
I have a little dictionary that I bought from Goodwill to tear up for pages.
I know it seems bad at first.
Especially for me.
I'm a book lover at heart, so to tear the pages out of one almost killed me.
But it's like anything else.
It gets easier with practice. :P
Just kidding.

But seriously though.
It's not so bad after a while. 
And the results are totally worth it, in my honest opinion.
Though I don't know how much my opinion means to you guys.
But it matters to me so...
Yeah.

That's all I've got for you guys today, but I'll see you tomorrow!
Bye!

Monday, September 5, 2011

ICAD #4 and ICAD Backgrounds


Hello my friends. :) And Happy Labor Day! I'm back once again with some more of my artwork. I have some index cards to show you today; not any art journal pages though. Or altered book pages. Or single sheets. And I'll tell you why. Even though I worked on some of all of those things; those pages that I did are classified. :) Let's just say that they have something to do with my challenge with Dede. :) I've been doing so much for that one on one challenge, and it's going to be a lot of fun when it actually comes time for the reveal. I've been playing around with colors, layering, and lettering. Just to experiment. I might just have more than one layout by the time the date comes around. :D If it's worth doing, then it's worth overdoing, right?

Anyways, getting back to the ICAD card of the day; look above to see it. I've been working with this kind of style; the fun, technique backgrounds, with a single magazine clipped word on it as decoration. On this one I put down a strip of paper on the bottom (This was actually a color copy of a page that I'd done previously. I've been cutting them up to use as collage fodder.) and drew a dotted border with a sharpie. This was an overall easy background to make; I've gotten used to layering paints, and pulling up paint with different things, but I'm still amazed every time. :)


If you look at these index cards above, you can see some of the things that I'm talking about. You know how I sometimes talk about "lifting"? Well this is a fine example of that. I take a page that has wet paint on it and layer something on top of it; a piece of book paper, an index card, a sheet of regular paper, or even another, smaller journal. If you press fairly heavily, you can lift up some of the paint. It goes in the direction of that the brushstrokes go, so, depending upon what I want the finished card to look like, I generally brush in both directions. These are bases for ICAD, that I'll probably work on further in the future. This is just so the intimidating white background is gone, and is simply giving me a jumping off point from which to play. I love the way these three turned out, which is why I'm posting these, but I've got a bunch more sitting on my desk as well.

Something else that I'm considering doing is taking some of these before they get more added to them and simply color copying them. This is one of my new favorite ways to create collage fodder. I'd probably do some in black and white, some in color, some in representative scale and some enlarged to a full sheet or so. Now that I think about it, it might be a cool idea to start a SERIES on collecting collage fodder. What do you guys think of that? Let me know in the comments, and have a nice rest of Labor Day! :)

Saturday, September 3, 2011

Paper Beads + Index Card #2


Hey guys! I'm here again with another post!! Today I worked on quite a few things, since I actually had a day off of school today. :) It is a Saturday. Actually, this is a three-day weekend; I'm off Saturday through Monday, and go back on Tuesday. So happy that I finally get a chance to relax after a long week. You know what I mean? Well, anyways, I was working on some paper beads today. I used to make these a lot when I was younger, but they never looked this good. I've been using just plain old magazine pages. It's pretty cool. You can just see the edges, which makes it an awesome effect. I don't really know if you can really see the details in this picture that I have. You could try enlarging the picture though. I started this afternoon and so far I've made about 75. In the picture above, I am showing you 2 strands of 35. There's another strand I started somewhere else. When I actually want to use some of these in a piece of jewelry, then I can just cut the strand a bit, and then just pull off whichever ones I like or want to use. I've seen quite a few professional looking pieces using homemade paper beads. I think I'll find some ways to play with that. :)


And here's my index card of the day. I was just playing around with some different paints and layers with this card. i love the colors of this, and the cool stamped pattern on the side is one that I carved myself. I love the way that one turned out. Plus I did this really cool distressed/crackle paint texture with the blue color. It sort of came out that way, even though I wasn't even trying to. It just turned out that way. The way I did it was that I took some glue (just plain regular roseart) and spread it all over the surface of the card. After a minute or so, I let it get a little tacky, and then put some paint into it. I spread it all out, and then put a piece of paper over it and then pulled it up. I got a cool background, and after the glue dried, it crackled, and turned out really cool. I'll probably add a title, but after that, it'll be done. And that's all I've got. :) See you guys later!

Tuesday, August 30, 2011

Found Paper Pile


Hey guys! I'm here with you guys again with another single photo page. I didn't really know what to show you guys today, but I walked into my room, and found this pile of papers. My desk is such a mess ALL the time, but this little pile is about my favorite thing of all time. Seriously. It's about 5" tall, and has all kinds of AWESOME stuff in it. I have a ton of different papers in it, stamped papers, and all kinds of text papers and stuff. A bunch of random pieces of card, and I'm pretty sure there's some foam stamps stuck in there somewhere. It's an awesome pile that I dig though for all my collage fodder and other stuff.

It's been sitting there for a month; actually I started it a month ago. How crazy is that? When you're actually working on it, or are like me, and are just plain addicted to collecting collage fodder, the stuff really grows into a huge pile REALLY quickly. I say that everyone should try it. :) Anyways, if you start a pile or a file, make sure to send me a picture. :) See you guys later!

Wednesday, March 30, 2011

ATCs Galore!! (And a Tutorial!)

Hey all! Okay, so I know that I promised you all an ATC tutorial when we last met, and I'm not one to break my promises. At least I try my very best not to. :) So anyways, I'm here with some ATC's. No lie. So here's the deal. Some of these steps may seem pointless, worthless, or meaningless. And I almost guarantee that at least one of them will seem that way. But when it actually comes down to it, and you dig out all your supplies in order to try and make SOME sense of this tutorial, you'll thank me. ;)

So first off I'd like to start with a basic definition of an ATC. An ATC is a miniature piece of art. Otherwise knows as Artist Trading Cards. Thus the acronym. So basically what you do with them is to take your medium and work with it on a miniature "canvas", which is 2.5"x3.5." An ATC can be worked in many, many, MANY different mediums, so you never can be quite sure what you'll receive back when you participate in a swap. Some people collage, some paint in watercolors, some in acrylics. Some draw theirs, and some even embroider (a medium that I have yet to try in ATC form :O) theirs. For my example I'm going to show you a collaged one. (For the time at least)


Okay. To start off, you need to collect your supplies. I collect a vast variety of supplies, pulling anything and everything that could possibly match the idea I have forming in my head. That's another thing to note. When I'm working on an ATC, I normally have a basic idea in my head, though it is only in the VERY beginning stages. Don't be intimidated by my large pile of supplies (otherwise known as arty crap); I won't use them all, only a few of the actual things in the pile shown will be used.

I'm more of the out of sight, out of mind type. So having all of my possible supplies out in front of me (even for something as small as an ATC) is very helpful. Notice that I have various images, stamps, papers, inks, punch outs and punches, trims, tapes, embellishments, and paints sitting out in front of me. I'm telling you, it totally helps.


A closer shot of the various papers I was trying to choose from. I had a piece of a magazine image, a paint chip, several specialty papers, and some pages from an old book. These show the variety that can be used. For a tutorial, I should have also included some cardstocks, but unfortunately they didn't quite match the vision I had in mind for this particular card. Also, don't be afraid to choose and pull several papers. Or even try out several for the same image. The thing with this kind of art is, that if it doesn't work, just use it on something else. :P I'm telling you; my method's foolproof.


The next step is to cut your paper into 2.5x3.5" rectangles. When you are cutting and measuring for this step, make sure that they stay pretty true to the initial measurements. When you're just getting started it doesn't matter that much, as you're probably not going to be trading your first cards, but when you get started trading they need to be pretty precise. Some people even think that if the measurement varies too far from the right proportions, then they cease being ATCs!! So be careful. One more note on this picture; as you can see, this is actually a perfect example of the tip I mentioned in the last paragraph in action. I couldn't decide between the specialty or the text paper for my image, so I cut one of each and tried out the image on both. It gives me a better visual. Also, the one that you decide not to use can always be used for your next card. :P

I decided on the specialty paper. It just seemed to work right with my image. After looking at it for a moment, I decided that it seemed a little plain, so I jazzed it up a bit with a cursive background stamp. You can see that the bottom stamping defiantly isn't perfect, but you won't be able to notice in the finished card.


Next up on the list; paint! I love paint for all of my projects, so when you mention collage ATCs, that's sort of the first thing that comes to mind. Don't ask me why, it just does. When I looked at what I had already decided, I thought that a more monochromatic type scheme would work best for this project, so I found a nice metallic bronze. You can't really see here, but it's actually a bit sparkly and shiny in real life.

Also, instead of using a paint brush to spread my paint like a "normal" person would, I use an old credit/gift card. They're sturdy and fun to use and they sort of resemble a pallet knife when they're used. Plus, as an added bonus, I don't have to clean any brushes; I just let the paint dry on the card! I'm a lazy bum when it comes to art, I admit it, but I don't really care...


This is what the card looks like after being spread with metallic paint. I told you it resembles a pallet knife!! And can you see the sneak peek of my image there in the corner?


Now for the stamping. I like to add at least a bit of stamping to each of my cards and art journal pages. Actually, anything that uses even a bit of collage automatically needs some stamping. Sometimes I use rubber or acrylic stamps with ink pads, but this time I thought the card was calling for something drastic. I used a large (and I mean LARGE) spiral foam stamp with black acrylic paint. It gave me just the look I was going for!! If you want another tip for stamping, here's one for you; when stamping on anything (art journal pages, inchies, ATCs, scrapbook pages, etc) always stamp at least SOME of the images off of the edge of the paper. It gives it a nice cohesive effect.


Next, I went over the entire card with a layer of distress ink. A tip for using this stuff is to NOT apply it evenly. I know that it goes against everything you've ever learned about crafting. Ever. But trust me. It really works, and just adds to the distressed effect that's so popular recently. Now that I think about it, I should really do a distress ink tutorial/technique examples post. Hmmm...


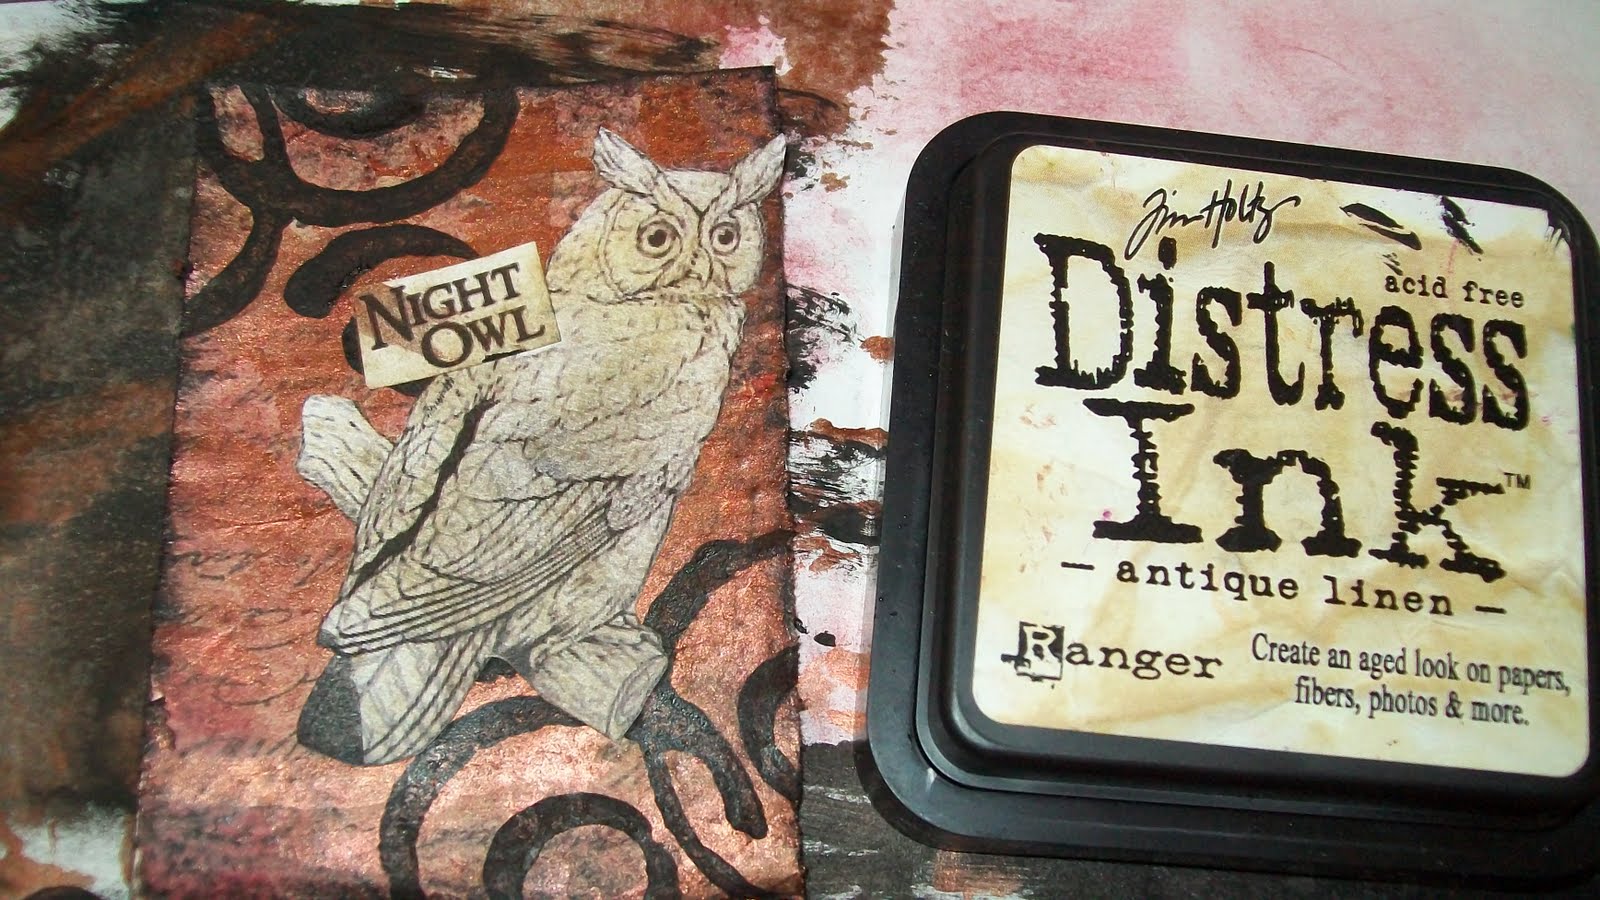
Next I placed my image on the card. Isn't the owl so cute?! Anyways, you see how the tip of the owl's tail has a streak of black on it? Or how the sentiment has a streak of metallic brown running through it? That was an accident. Purely mistake. But unlike some other people, who may have tried to cover it up, or even reprinted the entire thing, I just went with the flow. It's the same way as when I'm working with an art journal page. Almost every single time I sit down to create, another color gets mixed into the white background. Instead of getting upset, and either trying to cover it up or flipping to a new page, I just use it as a prompt! For example, if a bit of green gets scraped onto my page since it was left over on my pallet, I simply make a green page! Great inspiration.


Okay, anyways, back to the card. I thought that the above owl was looking a little bit white for the card, and it felt like it stood out too much. So, I went over it with an small amount of antique linen distress ink. I love this stuff and I'm proud!! :D

So anyways, here's the finished card. I just added the small piece of black electrical tape in the lower left hand corner and spotted it with white stickles (which is a professional glitter glue which has much more sparkle than regular glitter glue. Though I'm not really a sparkly/glitter person, when I do want bling, I want it to sparkle!)

So that's about it!! I know that the post was long, and maybe a bit annoying to read the whole thing, but I hope that I at least helped somebody with this. I know that I had fun writing it! Enjoy!

Related Posts Plugin for WordPress, Blogger...